Prerequisites
Before we get started, make sure you have the following:- A Clouddley account
- A DigitalOcean account
- A GitHub or Bitbucket account.
doctl(DigitalOcean CLI) installed and configured- DigitalOcean API token generated
- Ruby on Rails installed locally
- Git installed locally
- Basic familiarity with the Linux command line
Create a Ruby on Rails Application
Before deploying your application, it’s important to make sure it runs smoothly on your local machine. Here’s how to create and test a Ruby on Rails application step by step.Generate a new Rails application
app, complete with the default directory structure, configuration files, and a basic setup.Navigate into your application directory
Start the Rails Development Server
http://localhost:3000.Open the App on Your Browser
Containerize Your Rails App
Create a Dockerfile
To deploy your Rails app on Clouddley, you need to containerize it using Docker. This involves creating aDockerfile named triggr.dockerfile that defines how your application will run in a container.
Here’s a simple triggr.dockerfile for your Ruby on Rails app:
Building and Running the Container Locally
Here’s how to test your container locally:- Build the Docker Image:
This command builds a Docker image named
my-rails-appusing thetriggr.dockerfile - Run the Docker Container:
This command runs the container, mapping port 3000 of the container to port 3000 on your local machine. You can now access your Rails app at
http://localhost:3000.
Push Your App to GitHub
Once your Rails app is working locally, the next step is to track it with Git and push it to a remote repository like GitHub or BitBucket. This not only helps with version control, but it’s also essential for deploying on Clouddley. For this tutorial, we’ll be using GitHub. Let’s walk through the steps:Create a New Repository on GitHub
Initialize Git
Add and Commit Your Code
Create branch and add Remote Repository
Push code
Launch a DigitalOcean Droplet
We’ll create a Droplet from the command line using thedoctl CLI.
Before you begin, ensure you have your DigitalOcean API token ready.
- Authenticate with your DigitalOcean account, run the following command in your terminal:
- Enter your API token when prompted. This will allow doctl to interact with your DigitalOcean account.
-
Before creating your Droplet, make sure you have your
vpc_uuidandSSH keyadded to your DigitalOcean account.
How to find your VPC UUID
How to find your VPC UUID
How to add your SSH Key to DigitalOcean
How to add your SSH Key to DigitalOcean
my-key-name with a name you’ll recognize.- Create a Droplet using the following command:
your_vpc_uuid and your_ssh_key_id with your actual values. The SSH key added here allows Clouddley to securely connect to your Droplet during deployments. It uses this key to access the VM, run deployment scripts, and manage your app.
app-droplet with Ubuntu24.10 x64 image in the nyc1 region.
- To verify the Droplet was created successfully, you can run:

Deploy
Now you have your Ruby on Rails app and Droplet ready, it’s time to deploy your app.- Open your browser and log in to your Clouddley account
- Navigate to Apps and click on Deploy App

Accessing Apps
Step 1: Configure Service
- Choose your Git hosting service; either GitHub or Bitbucket. For this tutorial, we will be using GitHub.
- Click on Continue with GitHub

Choose your Git hosting service
Step 2: Configure Git
- To connect your GitHub user or organization account, click the Select username/organization dropdown and Add GitHub account.
- Select your repository and the branch from the dropdown list or quickly search.
- Click on Next

Setup the Ruby on Rails application repository on Clouddley
Step 3: Configure your Virtual Machine
- From the Choose or add server dropdown, select your VM if it appears in the list. If not, click + Add Virtual Machine.
- To add your VM, enter your droplet’s IP address as VM host, VM user, and the VM port for SSH access.
- Once you’ve entered the details, verify the connection using the Clouddley CLI(recommended) or SSH.
How to Install Clouddley CLI to Verify your DigitalOcean Droplet
How to Install Clouddley CLI to Verify your DigitalOcean Droplet
- Open your local machine’s command line, then connect to the remote VM you want to configure with Clouddley. Use this command to SSH into your DigitalOcean Droplet:
- Install Clouddley CLI by running the command:
- To add the SSH public key, run the command:
- Click on Verify. This verifies the connection.
- Click on Next

Configure virtual machine on Clouddley
Step 4: Configure app settings
- Insert the name of the application and its port.
- Click on Next.
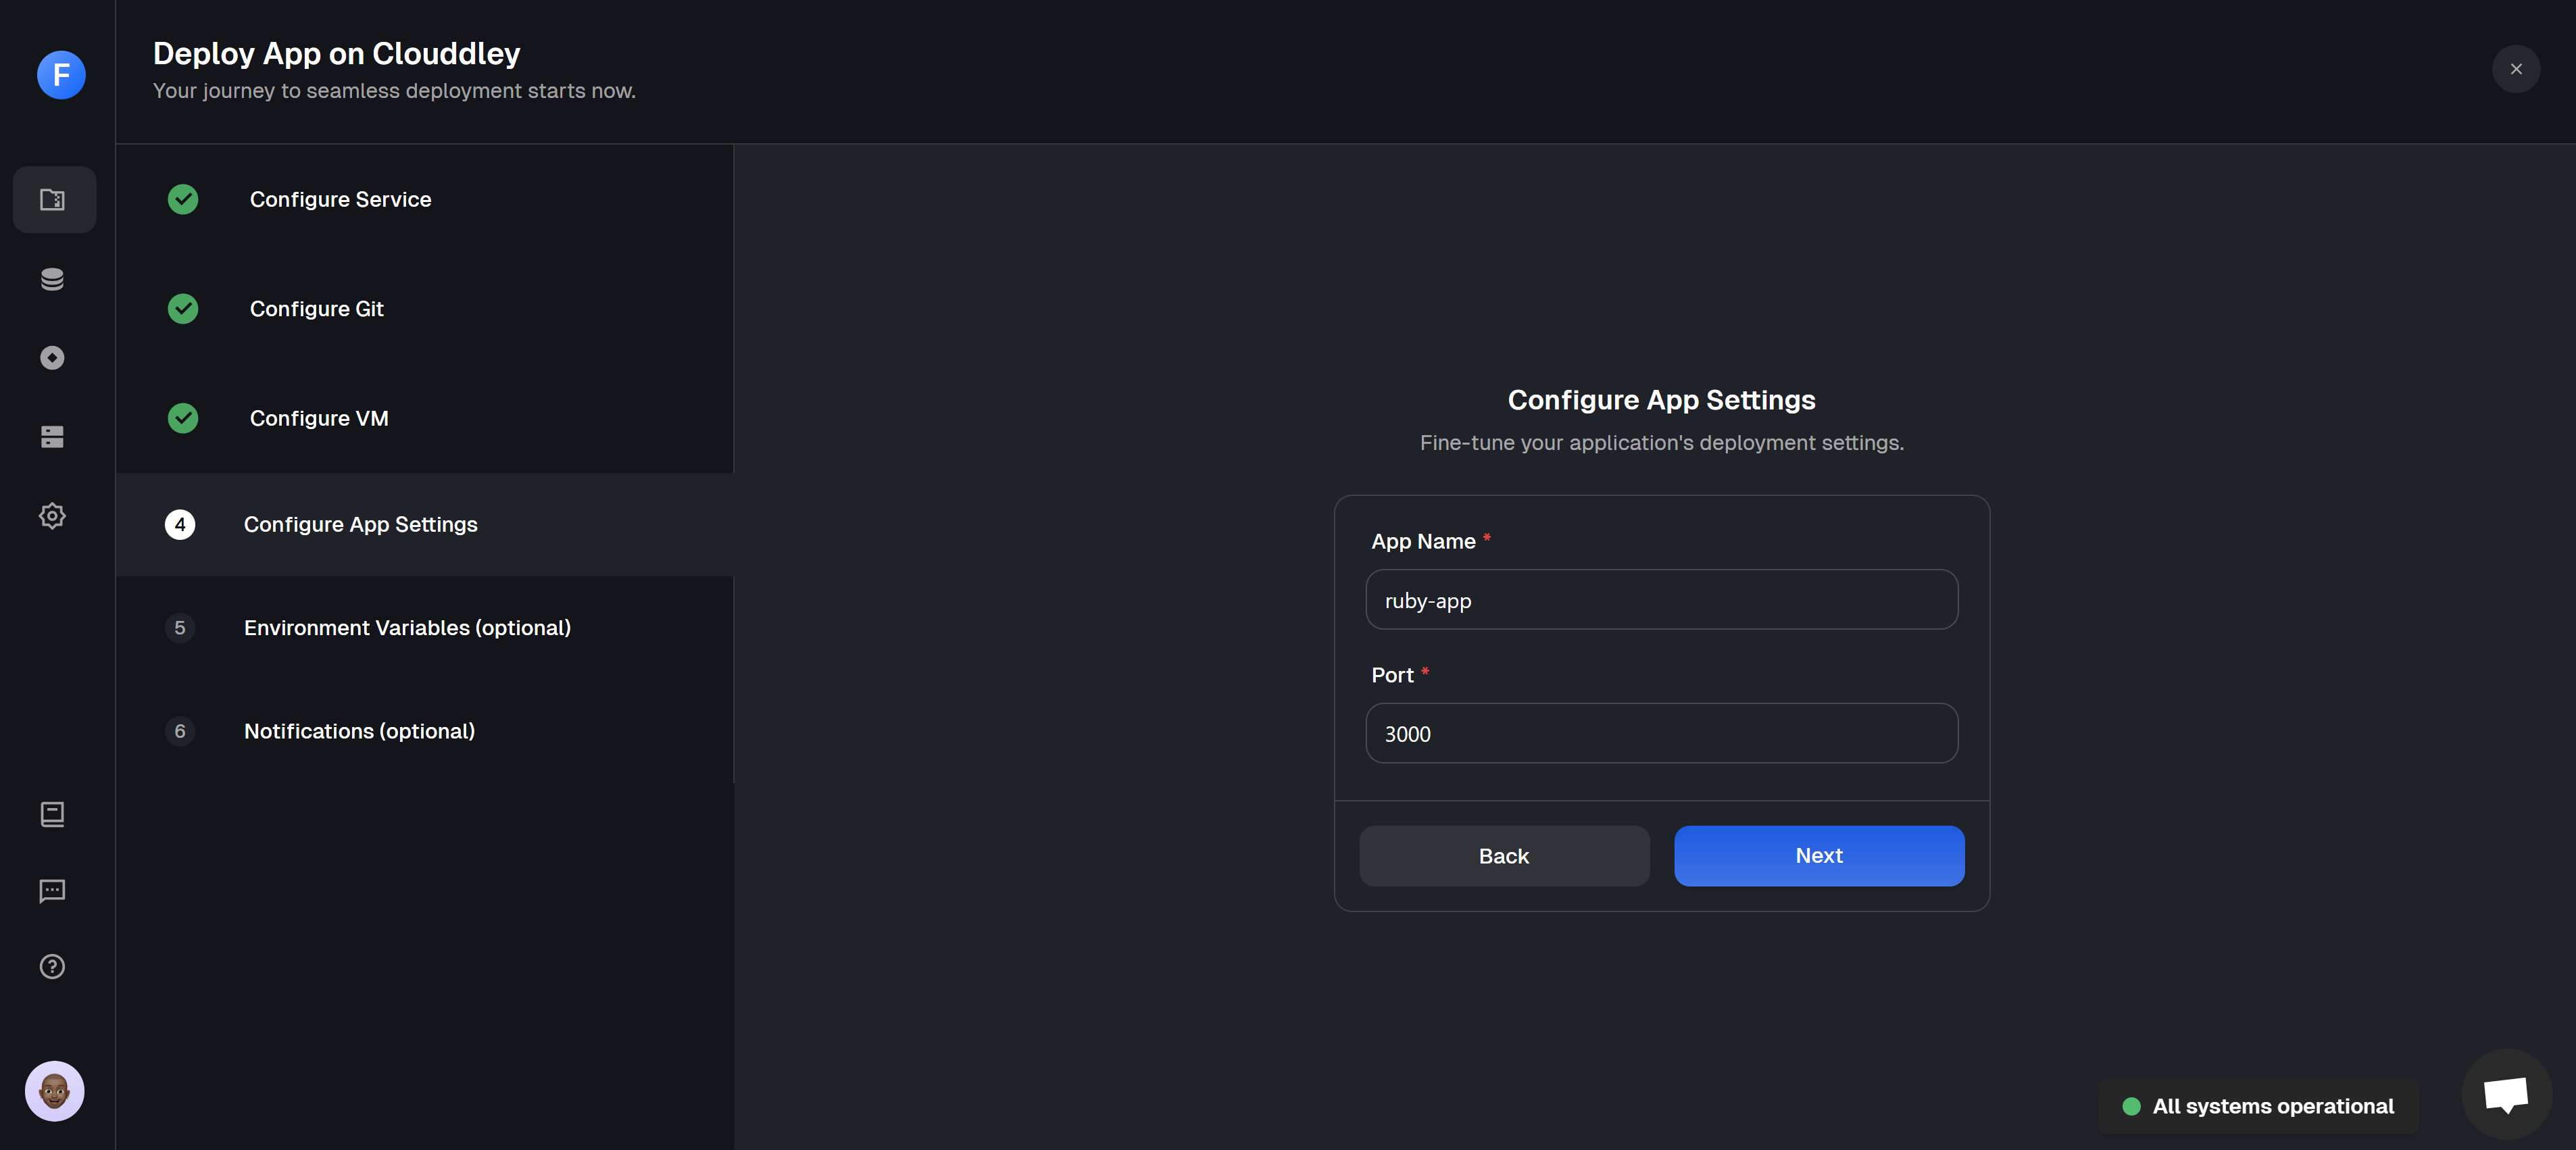
Configure the App name and port
Step 5: Configure Environment Variables
- To add environment variables, click on Add Variable
- Choose an ENV mode: either a single variable or import variables. Learn more here.
- Single Variable
- Import Variables

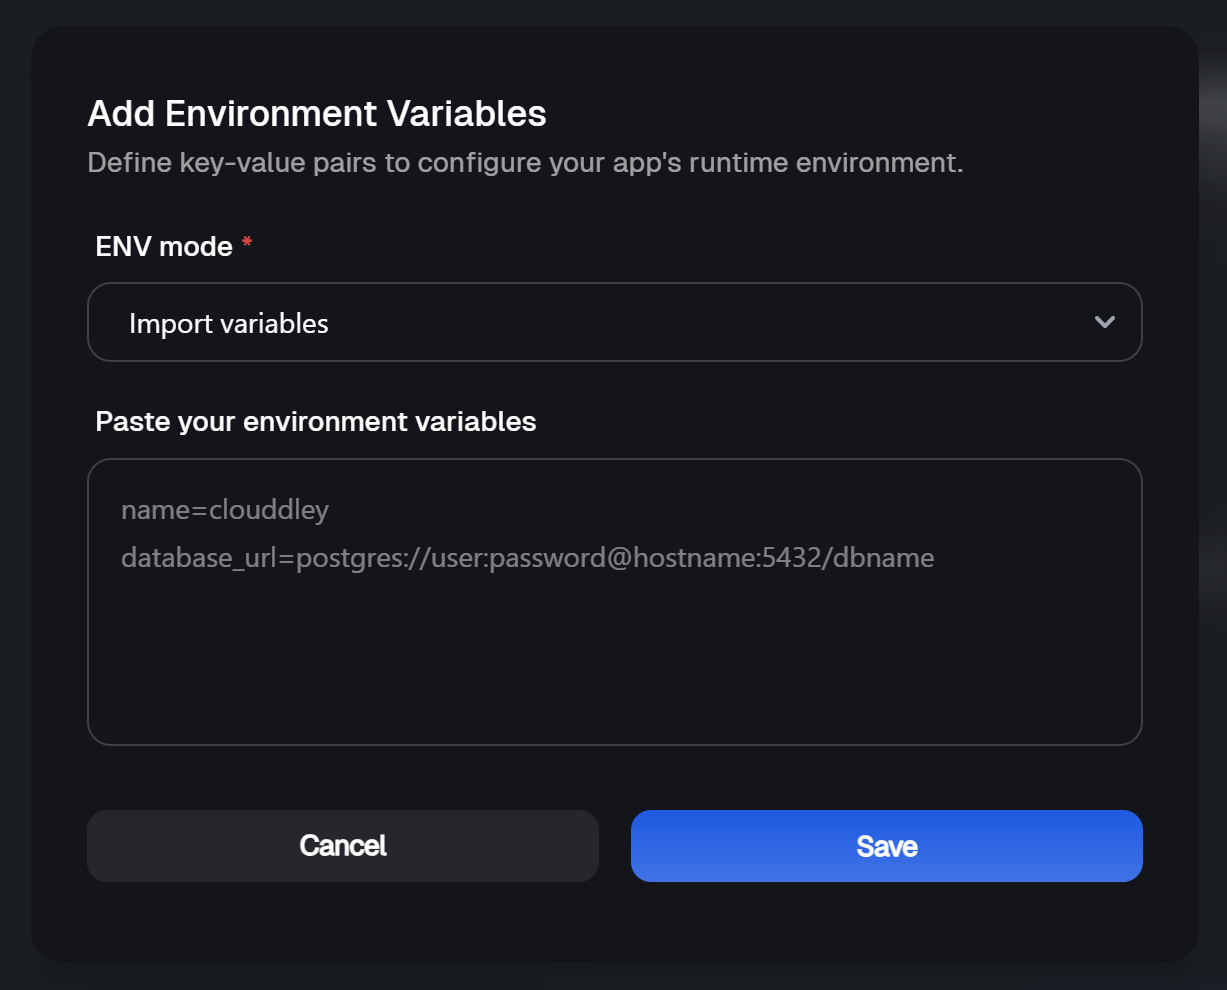
- Add the key-value pairs and click on Save
- Click on Next
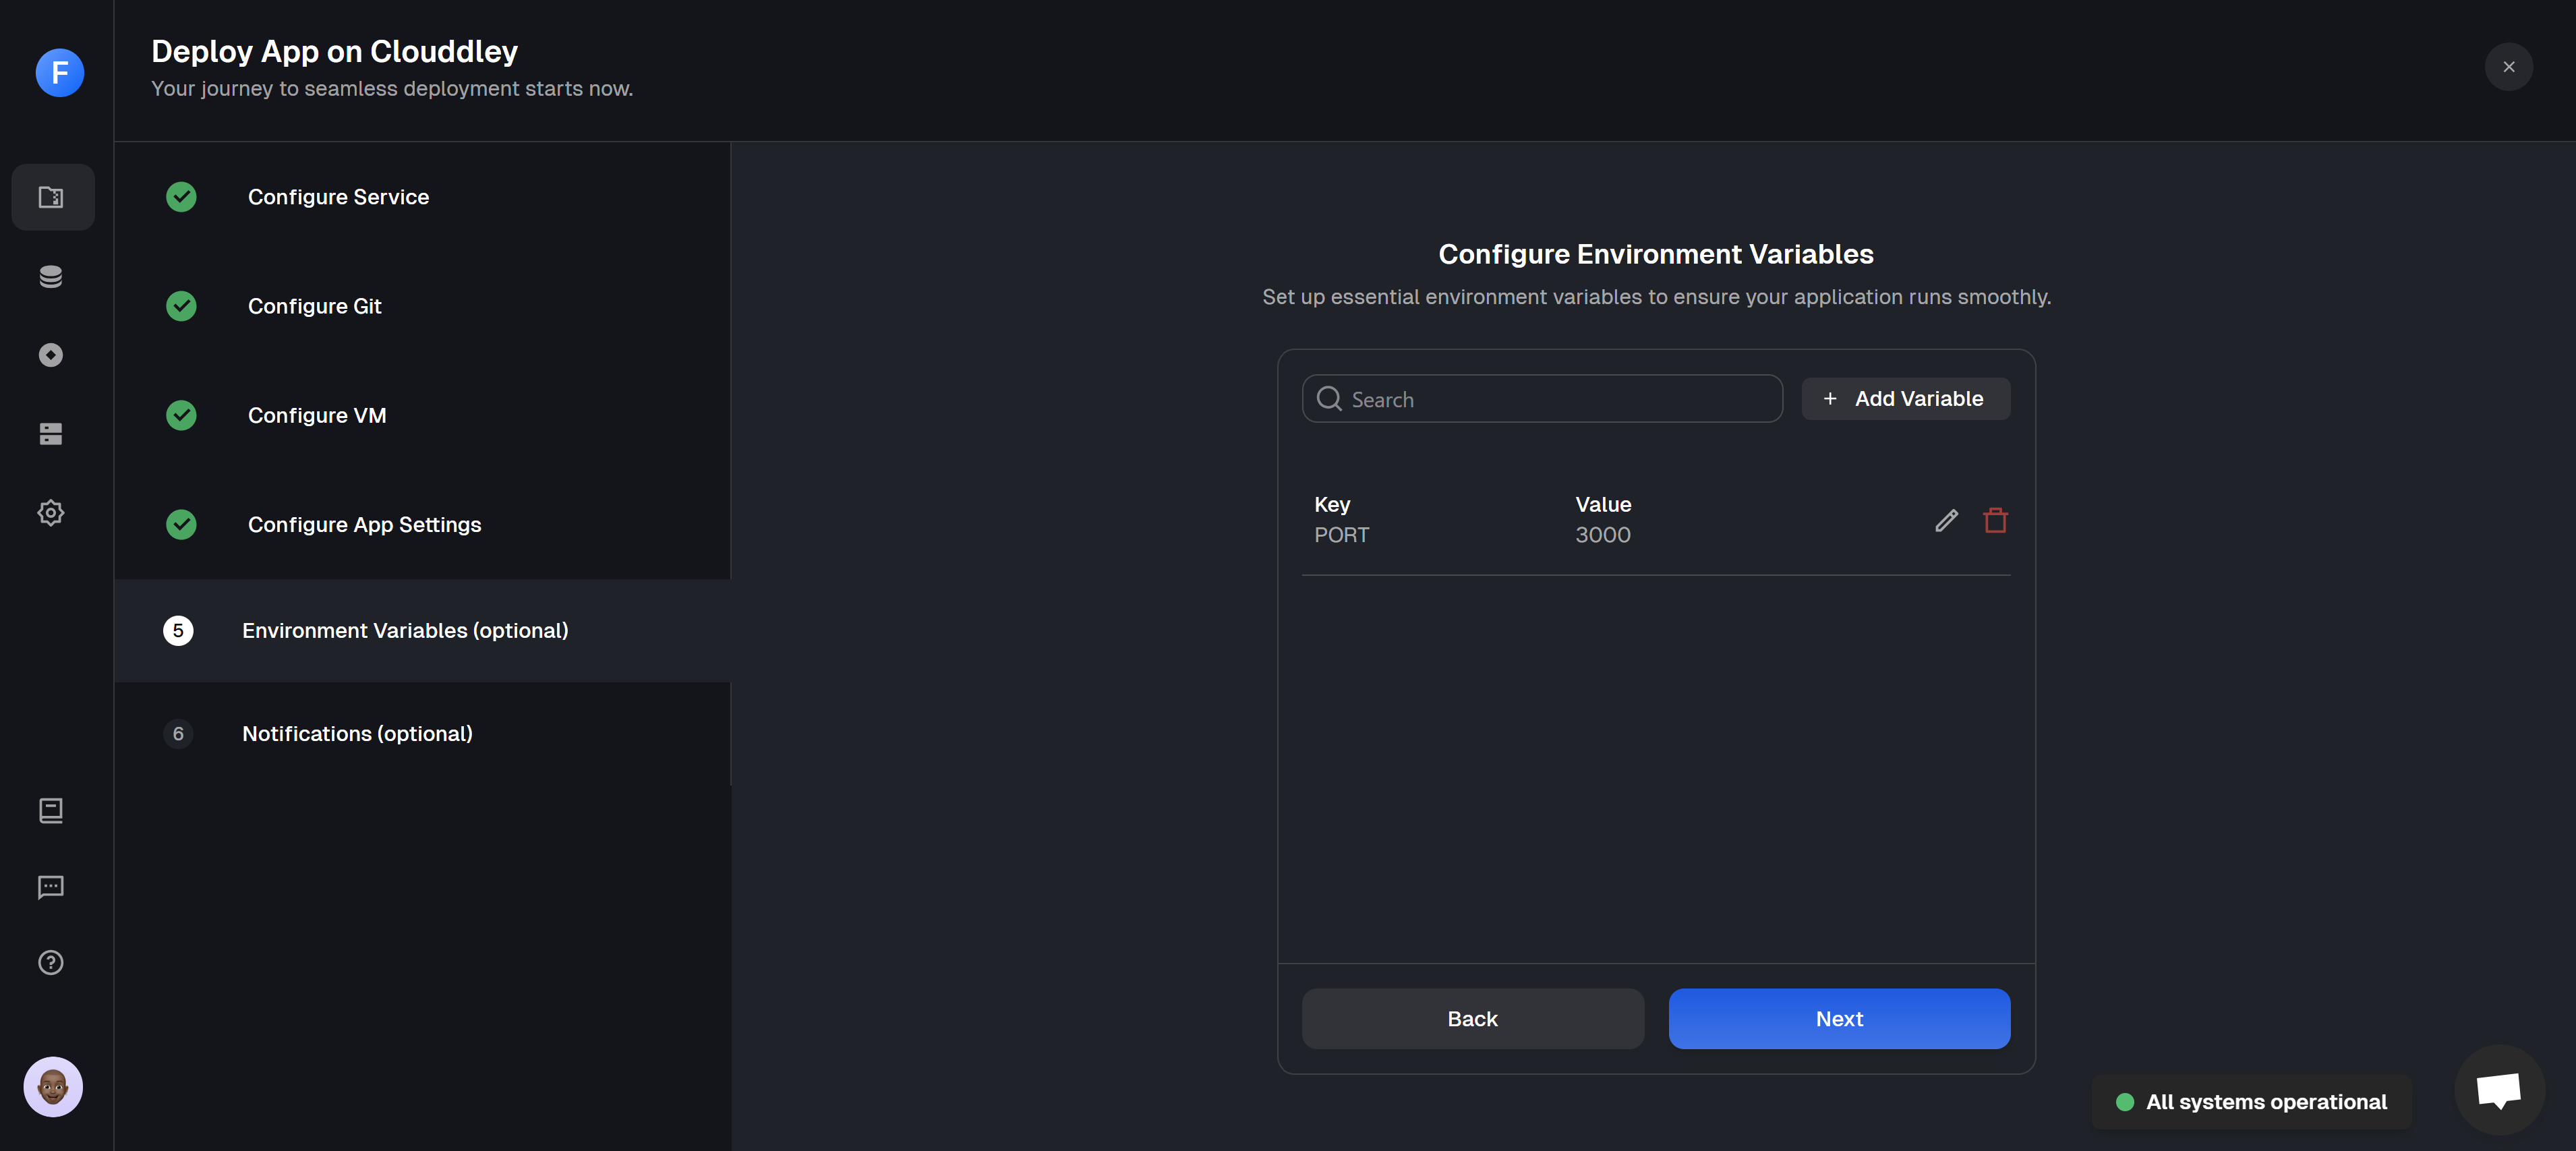
Adding environment variables
Step 6: Setup Notifications (optional)
- To configure the notifications settings of the application, click on Add Alert
- Select the Alert type. For this tutorial, we will set up Email Alerts.
- Toggle on the buttons of the deployment event (failed, timed out, or success) you want to be notified of.
- Enter the Email address where you want to receive alerts. (You can add multiple email addresses)
- Click on Save
- Click on Deploy

Notifications set up and creation of Ruby on Rails application on Clouddley
Step 7: Test and Verify the app
- Click on Go to Dashboard. Your app will be visible on the apps dashboard.
- After the app deployment is complete, the app status changes from
DeployingtoOnline

Ruby on Rails application dashboard overview
- Click on 🌐 Website at the top right corner of the page, this opens the URL of the deployed application in your browser.
- You can test the application’s functionalities.
Ruby on Rails application running from Clouddley on a DigitalOcean Droplet
Post-Deployment: Managing Your Ruby on Rails App
Once your Ruby on Rails app is up and running on a DigitalOcean Droplet using Clouddley, management is simple.The apps dashboard lets you handle key tasks without touching the server. You can adjust the settings, scale your app, roll back to earlier versions, pause or resume the app, or remove the app if needed. You’ll also find helpful features to view your deployment history, check logs, manage environment variables, and connect a custom domain, all in one place.
Ruby on Rails App Best Practices
Ruby on Rails App Best Practices
Stick to the framework’s naming and folder structure—it makes your code easier to understand and maintain. Keep things modular
Use services or concerns to break out logic and avoid bloated models or controllers. Secure your config
Store sensitive data like API keys and secrets in environment variables or use Rails credentials. Write clear commit messages
Good commit messages help track changes and make debugging easier down the road. Test your code
Add basic tests with RSpec or Minitest to catch bugs early and make updates with confidence. Watch performance
Use eager loading, caching, and proper indexing to keep your app running smoothly in production. Stay current
Keep Rails and your gems up to date to benefit from security patches and performance improvements.