> ## Documentation Index
> Fetch the complete documentation index at: https://blog.clouddley.com/llms.txt
> Use this file to discover all available pages before exploring further.
# How to Deploy a PostgreSQL Database on an AWS EC2 Instance using Clouddley
> Learn how to deploy a PostgreSQL Database on an AWS EC2 Instance using Clouddley.
export const date_0 = "Updated on September 10, 2025"
Ever felt like setting up databases in the cloud takes forever? You’re not alone. The good news is, it doesn’t have to be that way. With an EC2 instance as your server and [Clouddley](https://clouddley.com) handling the heavy lifting, deploying [PostgreSQL](https://www.postgresql.org/) on AWS becomes a smooth, simple process. In this tutorial, we’ll walk through the steps so you can spin up your PostgreSQL database quickly and focus on building instead of battling setup.
## Prerequisites
* A [Clouddley account](https://clouddley.com/)
* An [AWS account](https://aws.amazon.com/)
* [AWS CLI](https://docs.aws.amazon.com/cli/latest/userguide/getting-started-install.html) installed and configured on your local machine
* [AWS Access Keys](https://docs.aws.amazon.com/keyspaces/latest/devguide/create.keypair.html) with permissions to create and manage EC2 instances
* [Git installed](https://git-scm.com/book/en/v2/Getting-Started-Installing-Git) locally
* Basic familiarity with the Linux command line
## Create an AWS EC2 Instance
Create an EC2 instance to host your database. With AWS CLI, you can quickly create one.
First, create a VPC and security group if you don't want to use the default ones.
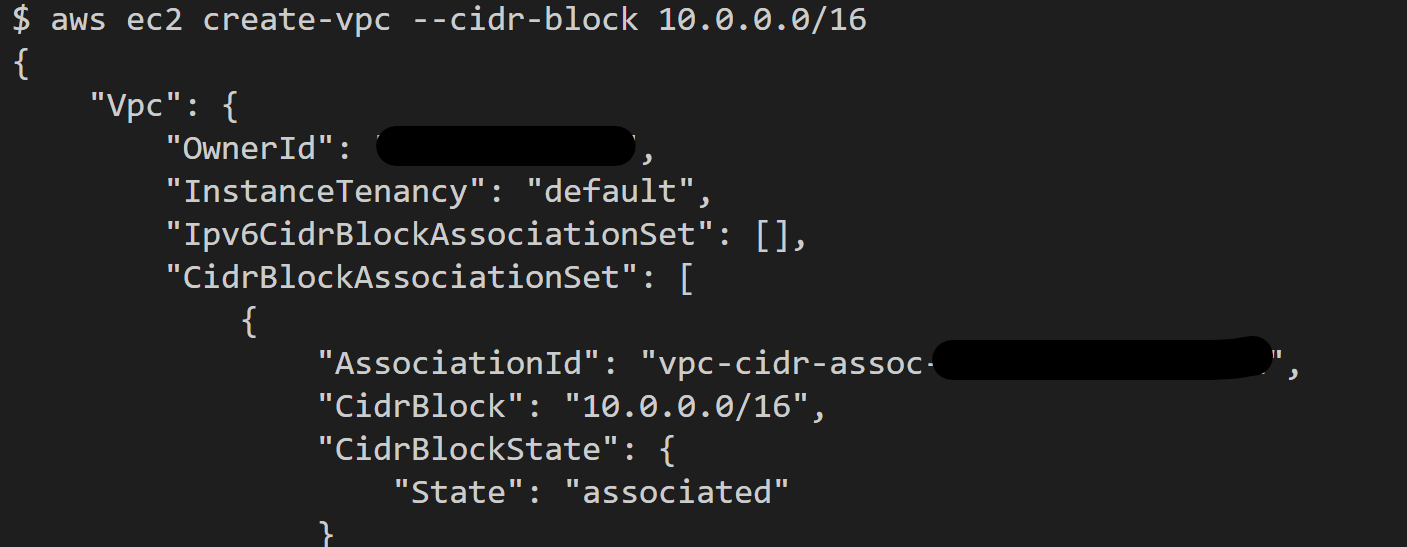
* Create a VPC by running the command:
```bash theme={null}
aws ec2 create-vpc --cidr-block 10.0.0.0/16
```
You should see an output like below:
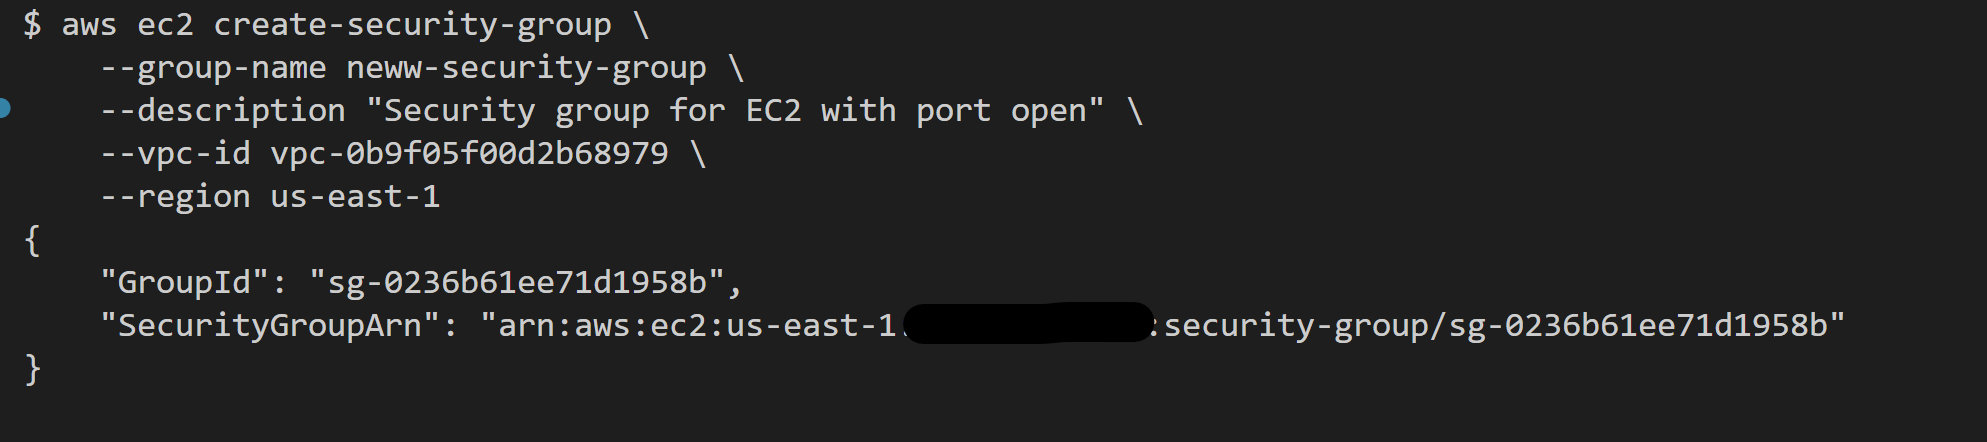
* Create a security group by running the command::
```bash theme={null}
aws ec2 create-security-group \
--group-name new-security-group \
--description "Security group for EC2 with port open" \
--vpc-id \
--region us-east-1
```
Replace the `vpc_id` with the one created in the previous step.
You should see an output like this:
* Allow inbound traffic on port 22 (SSH) by running the command:
```bash theme={null}
aws ec2 authorize-security-group-ingress \
--group-id \
--protocol tcp \
--port 22 \
--cidr 0.0.0.0/0
```
This command allows SSH access to your instance.
Replace the `sg_id` with the one created in the previous step.
* To create an EC2 instance, you need to have an SSH key pair. If you don’t have one, you can generate and import one below.
If you don’t have an SSH key pair on your local machine, follow the steps below.
* **Step 1:** To generate an SSH key, run the command:
```bash theme={null}
ssh-keygen -t rsa -b 4096 -C "your_email@example.com"
```
Press **Enter** to accept the default file location and choose a passphrase if you want one.
* **Step 2:** To add your SSH key to AWS, run:
```bash theme={null}
aws ec2 import-key-pair \
--key-name my-key \
--public-key-material file://~/.ssh/id_rsa.pub
```
Replace the path to your public key if it's different.
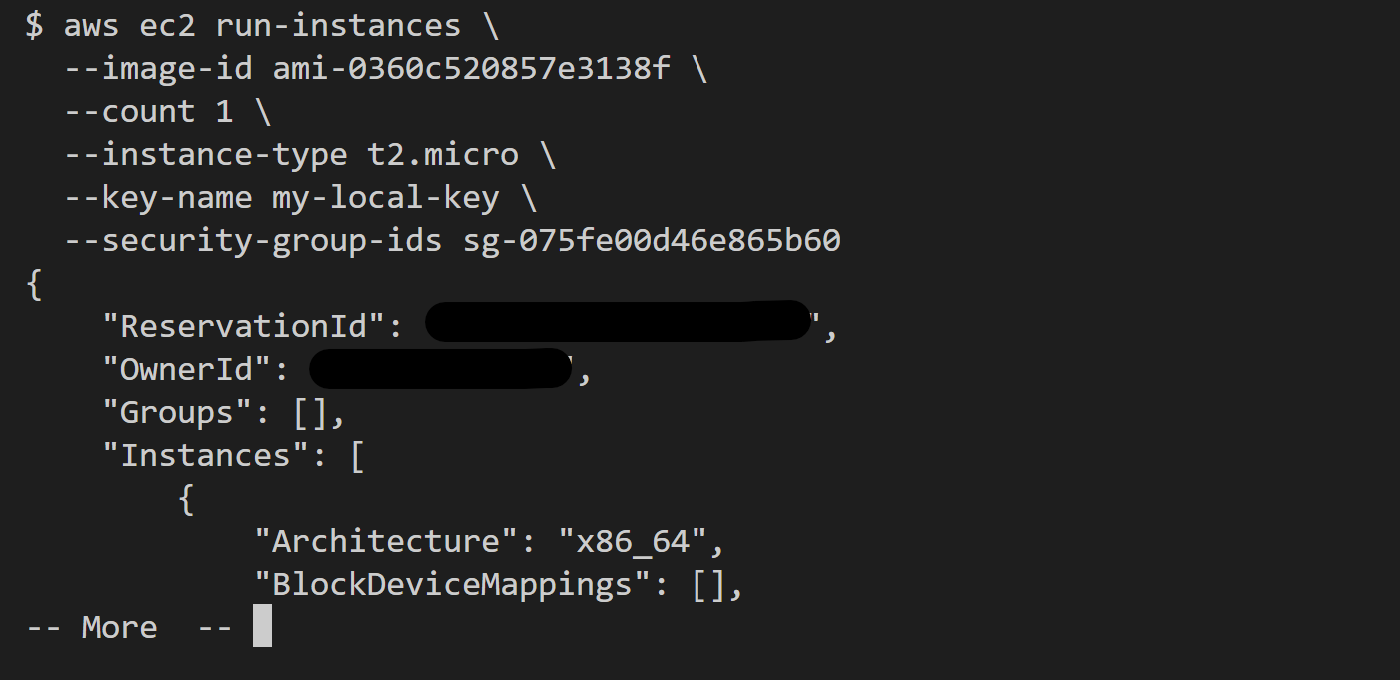
* Finally, create the EC2 instance:
```bash theme={null}
aws ec2 run-instances \
--image-id ami-xxxxxxxx \
--count 1 \
--instance-type t2.micro \
--key-name my-key \
--security-group-ids
```
* Replace *ami-xxxxxxxx* with regions's compatible AMI
* Replace *my-key* with your key pair name
* Replace *sg\_id* with your security group id
You should see the output below:
Once the instance is running, note the **Public IP address** of the instance. You'll need it later.
## Deploy
Your AWS EC2 instance is now ready. Next, deploy a PostgreSQL database using Clouddley.
Step 1: Access Databases
* Log in to your [Clouddley account](https://app.clouddley.com/auth/signin).
* Navigate to the Databases on the left sidebar.
* Click on Deploy Database Step 2: Configure your virtual machine(VM)
* In the **choose or add server** dropdown, select your VM if it's listed. If not, select **+ Add Virtual Machine** and enter your EC2 instance IP address as the **VM host**, along with the **VM User** and **SSH port**.
* After adding the details, verify the connection with the **Clouddley CLI (recommended)** or **SSH.**
- Open your local machine’s command line, then connect to the remote VM you want to configure with Clouddley. Use this command to SSH into your EC2 instance:
```bash theme={null}
ssh root@
```
* Install Clouddley CLI by running the command:
```bash theme={null}
curl -L https://raw.githubusercontent.com/clouddley/cli/main/install.sh | sh
```
* To add the SSH public key, run the command:
```bash theme={null}
clouddley add key
```
Using the CLI, you can deploy resources, manage configurations, and automate tasks efficiently.
* Click Verify to check the connection.
* Once verified, click on Next.
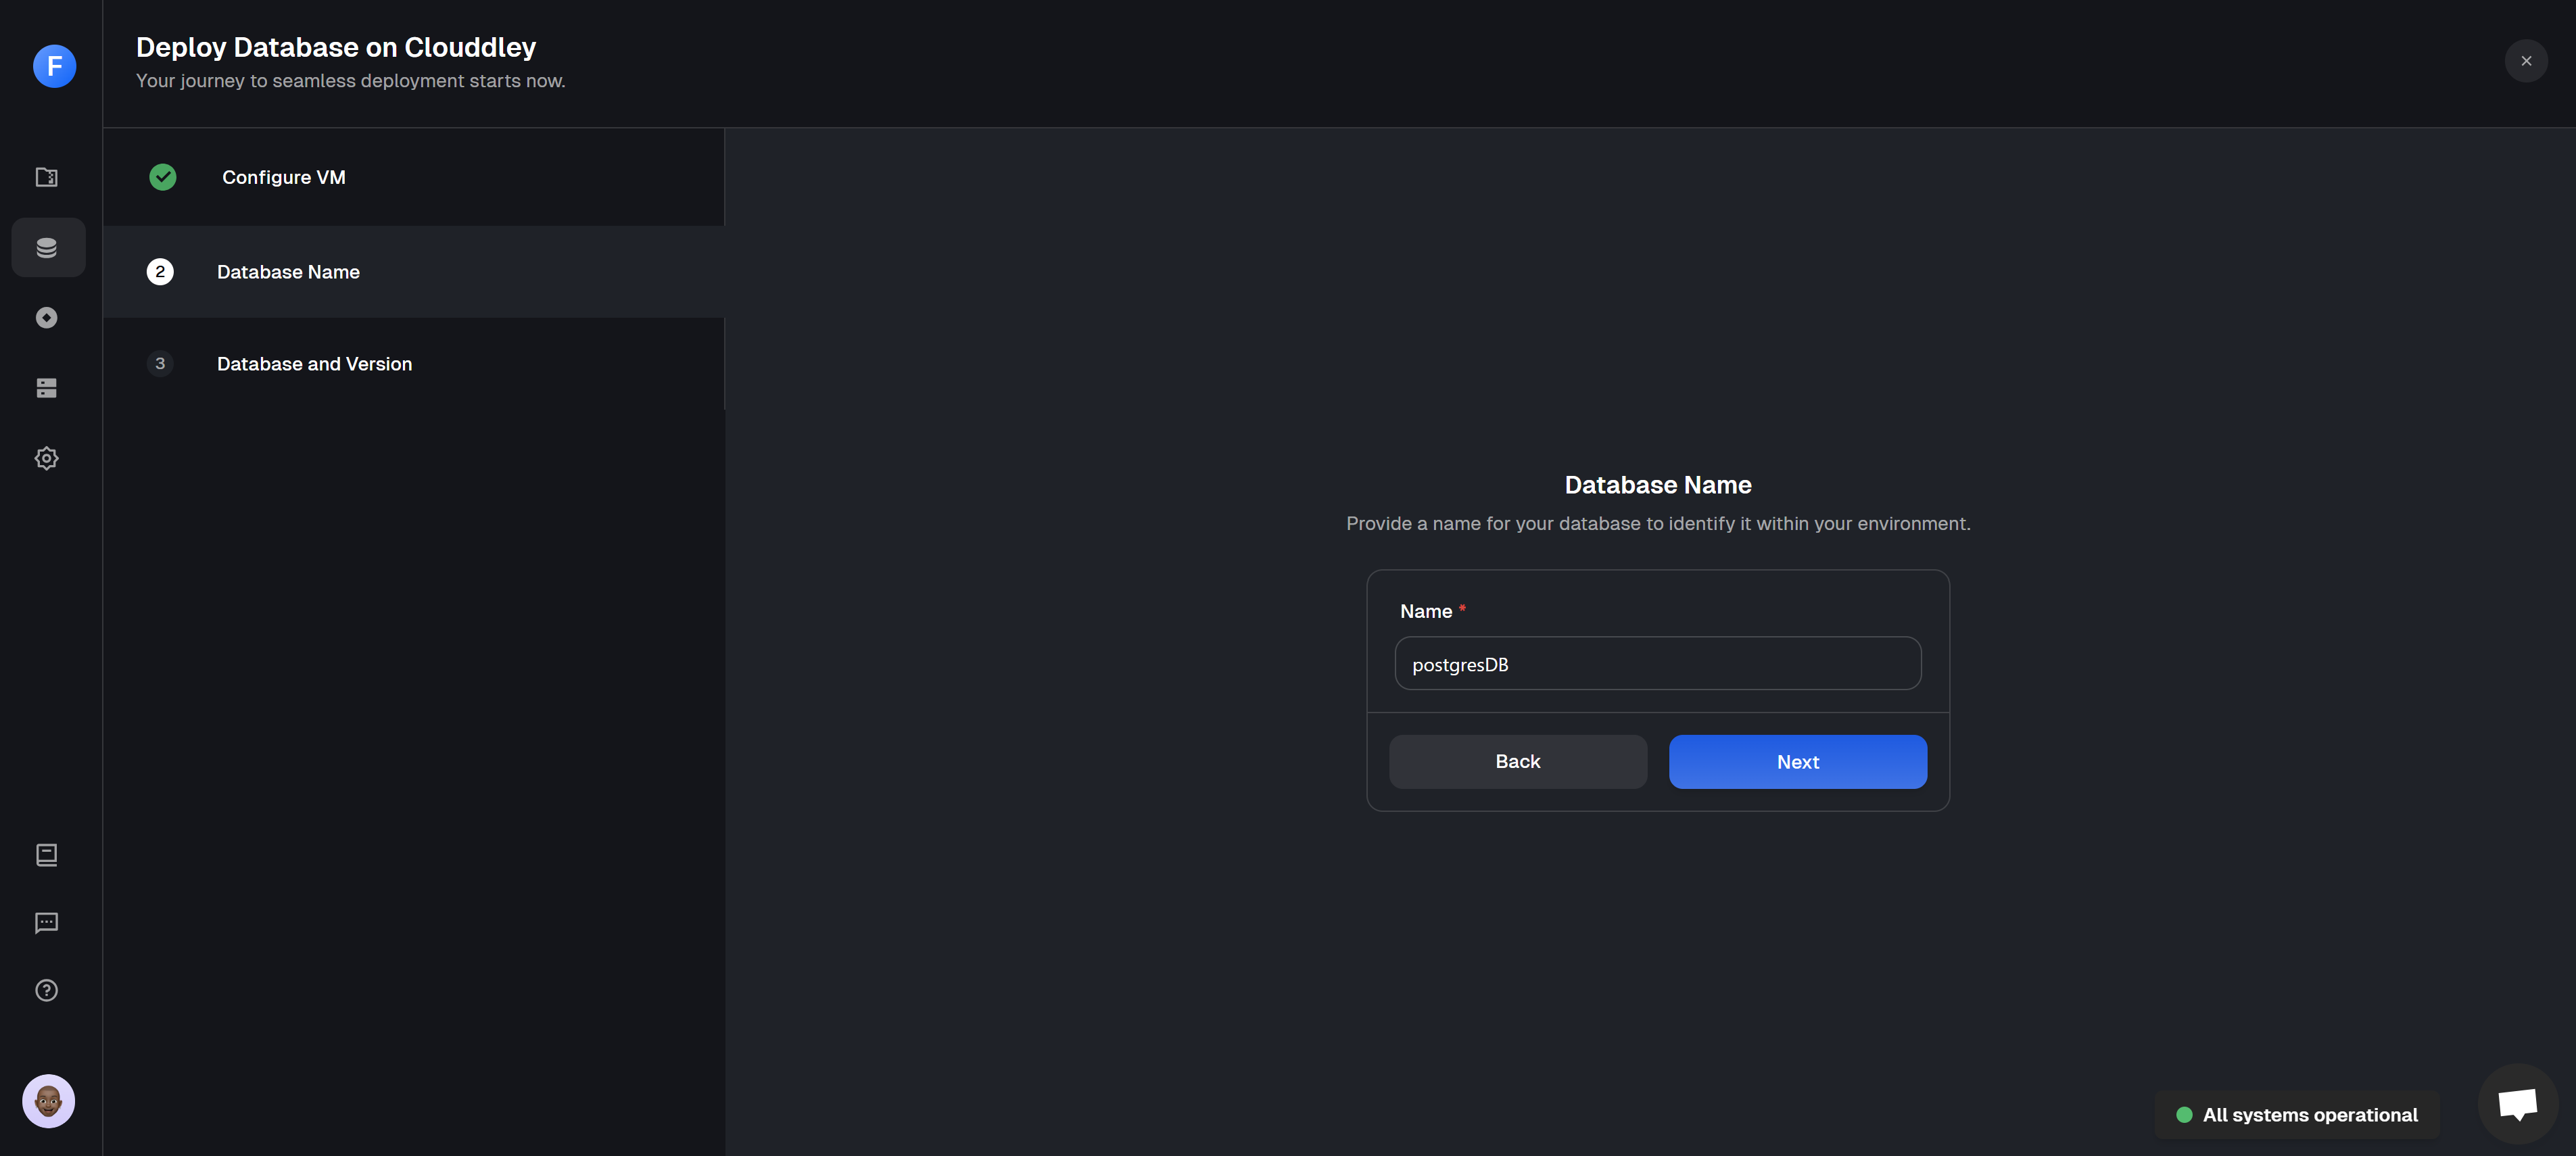
Step 3: Configure your database name
* Enter a name for your PostgreSQL database.
* Click on Next to proceed.
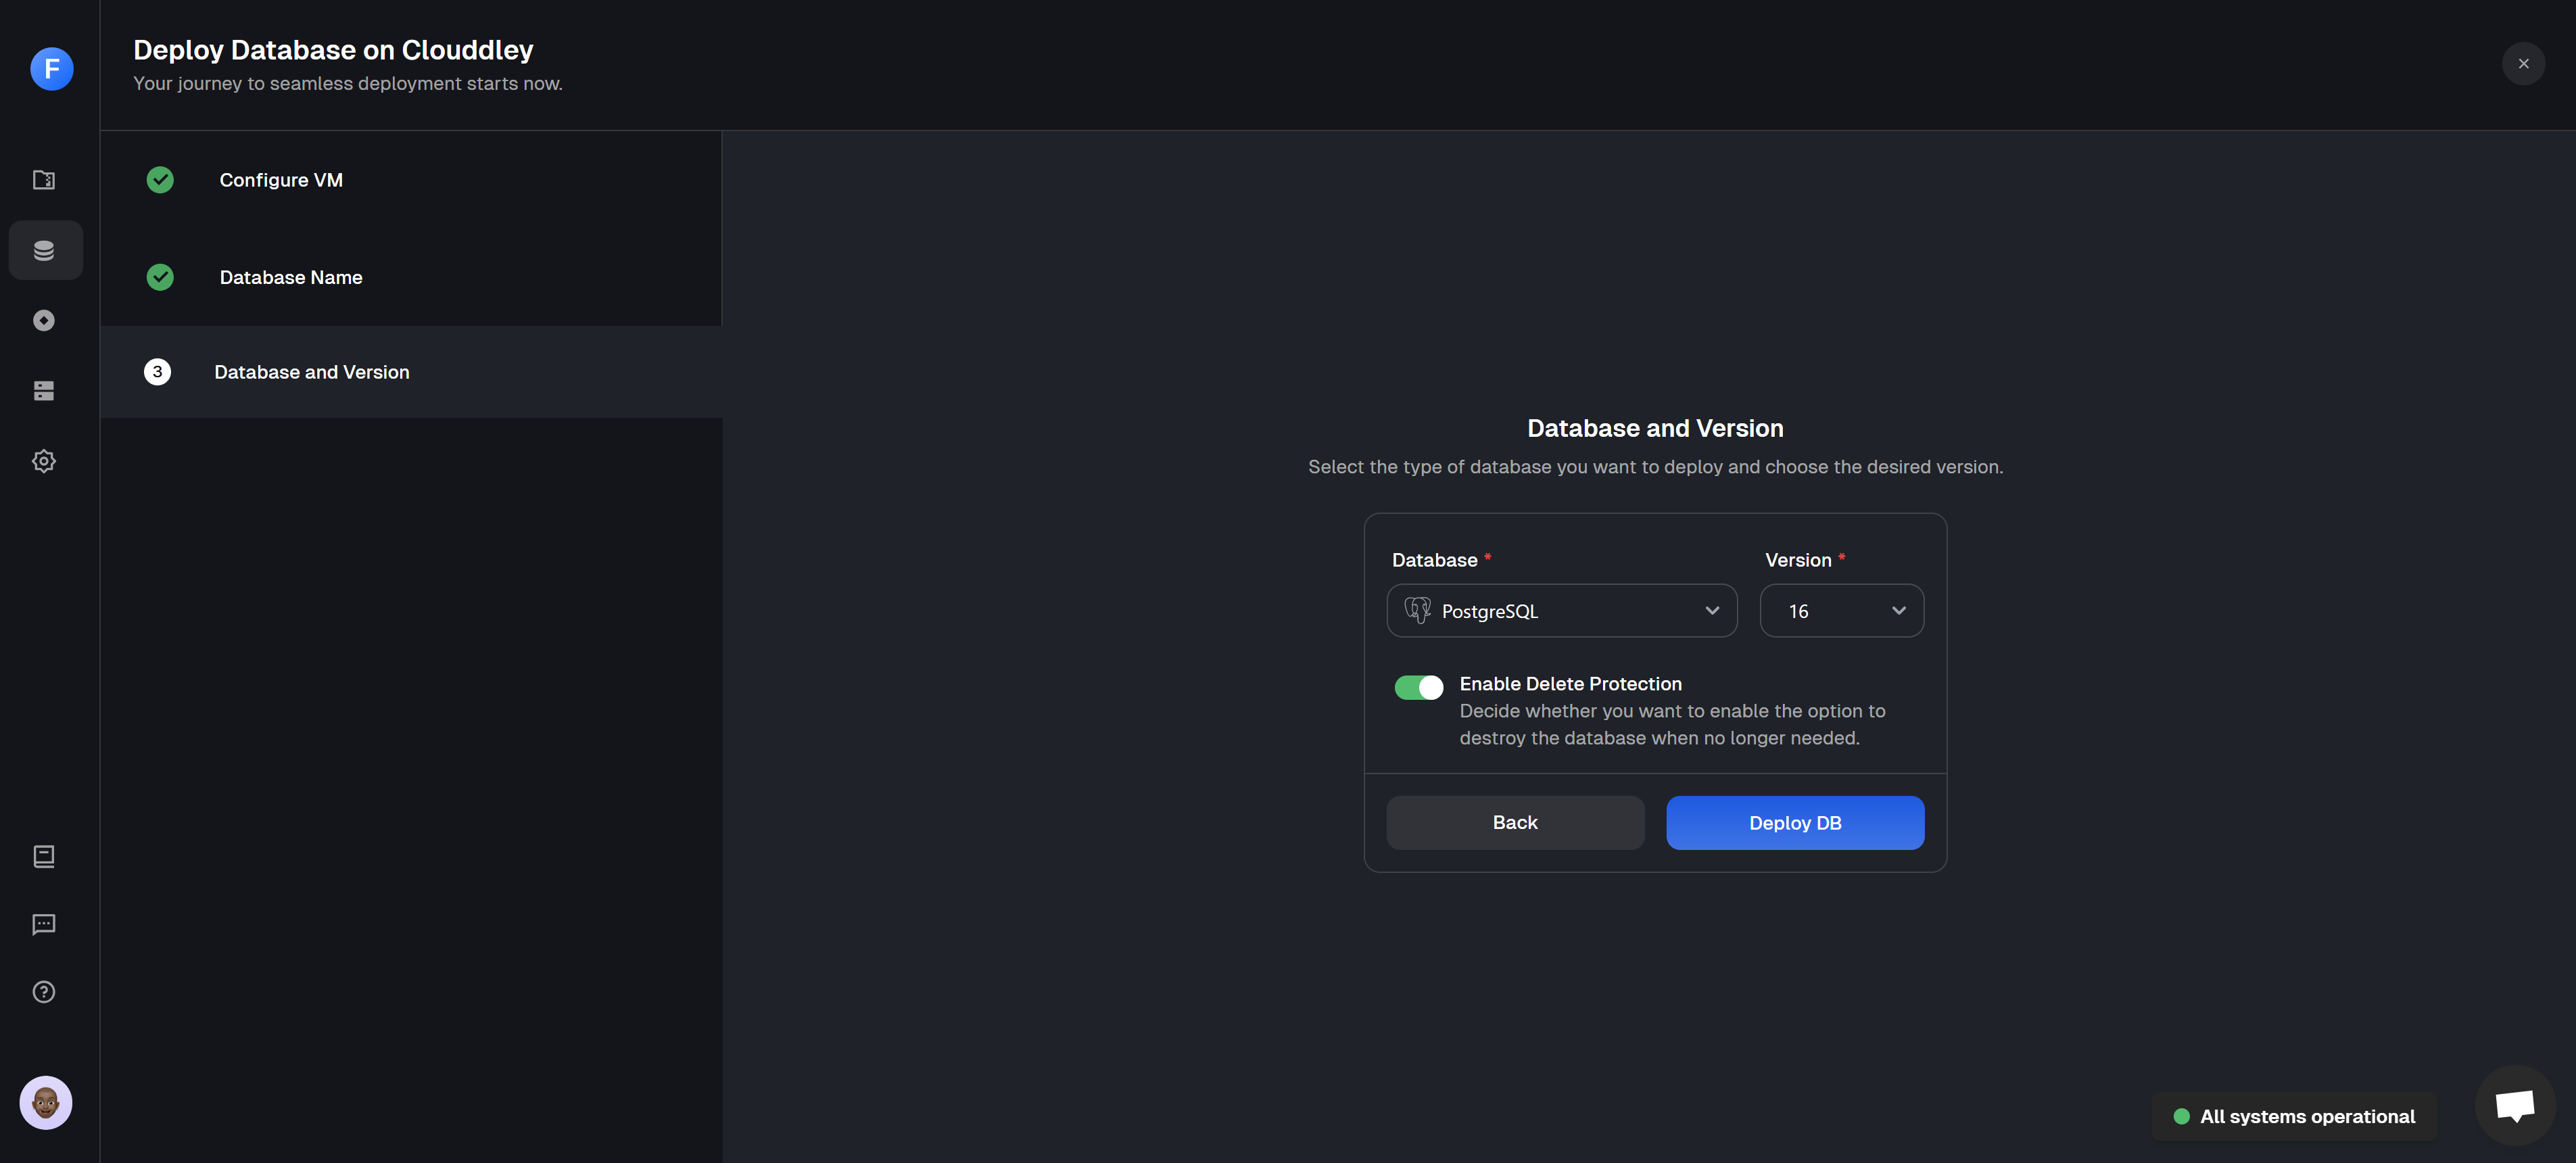
Step 4: Select your database type and version
* Choose PostgreSQL as your database type.
* Select the version of PostgreSQL you want to deploy.
Ensure you select a version that is compatible with your application requirements.
* Enable delete protection to prevent accidental deletions.
* Click on Deploy DB Step 5: Confirm deployment
* Once your deployment is complete, you will see a confirmation message `Deployed successfully!`
Step 6: Open database port on AWS EC2 instance
* Check the port Clouddley has configured for your PostgreSQL database. Then, add a new rule to your AWS security group to allow traffic for that port. For example, if Clouddley configured port `14172`, run:
```bash theme={null}
aws ec2 authorize-security-group-ingress \
--group-id \
--protocol tcp \
--port 14172 \
--cidr 0.0.0.0/0
```
Replace the `sg_id` with the one created earlier.
You can now connect your PostgreSQL database to your application.
## Manage your database
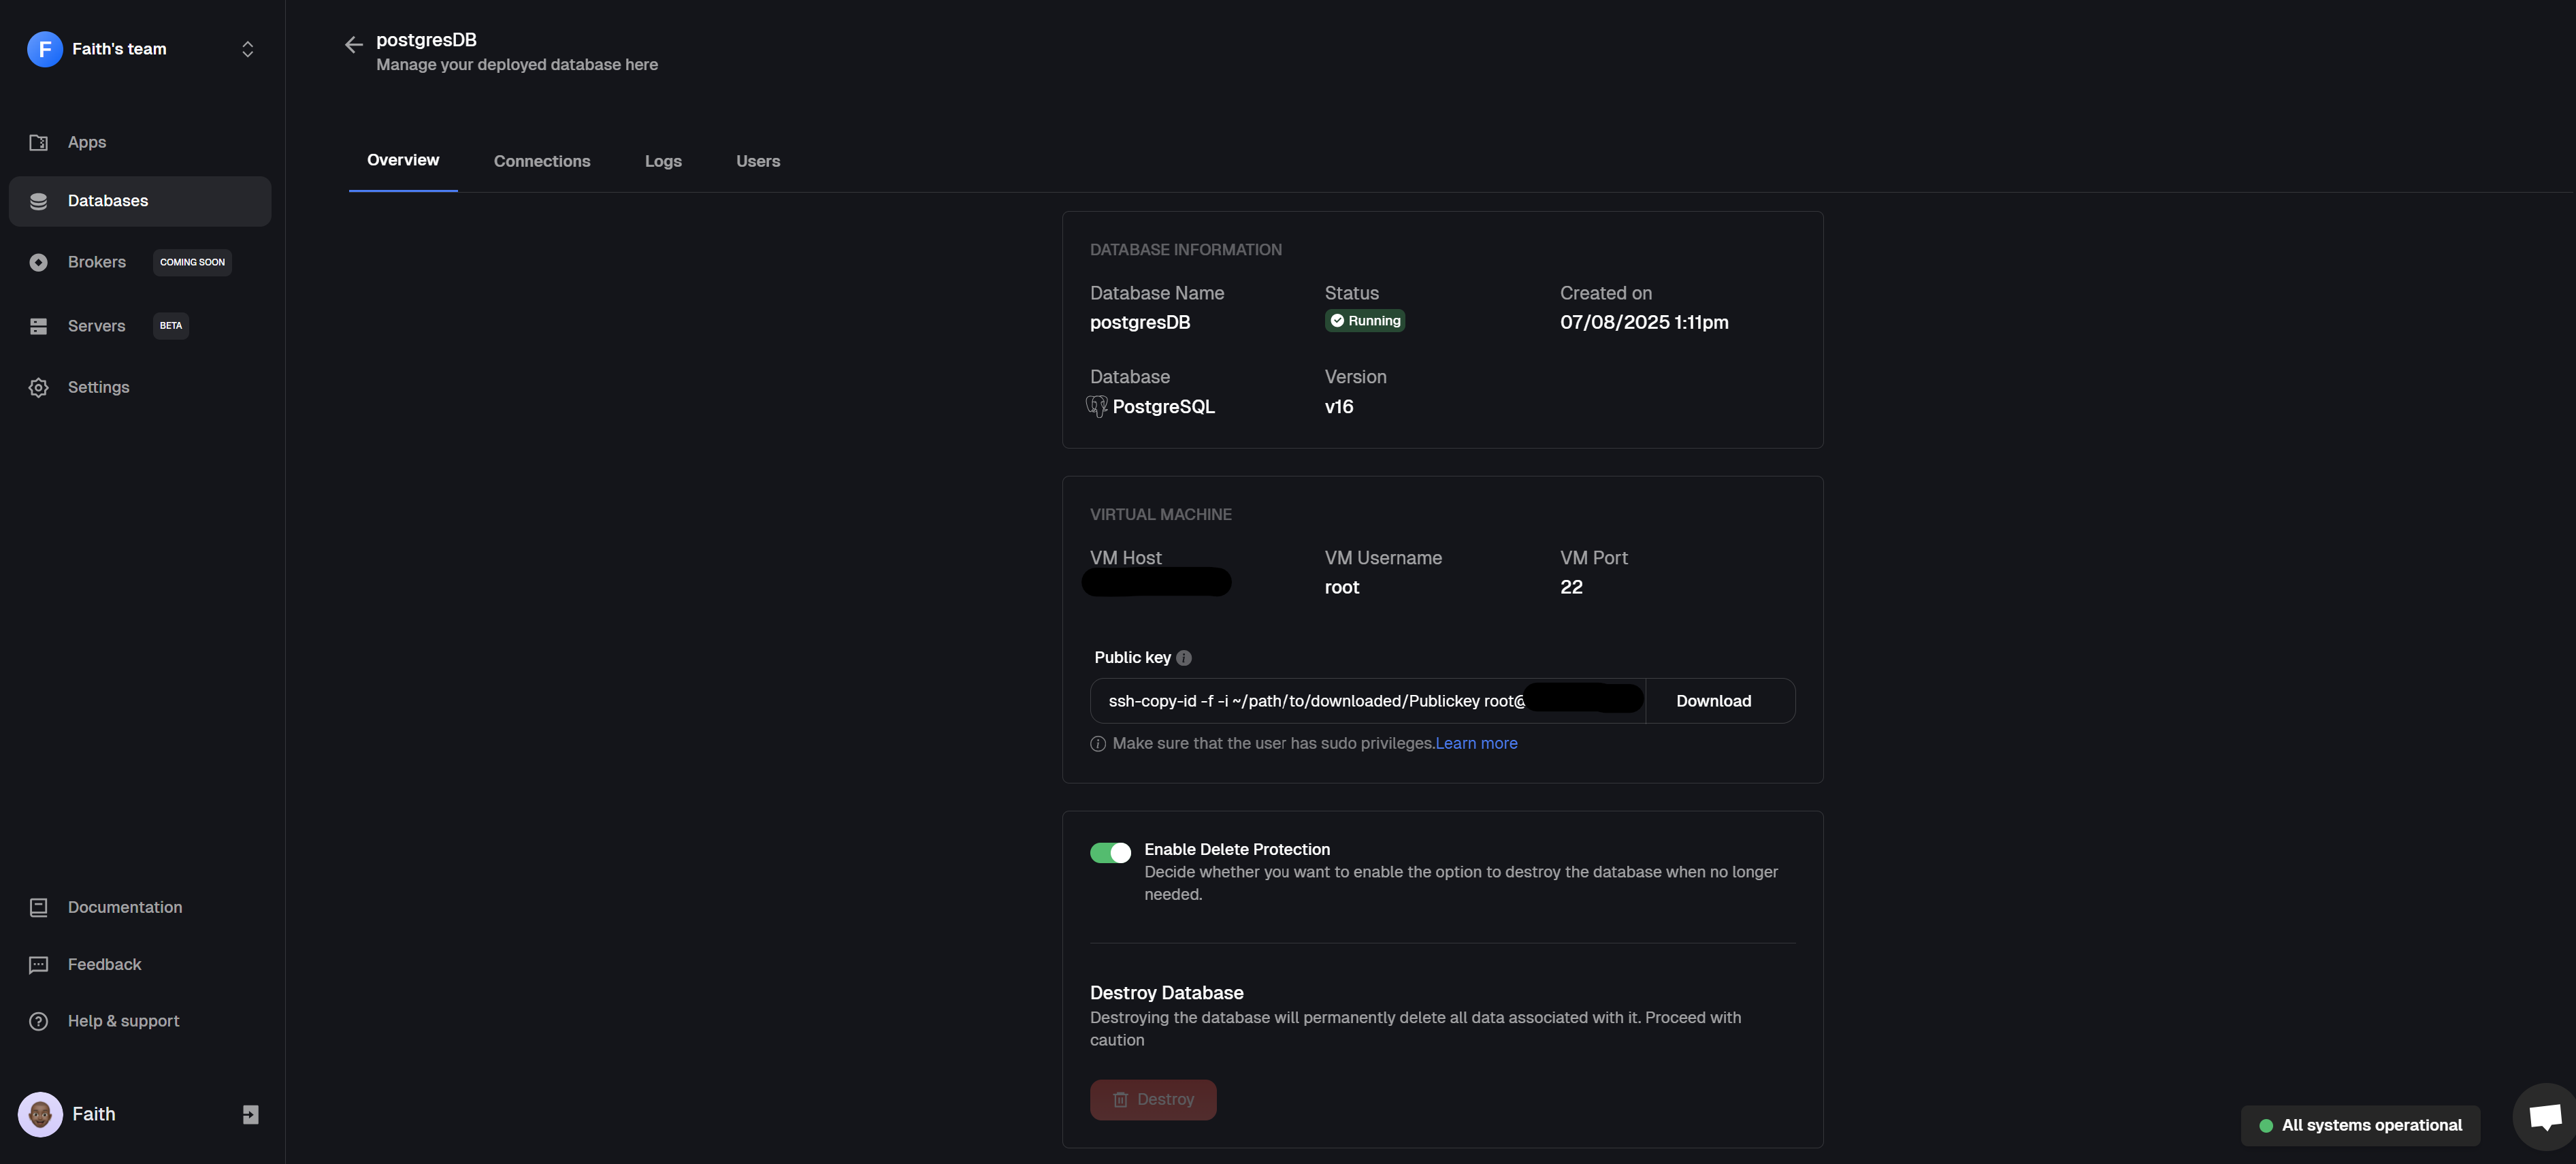
The Database dashboard makes it easy to manage your PostgreSQL database on an AWS EC2 instance. You can deploy, monitor, and maintain your database.
Here’s what you can do:
* View real-time logs to check performance and troubleshoot fast.
* Reset passwords securely with built-in authentication and encryption.
* Prevent accidental deletions with built-in delete protection.
* Manage the database users and access control.
Everything you need to manage your database is right where you need it.
## Conclusion
And there you have it, your PostgreSQL database is live on AWS, running on an EC2 instance with Clouddley making deployment easier. No endless trial and error. Just a clean, reliable setup you can build on. From here, you can start plugging your database into your apps, grow as your needs evolve, and feel confident knowing you’ve set it up the right way.
Got feedback or ideas to improve the experience? We’d love to [hear from you](https://clouddley.productlane.com/roadmap). We can’t wait to see what you deploy next!
A backend infrastructure for your own compute. Run apps, databases, brokers, and AI workloads on your VMs, bare metal, or VPS.
## Additional Resources
* [Clouddley Documentation](https://docs.clouddley.com/)
* [PostgreSQL Documentation](https://www.postgresql.org/docs/)
* [AWS EC2 Documentation](https://aws.amazon.com/ec2/)



 Everything you need to manage your database is right where you need it.
## Conclusion
And there you have it, your PostgreSQL database is live on AWS, running on an EC2 instance with Clouddley making deployment easier. No endless trial and error. Just a clean, reliable setup you can build on. From here, you can start plugging your database into your apps, grow as your needs evolve, and feel confident knowing you’ve set it up the right way.
Got feedback or ideas to improve the experience? We’d love to [hear from you](https://clouddley.productlane.com/roadmap). We can’t wait to see what you deploy next!
Everything you need to manage your database is right where you need it.
## Conclusion
And there you have it, your PostgreSQL database is live on AWS, running on an EC2 instance with Clouddley making deployment easier. No endless trial and error. Just a clean, reliable setup you can build on. From here, you can start plugging your database into your apps, grow as your needs evolve, and feel confident knowing you’ve set it up the right way.
Got feedback or ideas to improve the experience? We’d love to [hear from you](https://clouddley.productlane.com/roadmap). We can’t wait to see what you deploy next!