Prerequisites
Before you begin, ensure you have the following:- A Clouddley account
- A DigitalOcean account
doctl(DigitalOcean CLI) installed and configured- DigitalOcean API token generated
- Basic knowledge of the command line.
Create a DigitalOcean Droplet
Let’s create a Droplet usingdoctl, the official CLI for DigitalOcean.
Make sure you’ve installed doctl, have your DigitalOcean API token ready, added your SSH key to your account, and taken note of your VPC UUID.
- Authenticate with your DigitalOcean account by running the following command in your terminal:
- Enter your API token when prompted. This connects
doctlto your DigitalOcean account.
How to find your VPC UUID
How to find your VPC UUID
Open your terminal and run the command:This will display all your VPCs along with their UUIDs. Choose the one you want to use for your Droplet.
How to add your SSH Key to DigitalOcean
How to add your SSH Key to DigitalOcean
Open your terminal and run the command:If you do not have a previously created one, follow the steps below.Step 1: To generate an SSH key, run the command:Press Enter to accept the default file location and choose a passphrase if you want one.Step 2: To add your SSH key to digitalocean, run:Replace
my-key-name with a name you’ll recognize.- Now, let’s create a Droplet by running the following command in your terminal:
Replace the placeholders
<your_vpc_uuid> and <your_ssh_key_id> with your actual values. The SSH key added here allows Clouddley to securely connect to your Droplet during deployments.
db-droplet with Ubuntu 24.10 x64 image in the nyc1 region.
- After the Droplet is created, you can check its status by running:

Deploy
Your Droplet is now ready, you can deploy your MariaDB database using Clouddley. Step 1: Access Databases- Log in to your Clouddley account.
- Navigate to the Databases on the left sidebar.
- Click on Deploy Database

Accessing Triggr Databases
Step 2: Configure your virtual machine(VM)
- In the choose or add server dropdown, select your VM if it’s listed. If not, select + Add Virtual Machine and enter your droplet’s IP address as the VM host, along with the VM User and SSH port.
- After adding the details, verify the connection with the Clouddley CLI (recommended) or SSH.
How to Install Clouddley CLI to Verify your DigitalOcean Droplet
How to Install Clouddley CLI to Verify your DigitalOcean Droplet
- Open your local machine’s command line, then connect to the remote VM you want to configure with Clouddley. Use this command to SSH into your DigitalOcean Droplet:
- Install Clouddley CLI by running the command:
- To add the SSH public key, run the command:
- Click on Verify to ensure the connection is successful.
- Once verified, click on Next to proceed.

Configure virtual machine on Triggr
Step 3: Configure your database name
- Input a name for your MariaDB database.
- Click on Next to continue.
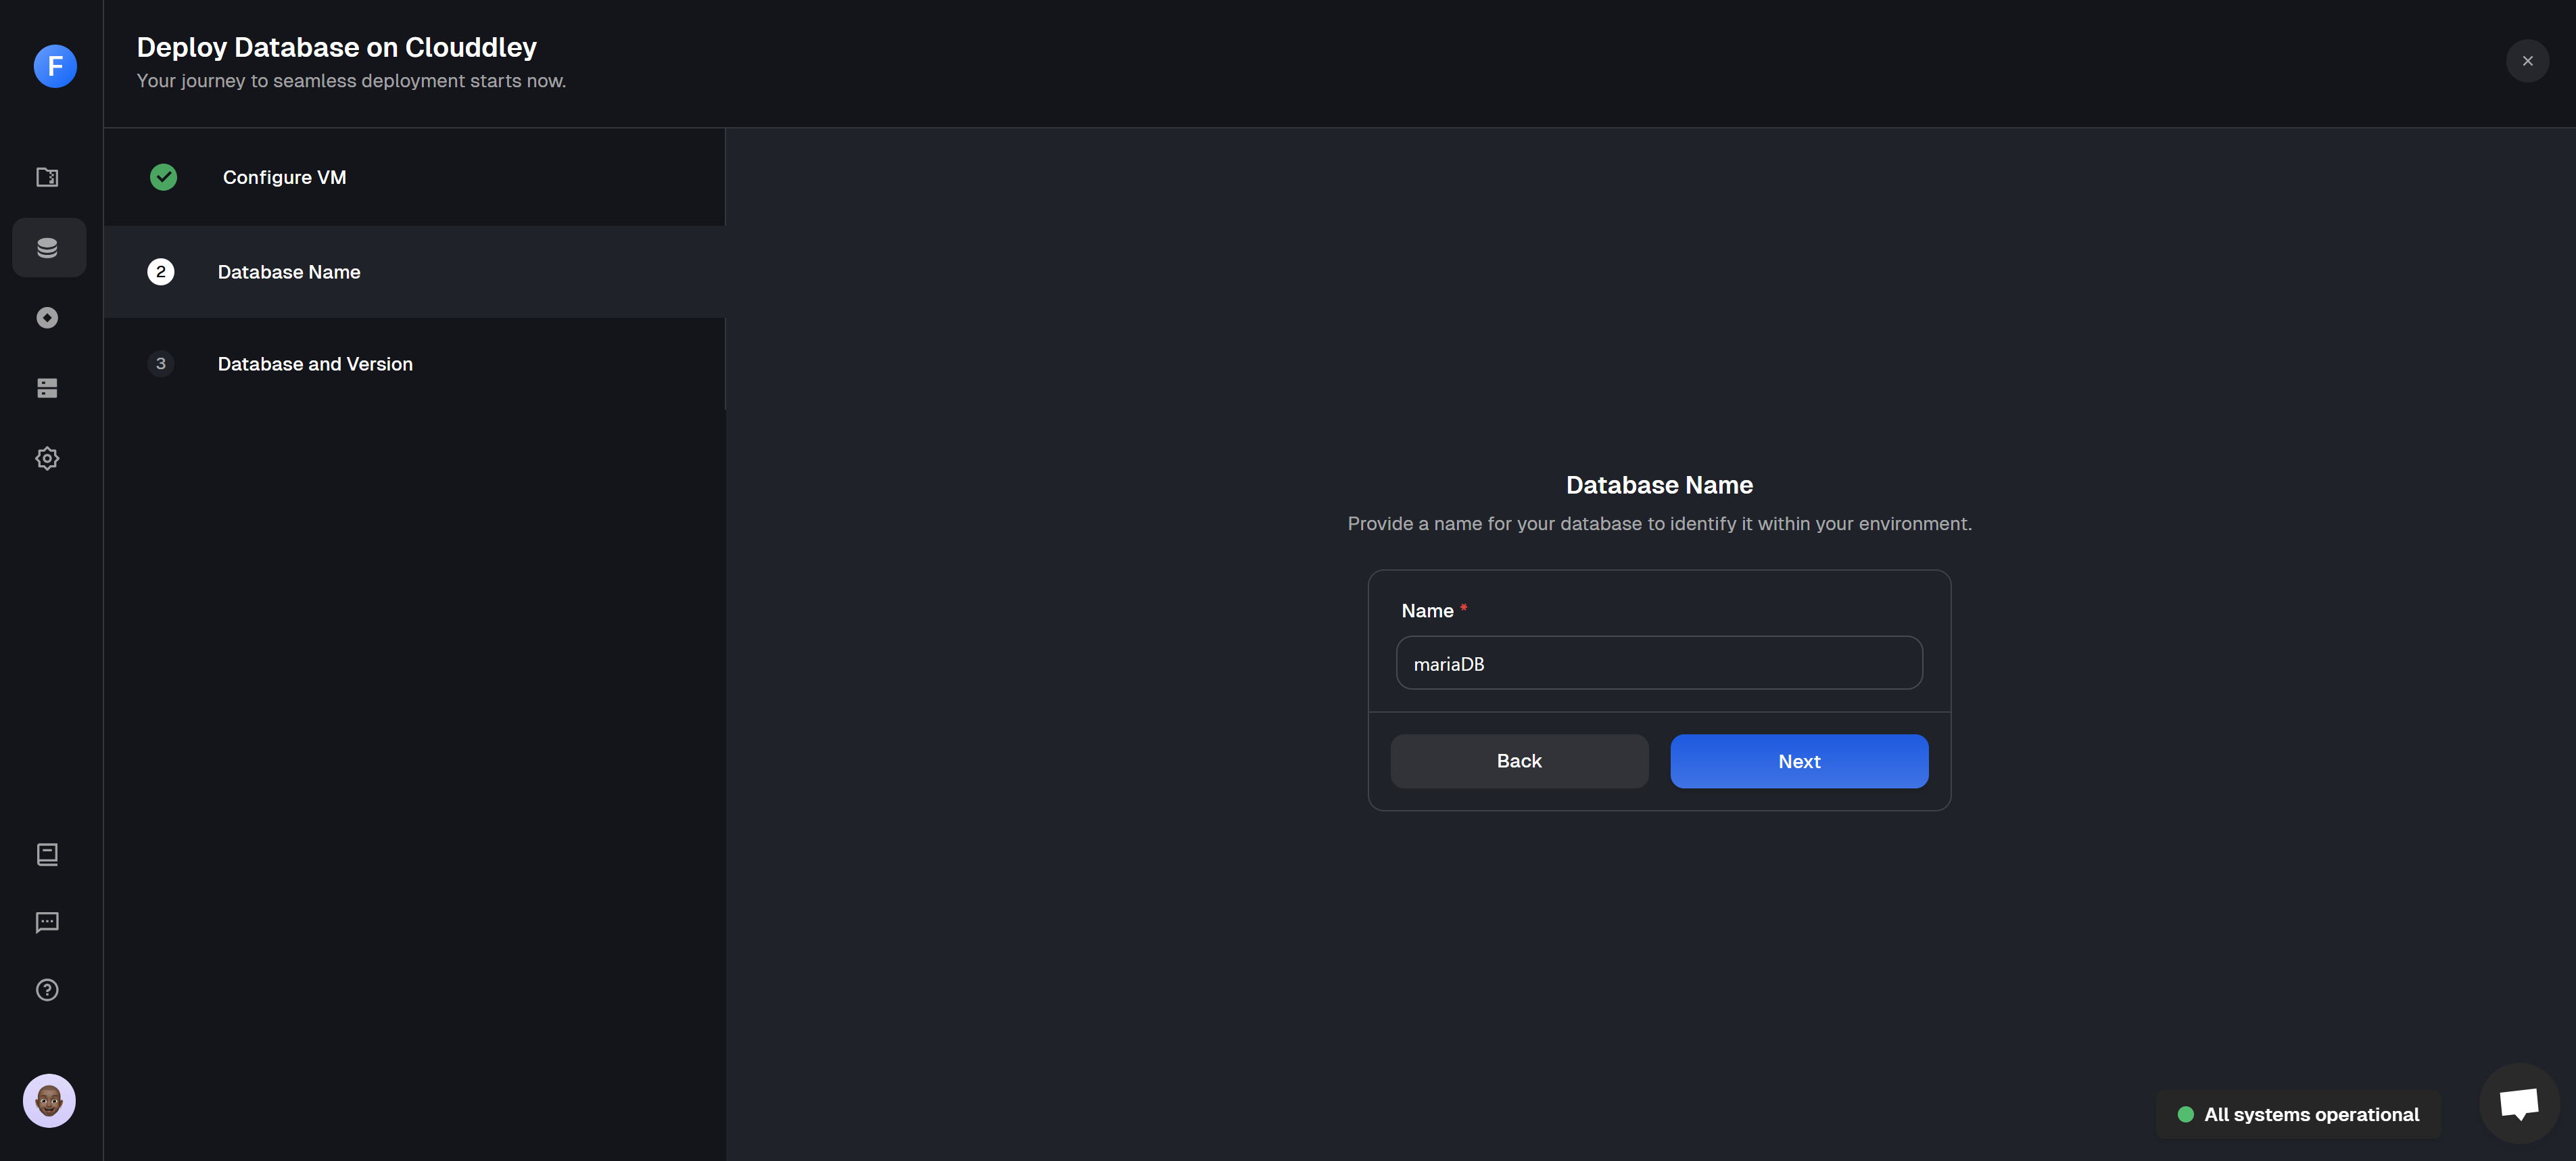
Defining a unique name for the MariaDB database
Step 4: Select your database type and version
- Select MariaDB as your database type.
- Choose the version of MariaDB you want to deploy.
- Enable delete protection to prevent accidental deletions.
- Click on Deploy DB
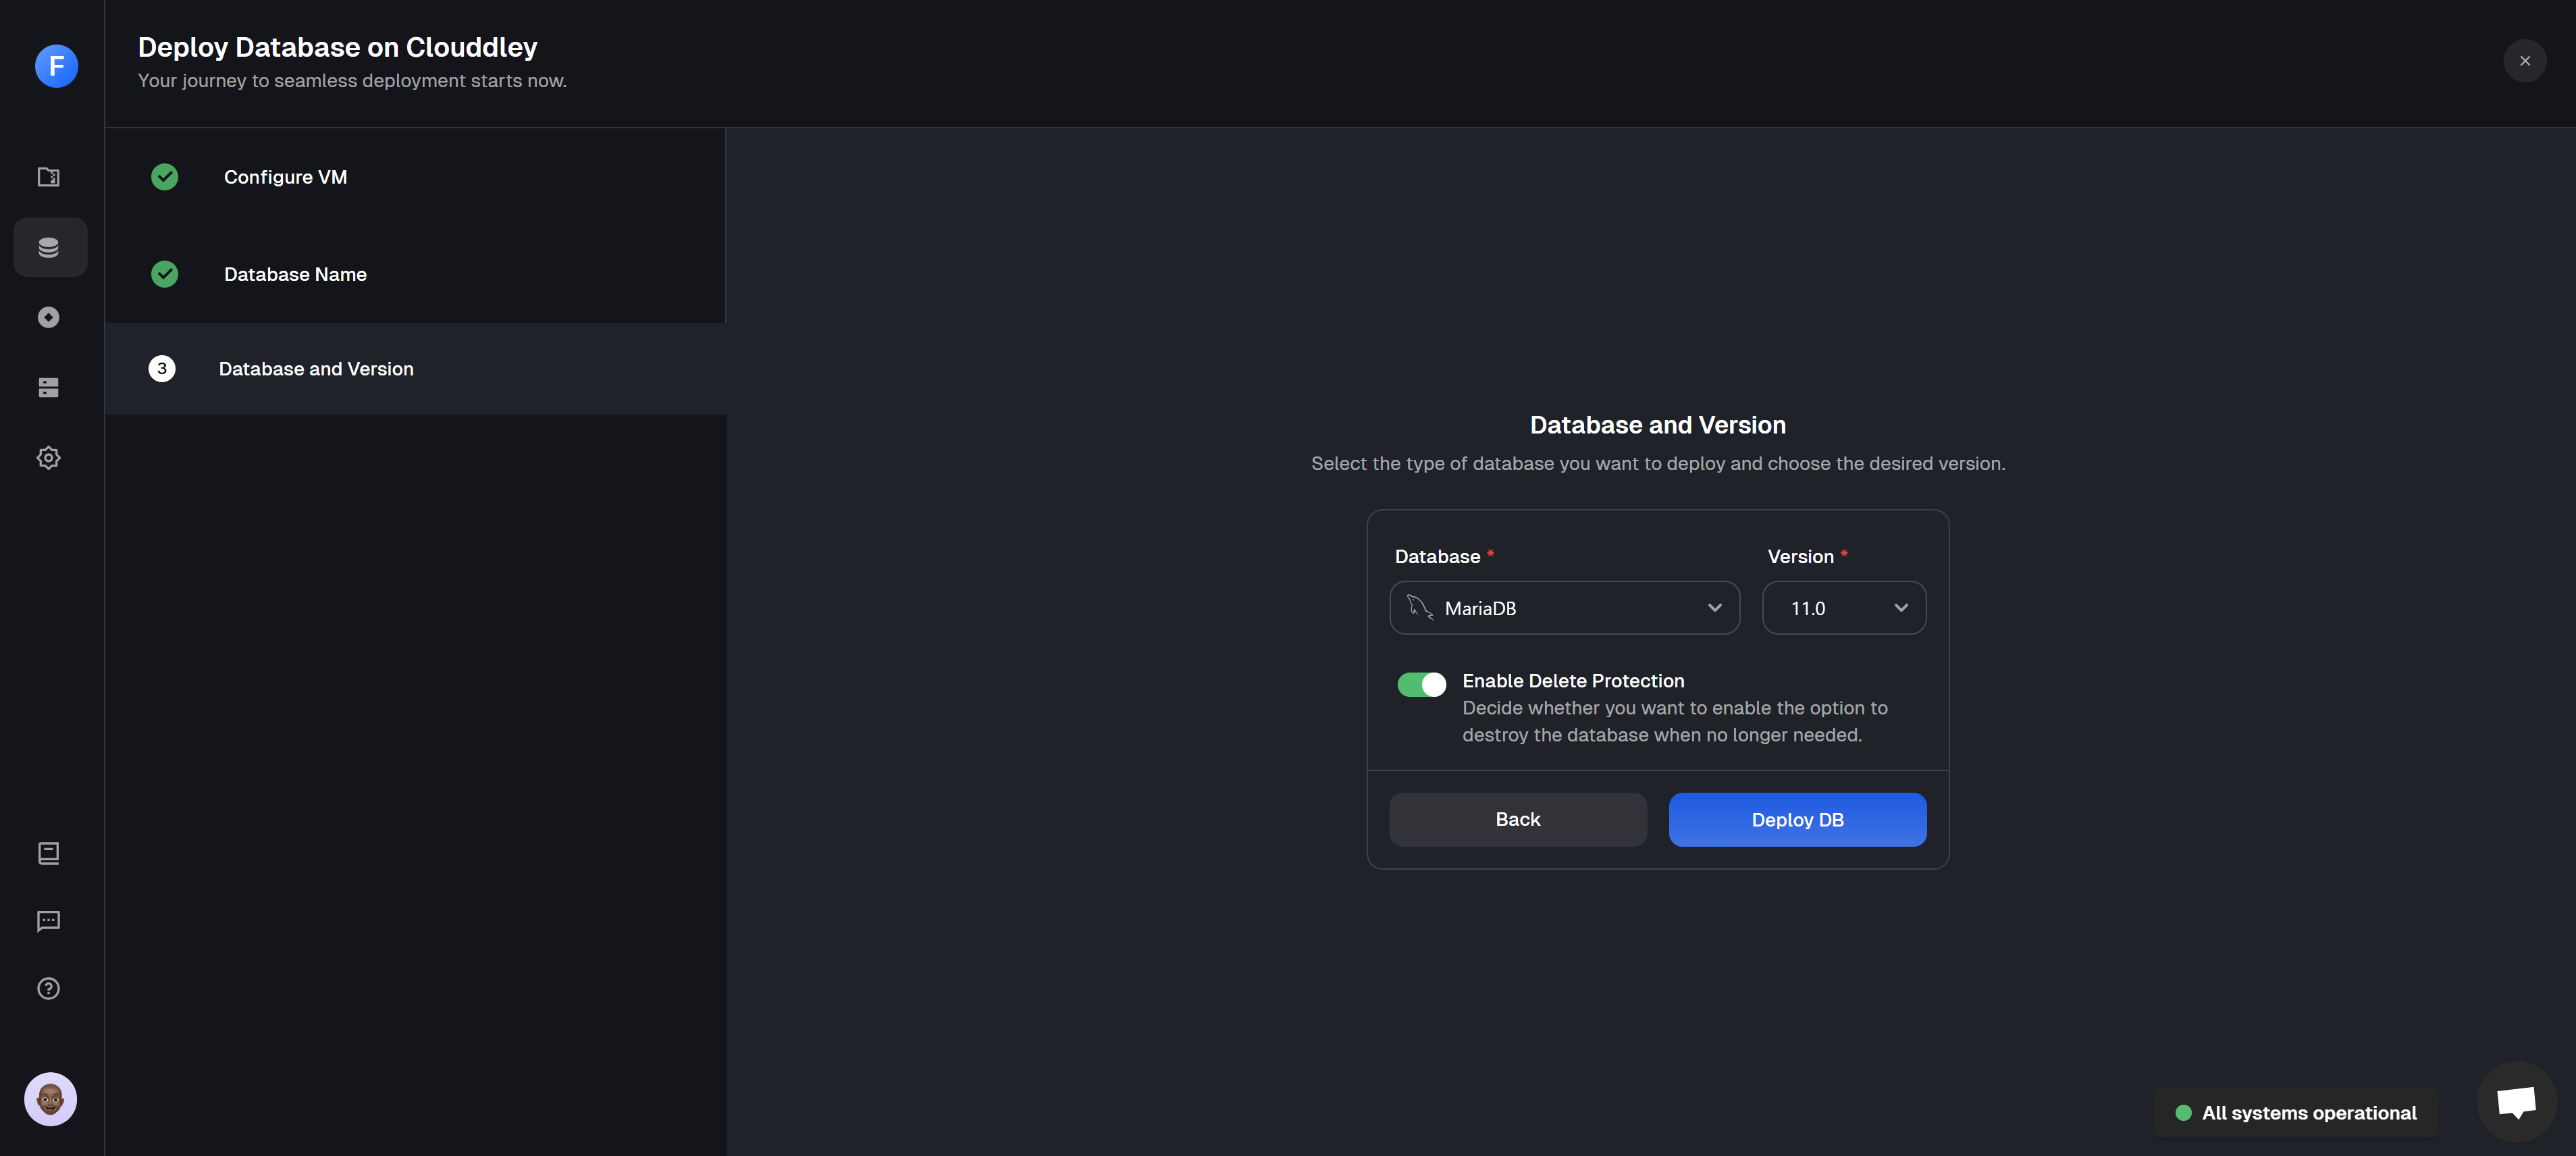
Selecting the MariaDB database type and specifying the version
Step 5: Validate deployment
- Once your deployment is complete, you will see a confirmation message
Deployed successfully!

MariaDB database successfully deployed
- Your MariaDB database is ready to connect to your application.
Manage your database
Managing your MariaDB database on DigitalOcean is simple with the Database dashboard. It gives you everything you need in one place. Here’s what you can do:- Monitor your database with real-time logs and quickly spot issues.
- Reset passwords safely with secure authentication and encryption
- Avoid accidental deletions with built-in delete protection.
- Control who can access your database with easy user management.
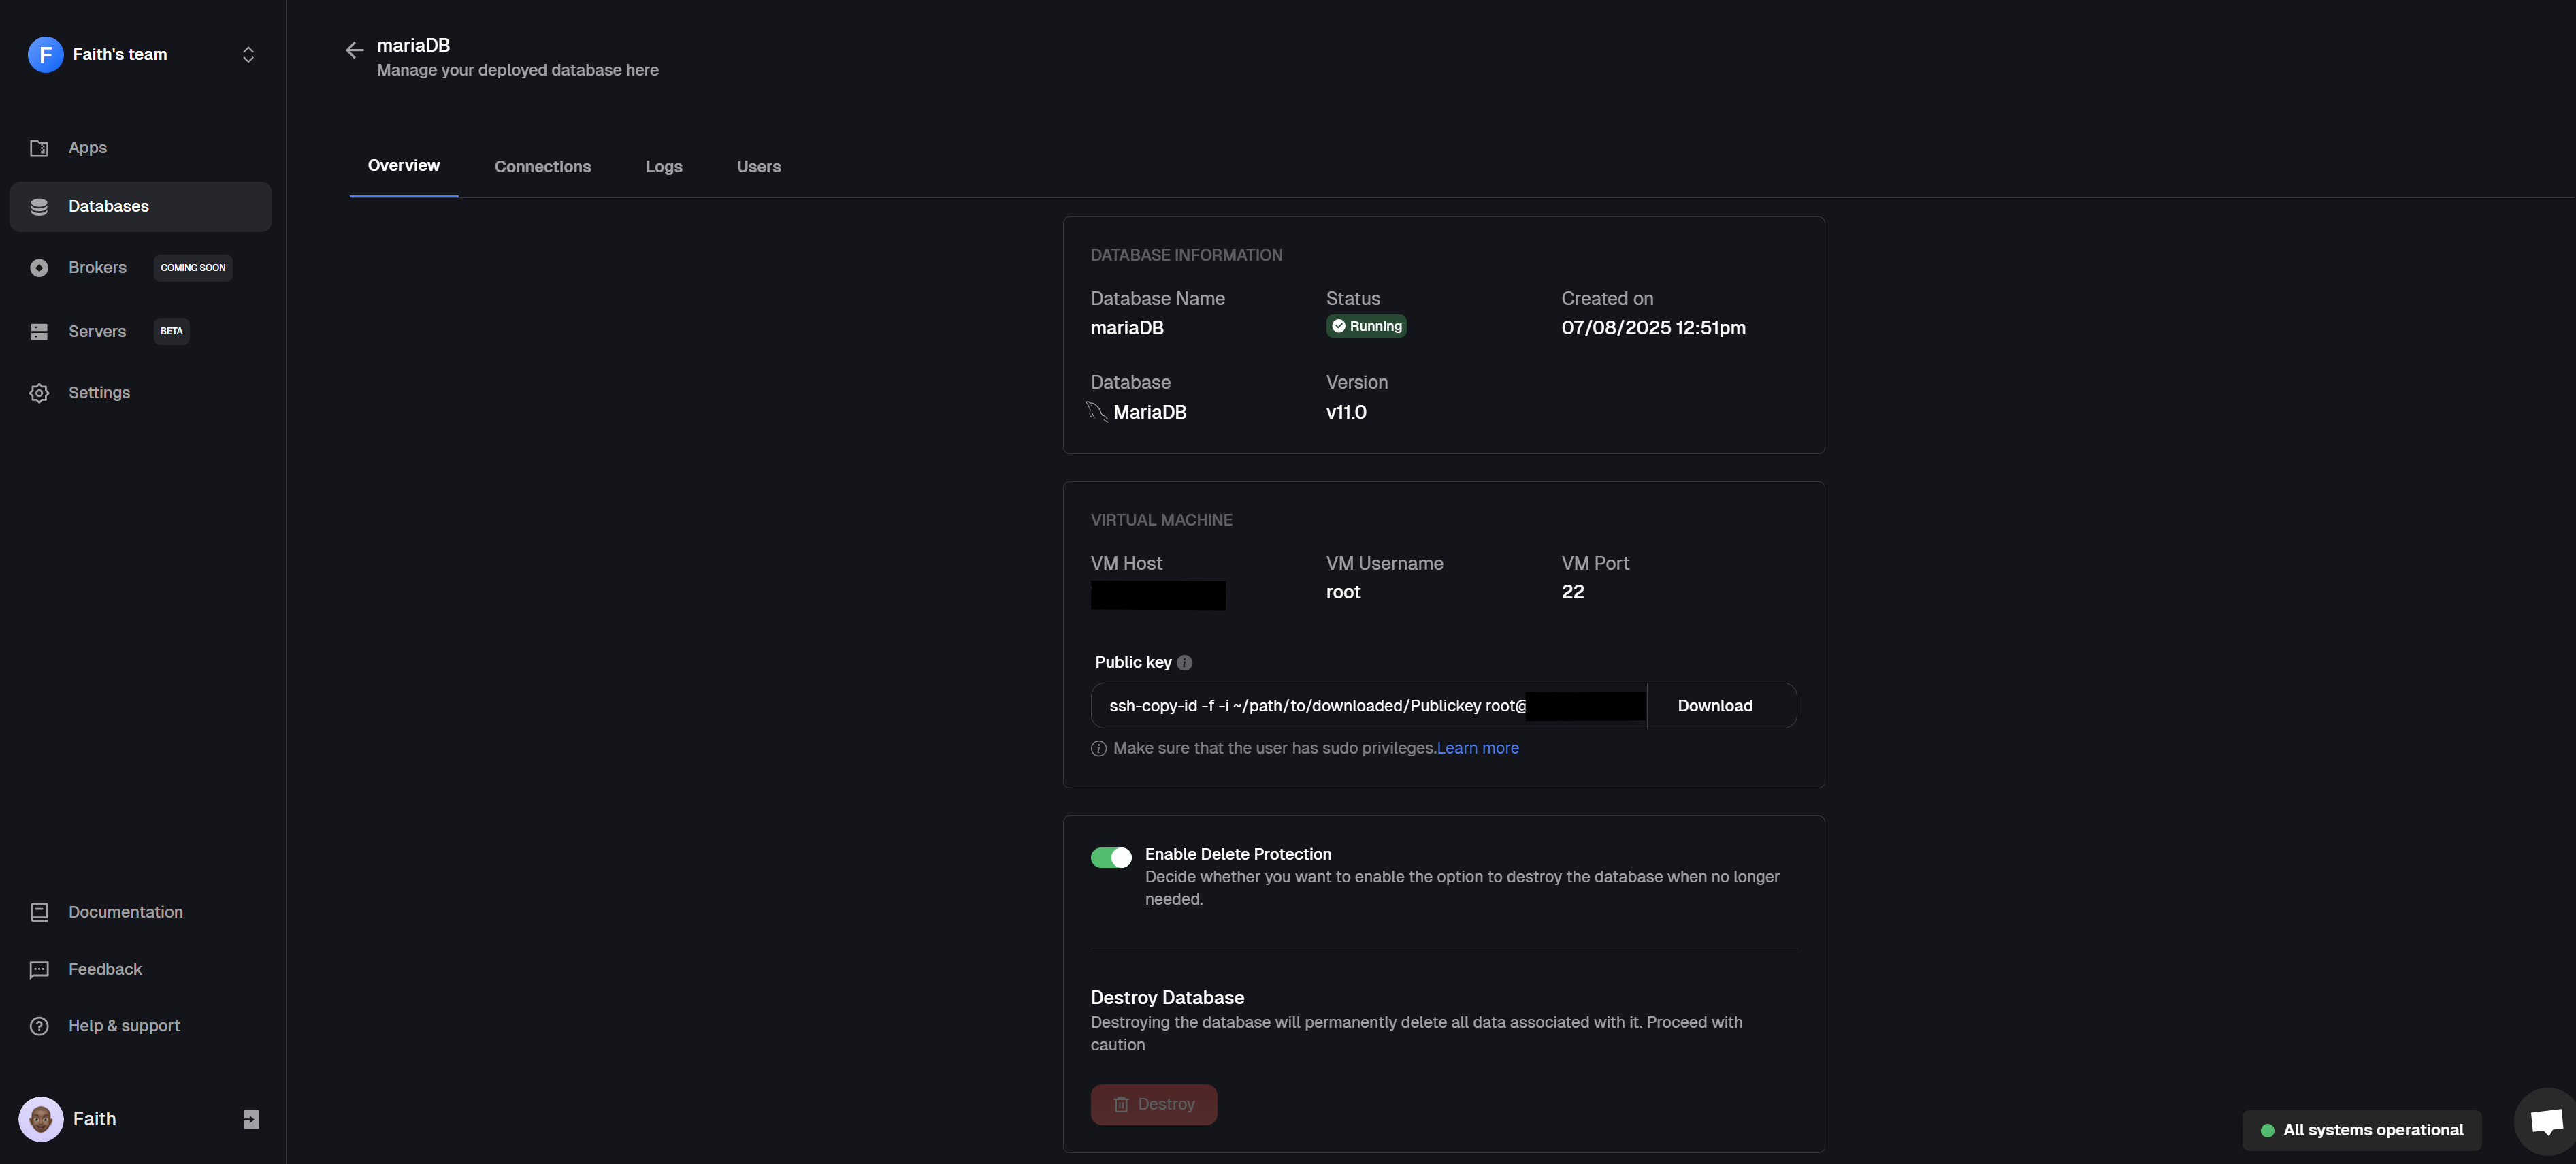
Database dashboard
Conclusion
You’ve now deployed MariaDB on a DigitalOcean Droplet using Clouddley, no complex configurations and no time-consuming setup. Just a simple, fast, and smooth experience that gets your database ready to go in minutes. Got feedback or ideas to improve the experience? We’d love to hear from you. We can’t wait to see what you deploy next!Getting started with Clouddley?
A backend infrastructure for your own compute. Run apps, databases, brokers, and AI workloads on your VMs, bare metal, or VPS.