Prerequisites
- A Clouddley account
- An AWS account
- AWS CLI installed and configured on your local machine
- AWS Access Keys with permissions to create and manage EC2 instances
- Golang installed on your local machine
- Git installed locally
- Basic familiarity with the Linux command line
Create a Golang Application
First, create a simple Golang application to deploy. If you already have one, you can skip this step.Push Your Code to GitHub
Create a New Repository on GitHub
Go to GitHub and create a new repository. Give it a name and leave the rest of the settings as default (no README, no .gitignore, you already have those locally).
Create branch and add Remote Repository
Create a branch and link your local repository to the GitHub repository you created:
Create an AWS EC2 Instance
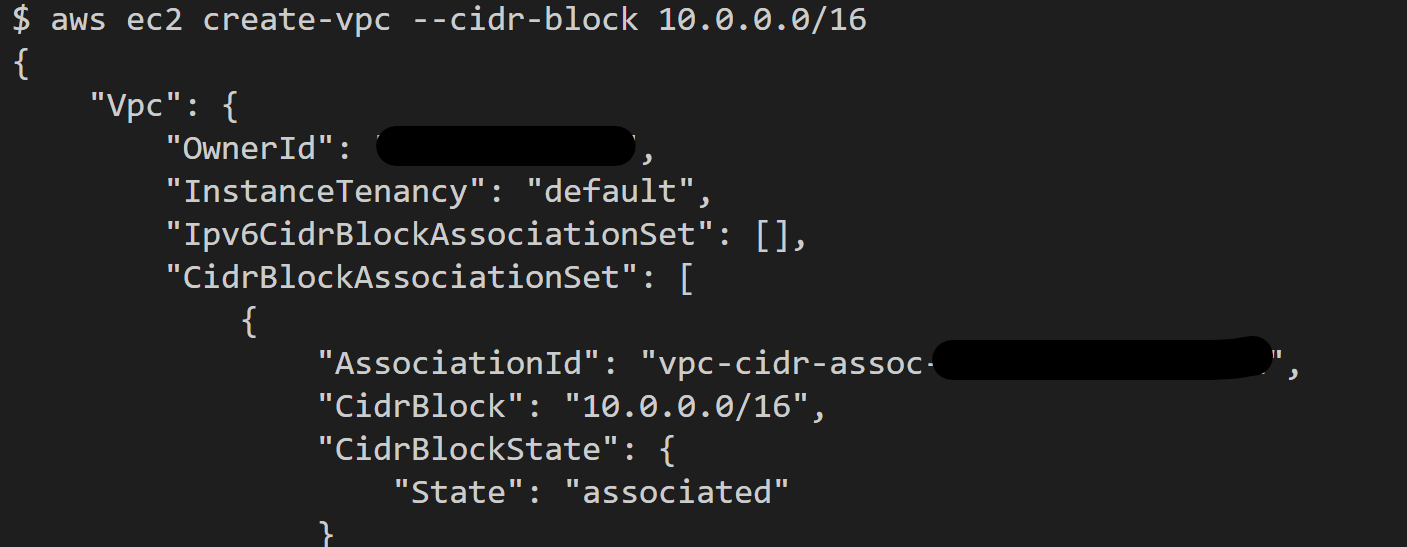
Now create an EC2 instance to host your app. With AWS CLI, you can quickly create one. First, create a VPC and security group if you don’t want to use the default ones.- Create a VPC by running the command:
- Create a security group by running the command:
Replace the
vpc_id with the one created in the previous step. 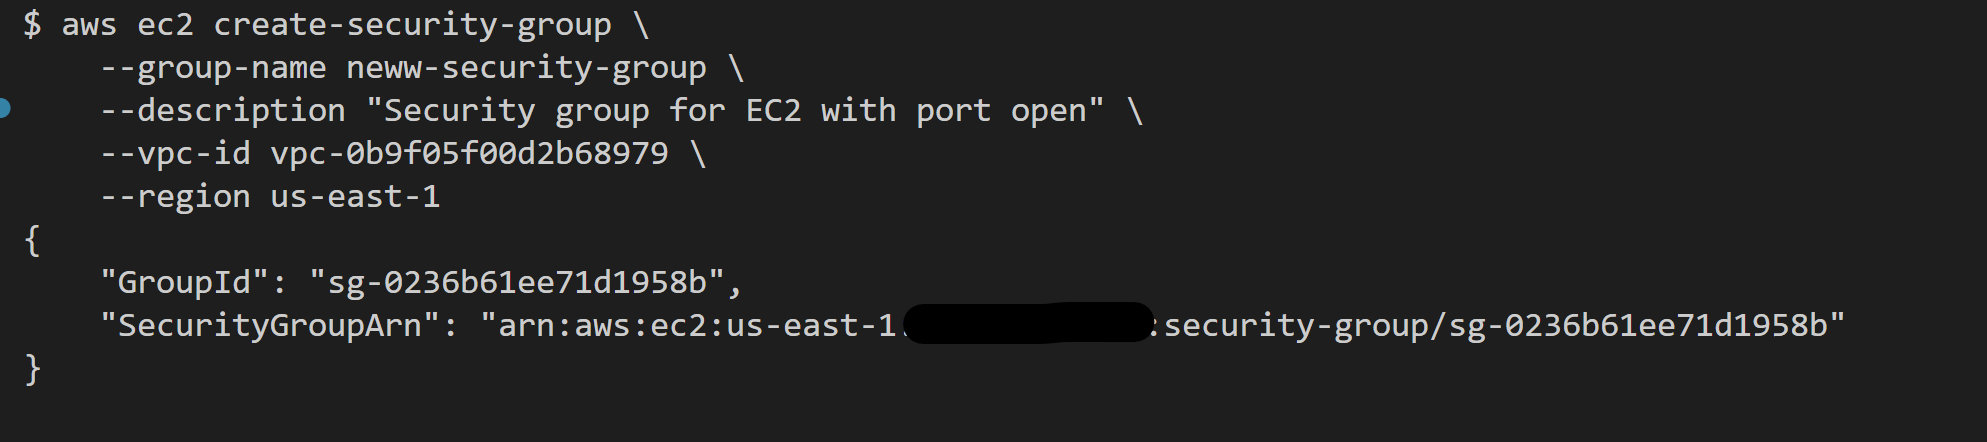
- Allow inbound traffic on port 22 (SSH) and port 3007 (your application port)
Replace the
sg_id with the one created in the previous step. - To create an EC2 instance, you need to have an SSH key pair. If you don’t have one, you can generate and import one below.
How to Generate and Import SSH Keys to AWS
How to Generate and Import SSH Keys to AWS
If you don’t have an SSH key pair on your local machine, follow the steps below.Press Enter to accept the default file location and choose a passphrase if you want one.
- Step 1: To generate an SSH key, run the command:
- Step 2: To add your SSH key to AWS, run:
Replace the path to your public key if it’s different.
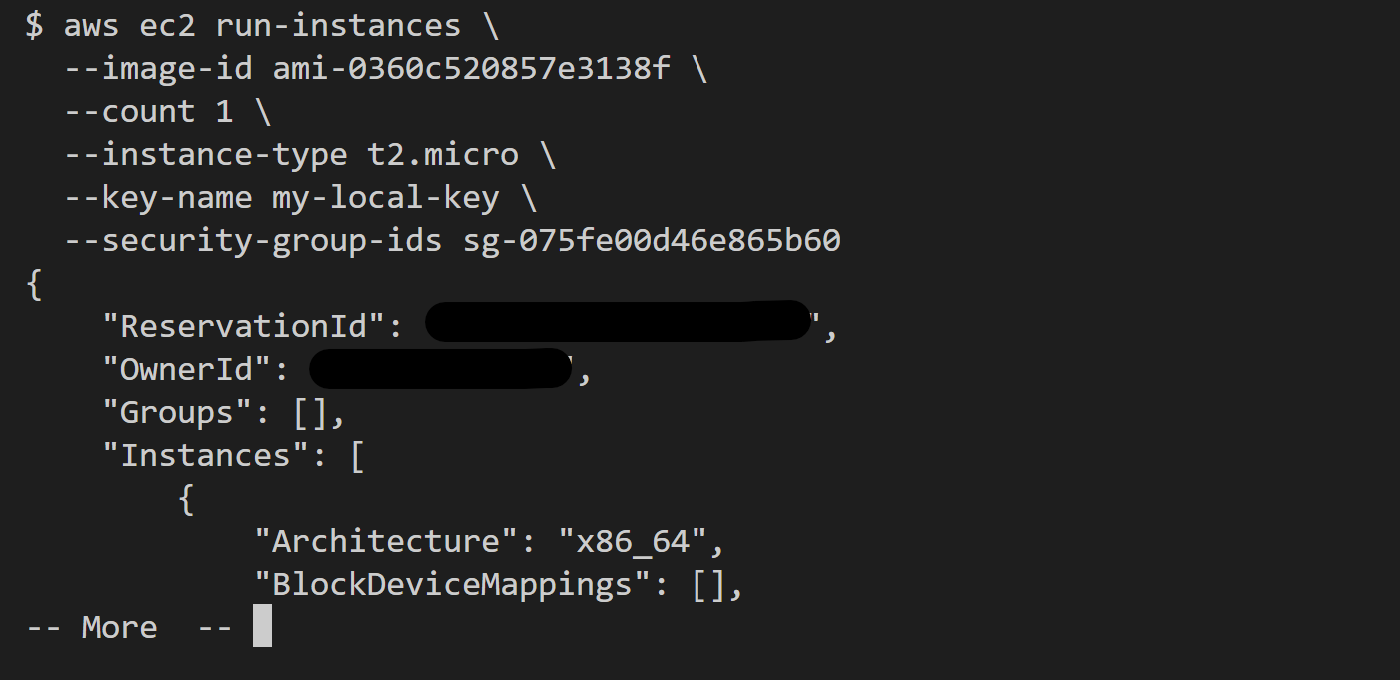
- Finally, create the EC2 instance.
- Replace ami-xxxxxxxx with regions’s compatible AMI
- Replace my-key with your key pair name
- Replace sg_id with your security group id
Once the instance is running, note the Public IP address of the instance. You’ll need it later.
Deploy
Your Golang application and EC2 instance are ready. Now, you can deploy your application.- Open your browser and log in to your Clouddley account
- Click on Apps at the left sidebar
- Click on Deploy App

Step 1: Configure Service
- Choose your Git hosting service which can be Github or Bitbucket. We will use Github in this tutorial.
- Click on Continue with Github and authorize Clouddley to access your Github account.

Step 2: Configure Git
- To connect your Github user or organization account, click on the Select username/organization dropdown and Add Github account.
- Select your repository and the branch from the dropdown list or quickly search.
- Click on Next.

Step 3: Configure your Virtual Machine
- From the Choose or add server dropdown, select your VM if it appears in the list. If not, click + Add Virtual Machine.
- To add your VM, enter your instance’s IP address as VM host, VM user, and the VM port for SSH access.
- Once you’ve entered the details, verify the connection using the Clouddley CLI(recommended) or SSH.
How to Install Clouddley CLI to Verify your AWS EC2 Instance
How to Install Clouddley CLI to Verify your AWS EC2 Instance
- Open your local machine’s command line, then connect to the remote VM you want to configure with Clouddley. Use this command to SSH into your EC2 instance:
- Install Clouddley CLI by running the command:
- To add the SSH public key, run the command:
- Click on Verify. This verifies the connection to your VM.
- Once verified, click on Next to proceed.

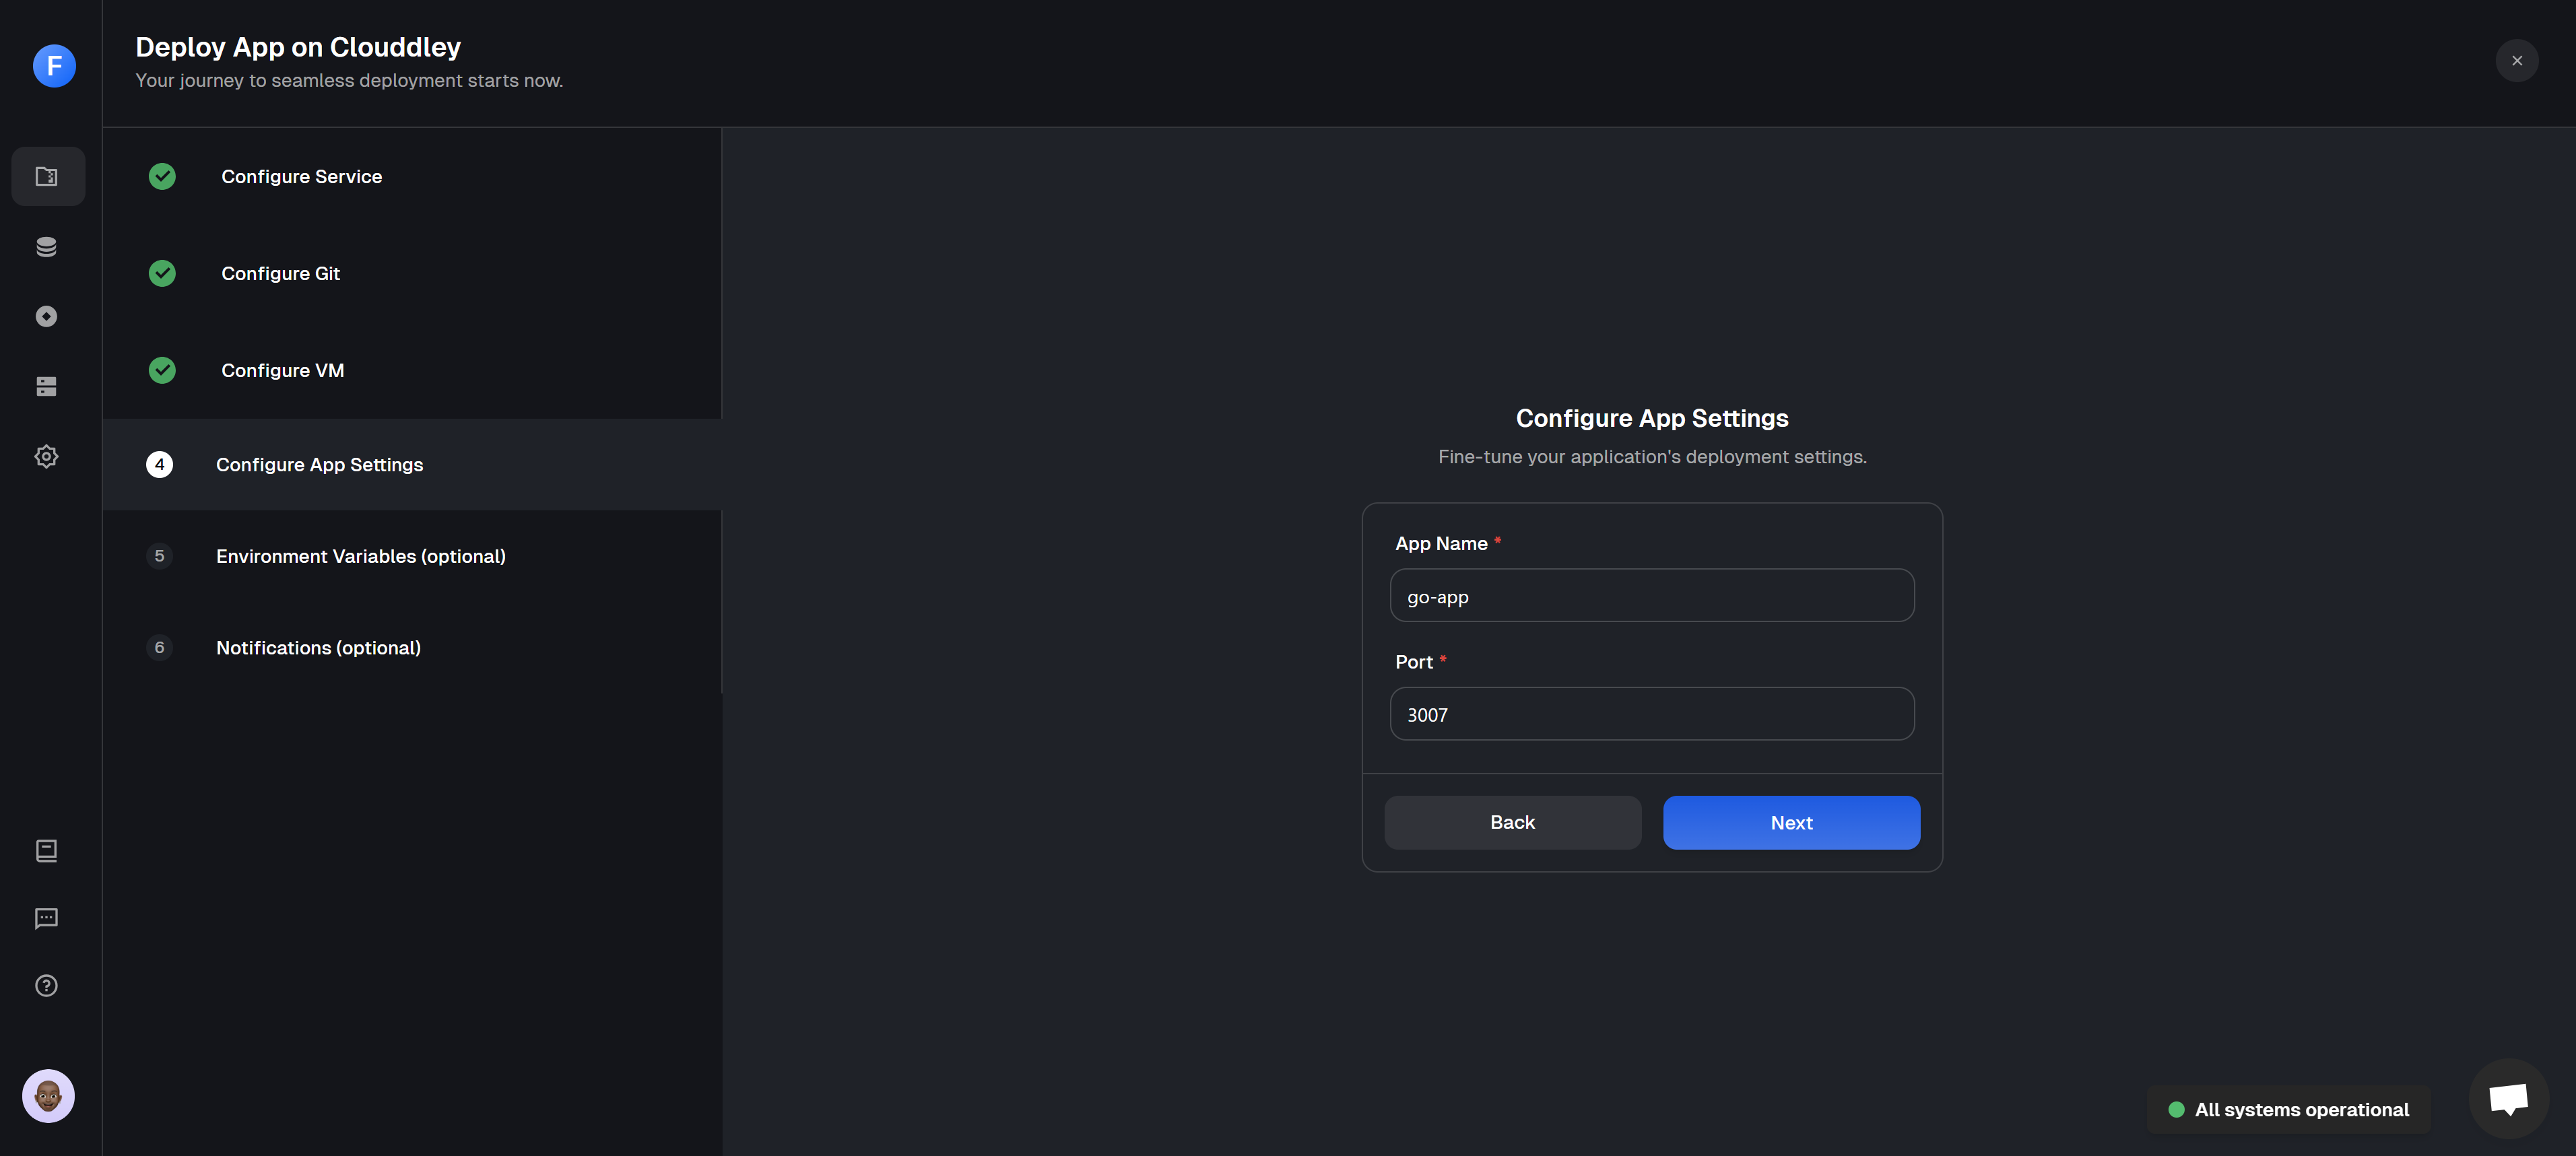
Step 4: Configure app settings
- Enter the name of your application and its port number.
- Click on Next to continue.
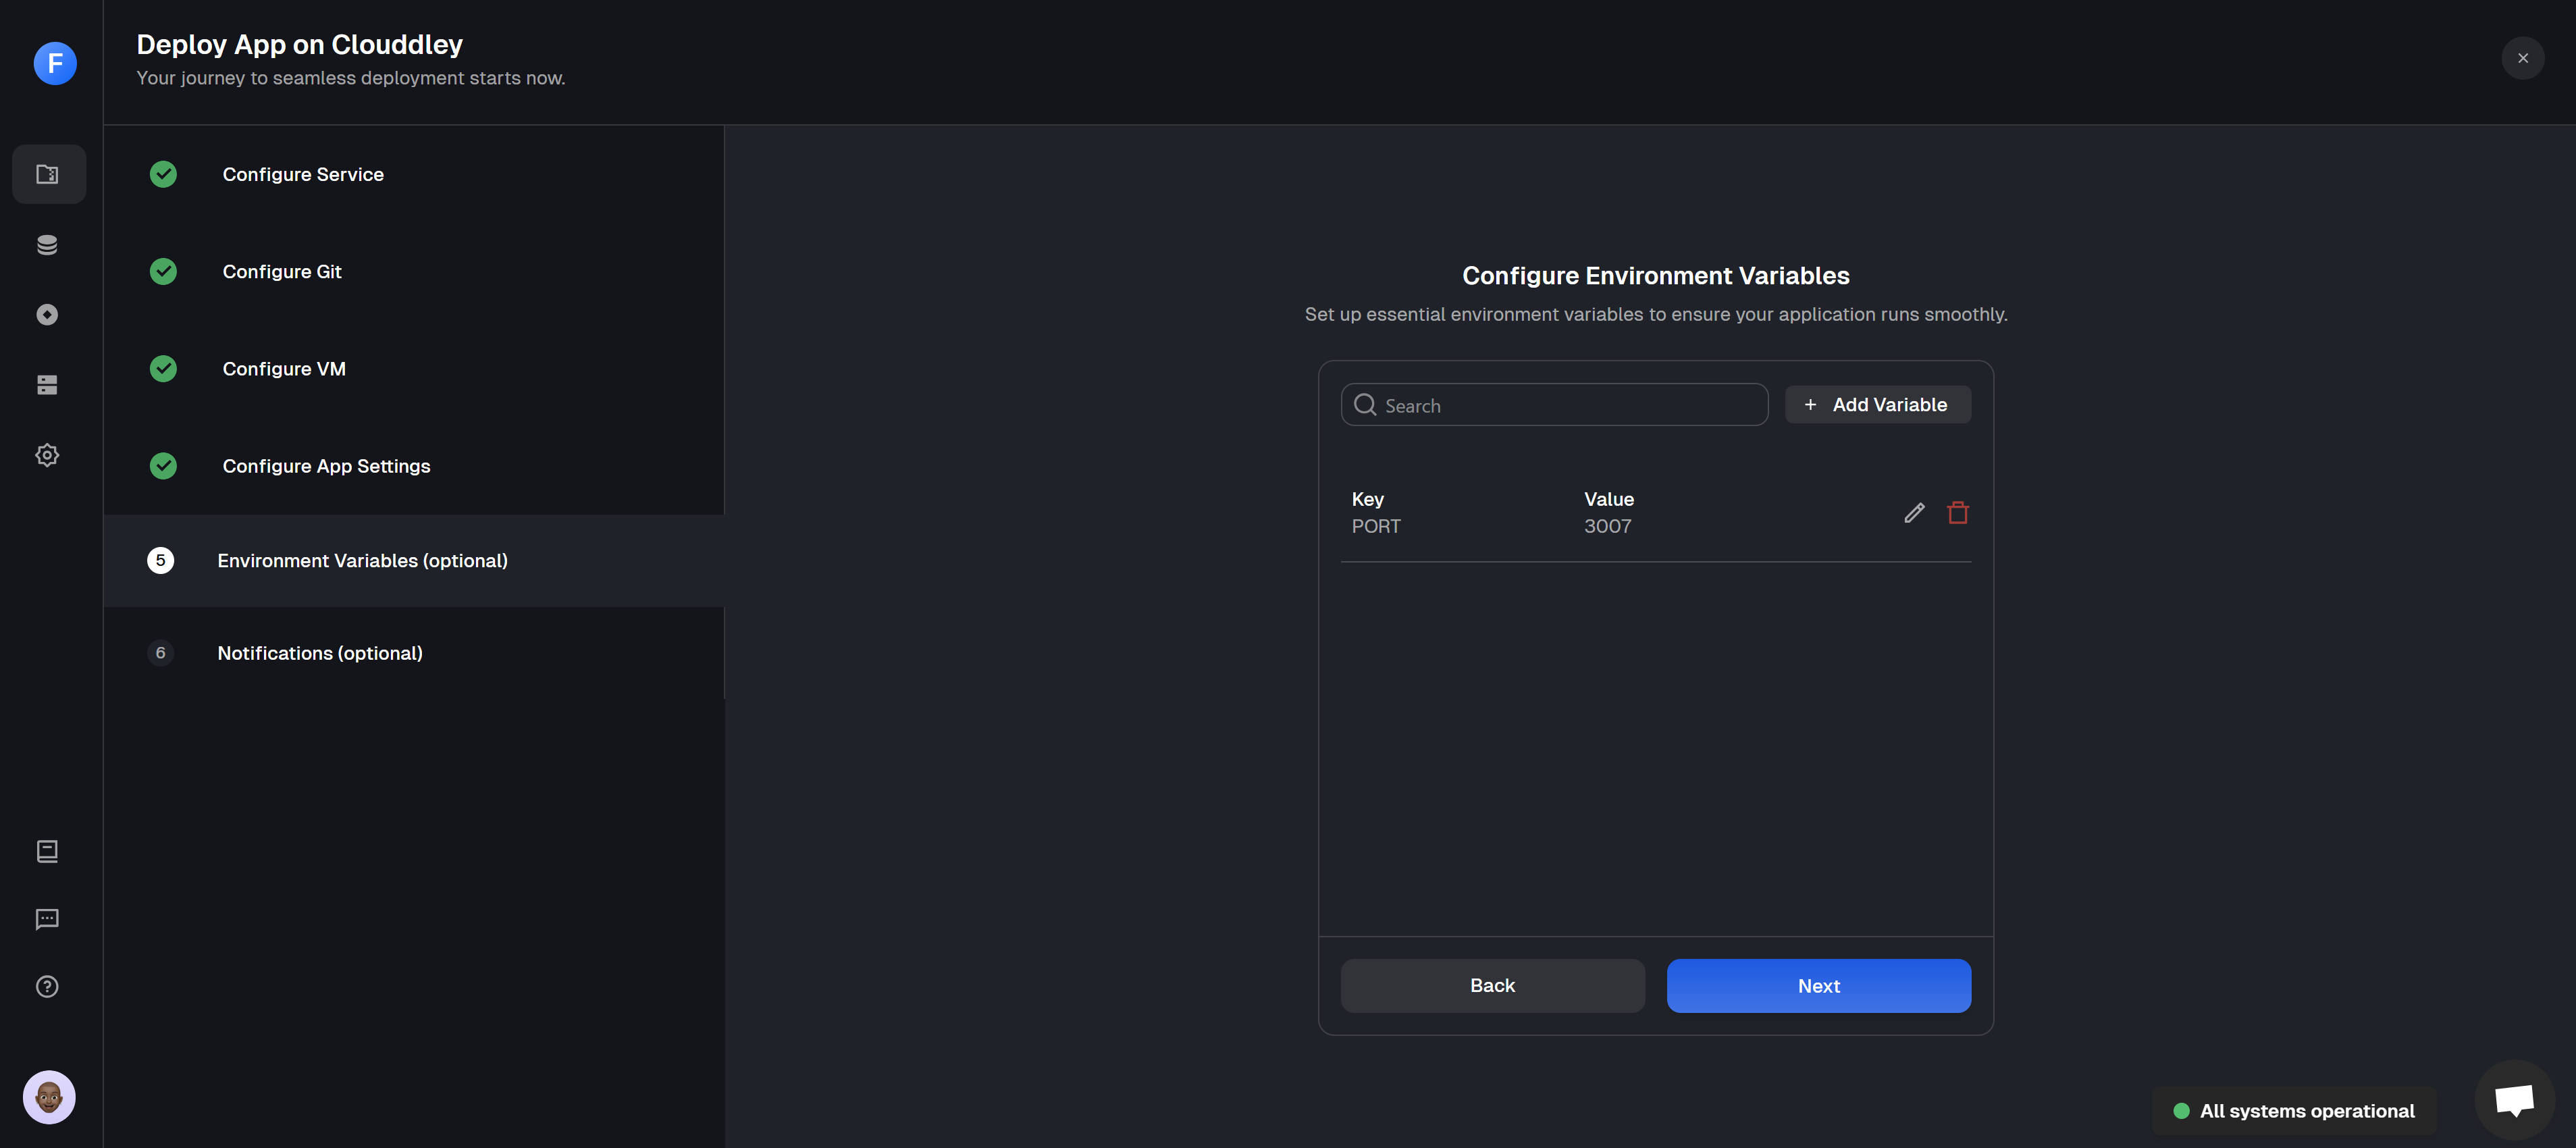
Step 5: Configure Environment Variables
- Click on Add Variable
- Choose an ENV mode: either a single variable or import variables mode. Learn more here.
- Single Variable
- Import Variables

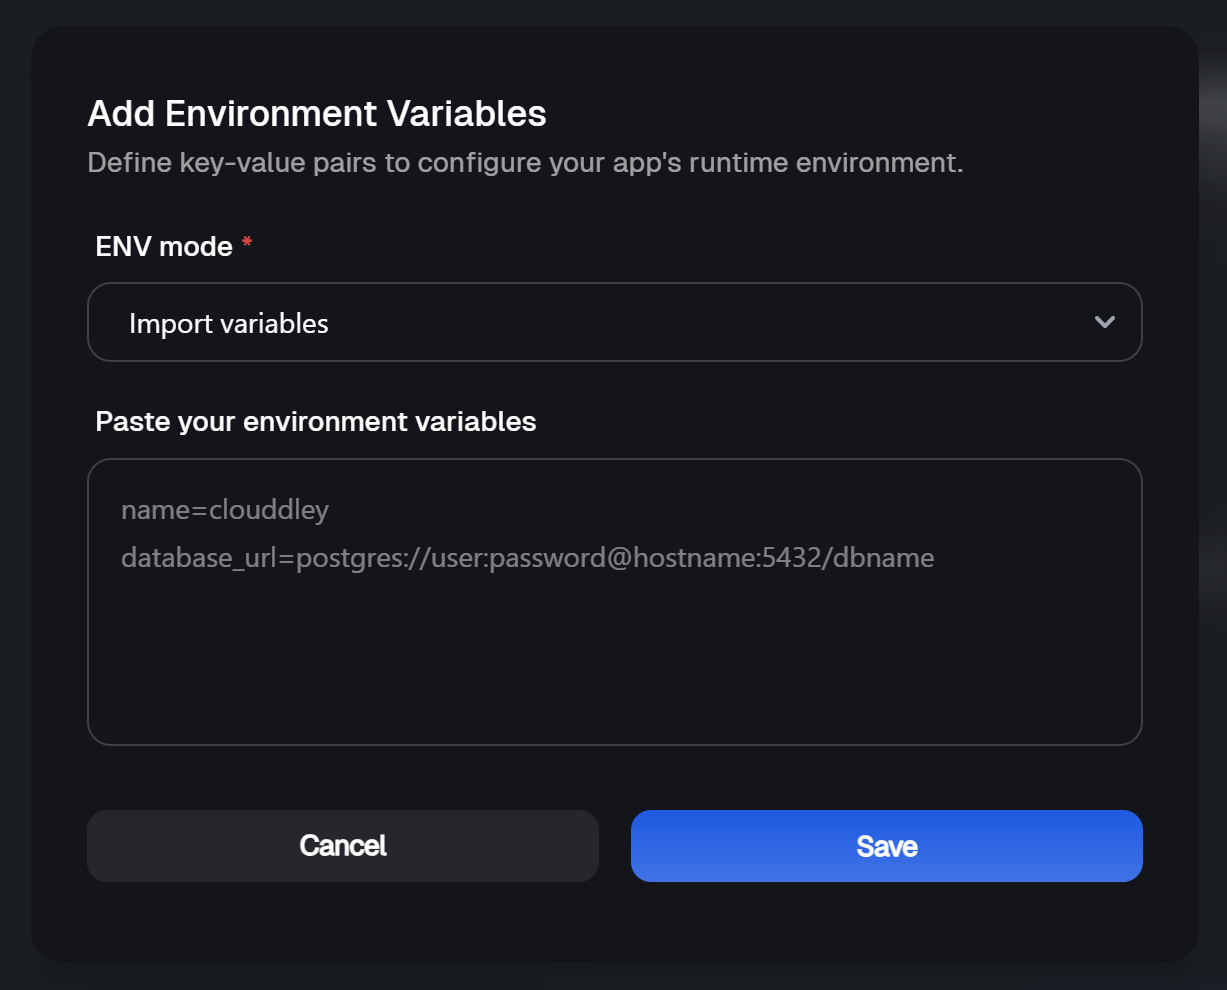
- Add the key-value pairs and click on Save.
- Click on Next to continue.
Step 6: Setup Notifications (optional)
- To configure the notifications settings of the application, click on Add Alert
- Select the Alert type. For this tutorial, we will set up Email Alerts.
- Toggle on the buttons of the deployment event (failed, timed out, or success) you want to be notified of.
- Enter the Email address where you want to receive alerts. (You can add multiple email addresses)
- Click on Save
- Click on Deploy

Step 7: Test and Verify the app
- Click on Go to Dashboard to see your application on the apps dashbaord.
- Once the deployment is complete, the app status changes from
DeployingtoOnline.
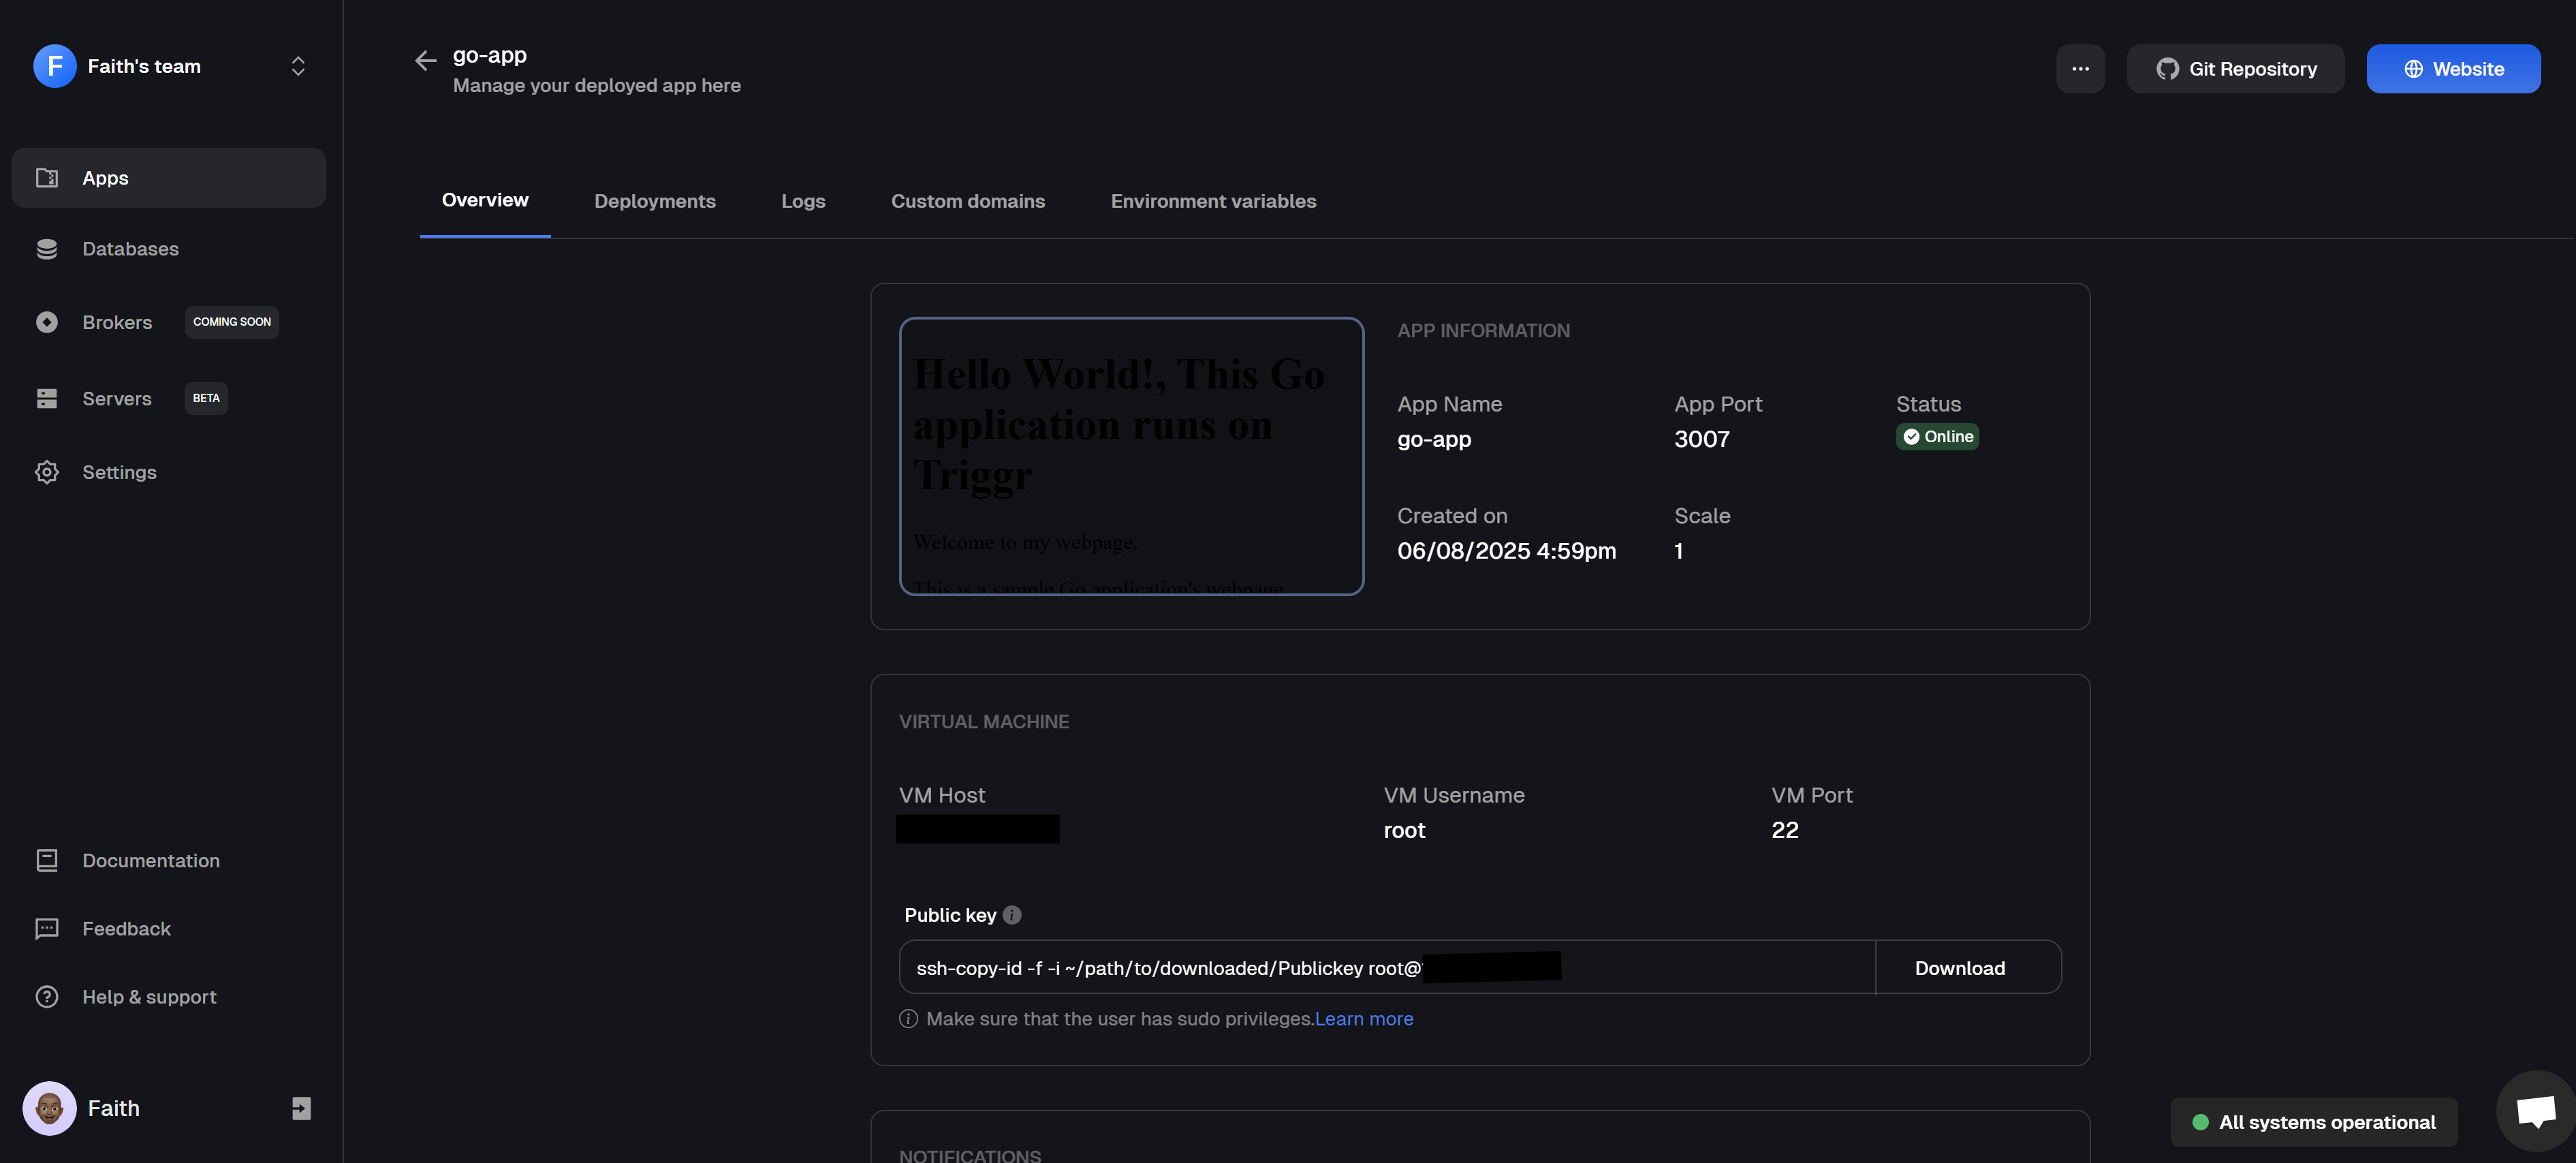
- Click on 🌐 Website at the top right corner of the webpage, this opens the URL of your application in your browser.
- You should see your Golang application running successfully.

Post-deployment: Managing your application
Once your Golang application is up and running on an AWS EC2 instance using Clouddley, management is simple.The apps dashboard lets you handle key tasks without touching the server. You can adjust the settings, scale your app, roll back to earlier versions, pause or resume the app, or remove the app if needed. You’ll also find helpful features to view your deployment history, check logs, manage environment variables, and connect a custom domain, all in one place.
Golang Application Best Practices
Golang Application Best Practices
Follow these best practices to keep your code is clean, reliable, and easy to maintain. Keep it simple
Don’t add layers of complexity you don’t need. Go’s standard library is powerful, use it before reaching for third-party tools. Structure your project well
Use a folder layout that makes sense. Group related filed together, separate internal logic from public code, and avoid clutter. Clear structure saves time when your project grows. Write Go the Go way
Stick to Go’s style conventions. Run gofmt or goimports so your code looks same everywhere. The goal is clarity and consistency. Handle errors properly
In Go, errors don’t hide. Check and return them instead of ignoring them. Use clear messages so you (or your team) can quickly fix issues later. Secure your configuration
Don’t hardcode values like API keys or database passwords. Load them from environment variables or a secure config file. Write tests
Use Go’s testing tools to write unit tests and integration tests. Keep them simple and make sure they explain what they’re checking. Use meaningful logs
Good logging tells the story of your app. Capture the details that matter, but avoid spamming your logs with unnecessary data. Limit external dependencies
Only add libraries when they solve a real problem. Too many dependencies can make your project harder to maintain and less secure. Use concurrency when it fits
Goroutines and channels are great, but they add complexity. Apply them where they truly help, and watch out for race conditions. Lock down your builds
Manage dependencies with Go modules (go mod) so builds are repeatable across different environments.
Conclusion
You’ve successfully deployed a Golang application on an AWS EC2 instance using Clouddley. Clouddley eliminates the usual headaches of deploying on a server, letting you focus on building great applications. If you’ve got feedback or ideas to make Clouddley even better, let us know here. We’re excited to see the cool things you’ll deploy with it!Getting started with Clouddley?
A backend infrastructure for your own compute. Run apps, databases, brokers, and AI workloads on your VMs, bare metal, or VPS.