> ## Documentation Index
> Fetch the complete documentation index at: https://blog.clouddley.com/llms.txt
> Use this file to discover all available pages before exploring further.
# How to Deploy a FastAPI Application on an AWS EC2 Instance using Clouddley
> Learn how to deploy a FastAPI Application on an AWS EC2 instance using Clouddley.
export const date_0 = "Updated on August 29, 2025"
Getting your [**FastAPI**](https://fastapi.tiangolo.com/) app up and running on AWS doesn’t have to feel like a big task. With an EC2 instance as your server and [**Clouddley**](https://clouddley.com) taking care of the heavy lifting, you can go from setup to launch in just a few steps. In this guide, I’ll walk you through the process so you can have your FastAPI app live on an AWS EC2 instance.
## Prerequisites
* A [Clouddley account](https://clouddley.com/)
* An [AWS account](https://aws.amazon.com/)
* [AWS CLI](https://docs.aws.amazon.com/cli/latest/userguide/getting-started-install.html) installed and configured on your local machine
* [AWS Access Keys](https://docs.aws.amazon.com/keyspaces/latest/devguide/create.keypair.html) with permissions to create and manage EC2 instances
* [FastAPI](https://fastapi.tiangolo.com/) installed on your local machine
* [Git installed](https://git-scm.com/book/en/v2/Getting-Started-Installing-Git) locally
* Basic familiarity with the Linux command line
## Create a FastAPI Application
If you don't have a FastAPI app yet, you can create a simple one by following these steps:
Create and activate a virtual environment:
```bash theme={null}
python3 -m venv venv
source venv/bin/activate # On Windows use `venv\Scripts\activate`
```
Install FastAPI and Uvicorn using pip:
```bash theme={null}
pip install fastapi uvicorn
```
Create a file named `main.py` and add the following code:
```python theme={null}
from fastapi import FastAPI
import uvicorn
app = FastAPI()
@app.get("/")
def read_root():
return {"Hello": "World"}
if __name__ == "__main__":
uvicorn.run(app, host="0.0.0.0", port=3033)
```
You can run your FastAPI app locally to test it:
```bash theme={null}
python main.py
```
Open your browser and navigate to `http://localhost:3033` to see `{"Hello": "World"}`.
To deploy your FastAPI app using Clouddley, you need a Procfile. Create a file named `Procfile` in the root of your project directory and add the following line:
```Procfile theme={null}
web: python main.py
```
## Push Your Code to GitHub
You need to push your FastAPI app code to a Git repository.
Go to [GitHub](https://github.com/) and create a new repository. Give it a name and leave the rest of the settings as default (no README, no .gitignore, you already have those locally).
If you haven’t already, initialize a Git repository in your project folder:
```bash theme={null}
git init
```
Add your files and commit:
```bash theme={null}
git add .
git commit -m "Initial commit"
```
Create a branch and link your local repository to the GitHub repository you created:
```bash theme={null}
git branch -M main
git remote add origin
```
Finally, push your code to GitHub:
```bash theme={null}
git push -u origin main
```
Your FastAPI app code is now on GitHub, let's create an EC2 instance.
## Create an AWS EC2 Instance
Now, let's create an EC2 instance on AWS using AWS CLI. Make sure you have AWS CLI configured with your credentials.
First, create a VPC and security group if you don’t have one already.
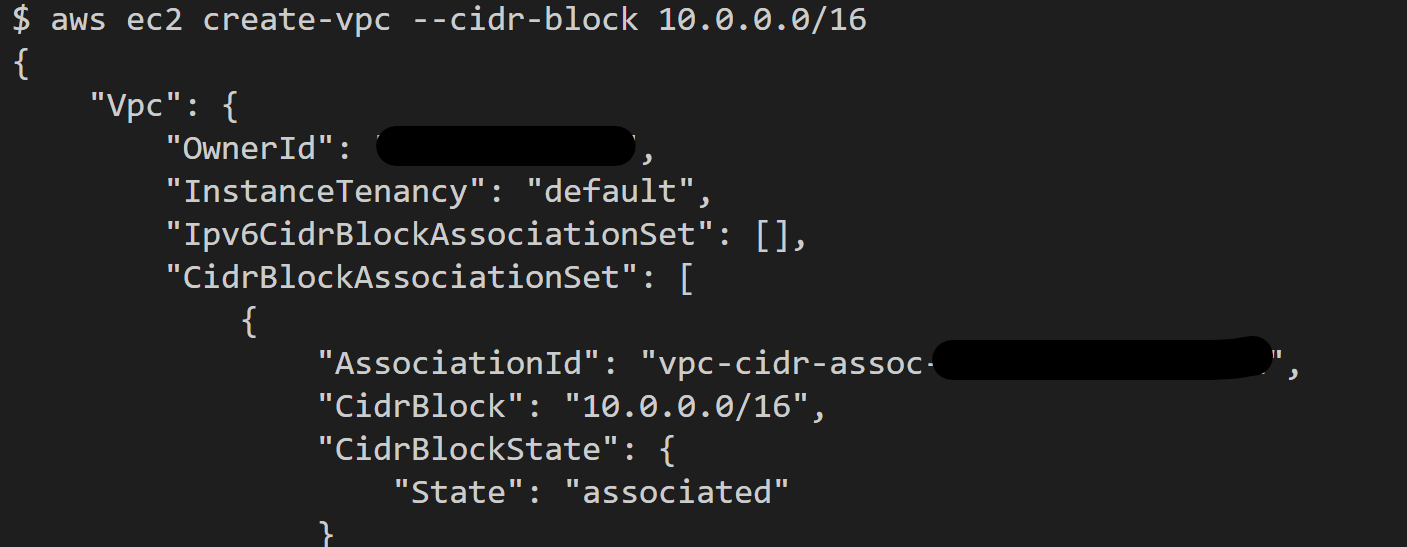
* Create a VPC by running the command:
```bash theme={null}
aws ec2 create-vpc --cidr-block 10.0.0.0/16
```
You should see an output like below:
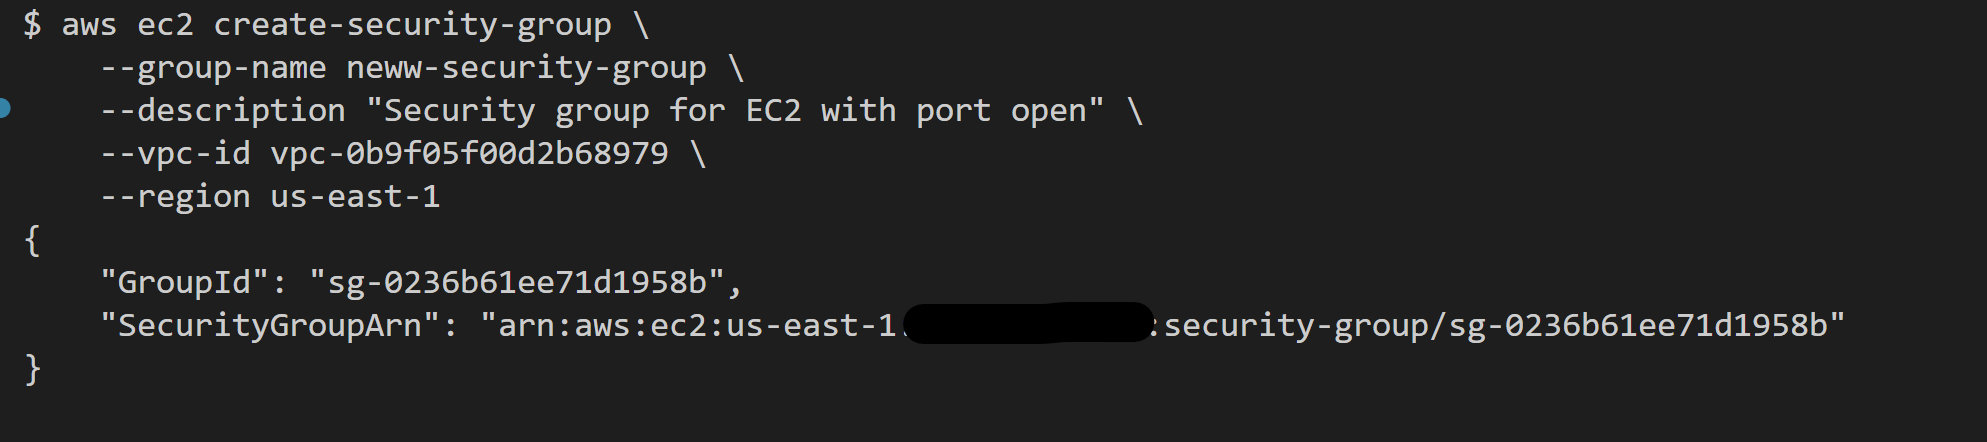
* Create a security group by running the command:
```bash theme={null}
aws ec2 create-security-group \
--group-name new-security-group \
--description "Security group for EC2 with port 8080 open" \
--vpc-id \
--region us-east-1
```
Replace the `vpc_id` with the one created in the previous step.
You should see an output like this:
* Allow inbound traffic on port 22 (SSH) and port 3033 (your application port):
```bash theme={null}
aws ec2 authorize-security-group-ingress \
--group-id \
--protocol tcp \
--port 22 \
--cidr 0.0.0.0/0
```
```bash theme={null}
aws ec2 authorize-security-group-ingress \
--group-id \
--protocol tcp \
--port 3033 \
--cidr 0.0.0.0/0
```
Replace the `sg_id` with the one created in the previous step.
* To create an EC2 instance, you need to have an SSH key pair. If you don’t have one, you can generate and import one below.
If you don’t have an SSH key pair on your local machine, follow the steps below.
* **Step 1:** To generate an SSH key, run the command:
```bash theme={null}
ssh-keygen -t rsa -b 4096 -C "your_email@example.com"
```
Press **Enter** to accept the default file location and choose a passphrase if you want one.
* **Step 2:** To add your SSH key to AWS, run:
```bash theme={null}
aws ec2 import-key-pair \
--key-name my-key \
--public-key-material file://~/.ssh/id_rsa.pub
```
Replace the path to your public key if it's different.
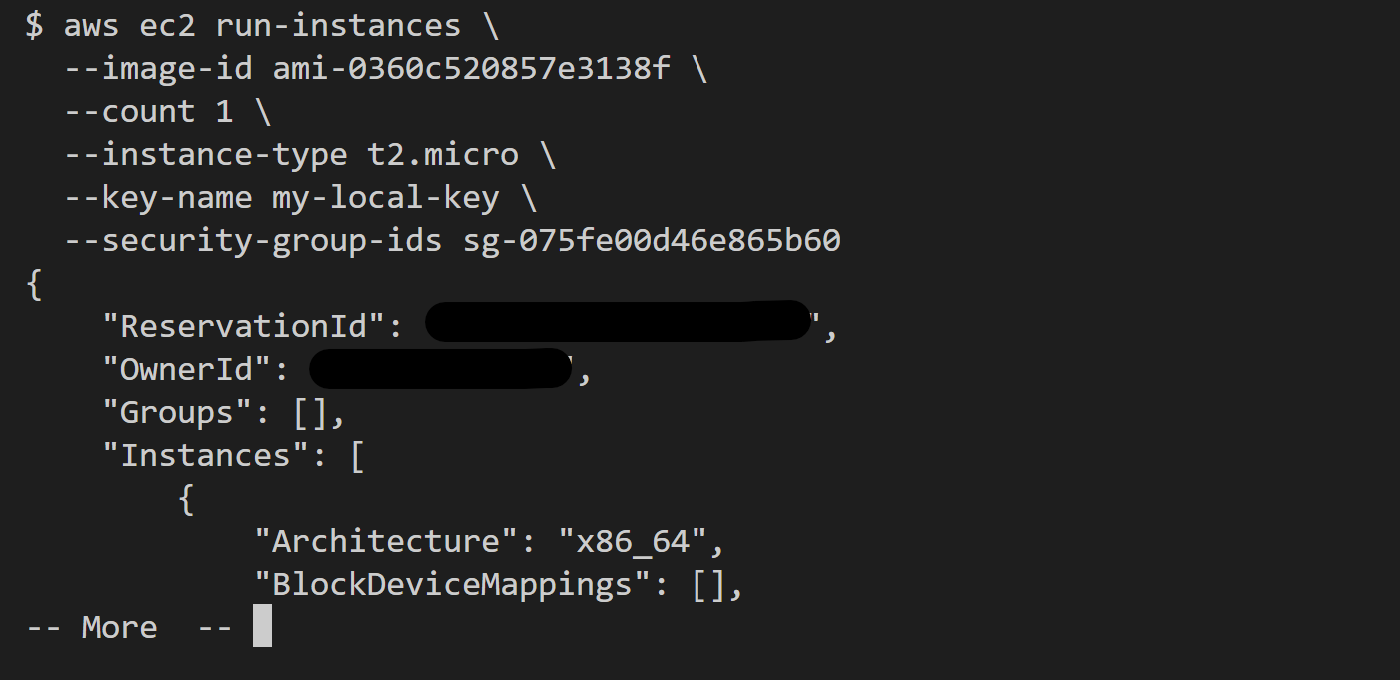
* Finally, create the EC2 instance:
```bash theme={null}
aws ec2 run-instances \
--image-id ami-xxxxxxxx \
--count 1 \
--instance-type t2.micro \
--key-name my-key \
--security-group-ids
```
* Replace *ami-xxxxxxxx* with regions's compatible AMI
* Replace *my-key* with your key pair name
* Replace *sg\_id* with your security group id
You should see the output below:
Once the instance is running, note the **Public IP address** of the instance. You'll need it later.
## Deploy
Now you have your FastAPI app on GitHub and an EC2 instance running on AWS. The next step is to deploy it.
* Log in to your [Clouddley account](https://app.clouddley.com/auth/signin)
* Click on **Apps** at the left sidebar
* Click on **Deploy App**
**Step 1: Configure Service**
* Choose your Git hosting service which can be **Github** or **Bitbucket**. We will use Github in this tutorial.
* Click on **Continue with Github** and authorize Clouddley to access your Github account.
**Step 2: Configure Git**
* To connect your Github user or organization account, click on the **Select username/organization** dropdown and **Add Github account**.
* Select your **repository** and the **branch** from the dropdown list or quickly search.
* Click on **Next**.
**Step 3: Configure your Virtual Machine**
* From the **Choose or add server** dropdown, select your VM if it appears in the list. If not, click **+ Add Virtual Machine**.
* To add your VM, enter your instance's **IP address** as **VM host**, **VM user**, and the **VM port** for SSH access.
* Once you've entered the details, verify the connection using the **Clouddley CLI(recommended)** or **SSH**.
- Open your local machine’s command line, then connect to the remote VM you want to configure with Clouddley. Use this command to SSH into your EC2 instance:
```bash theme={null}
ssh root@
```
* Install Clouddley CLI by running the command:
```bash theme={null}
curl -L https://raw.githubusercontent.com/clouddley/cli/main/install.sh | sh
```
* To add the SSH public key, run the command:
```bash theme={null}
clouddley add key
```
Using the CLI, you can deploy resources, manage configurations, and automate tasks efficiently.
* Click on **Verify**. This verifies the connection to your VM.
* Once verified, click on **Next** to proceed.
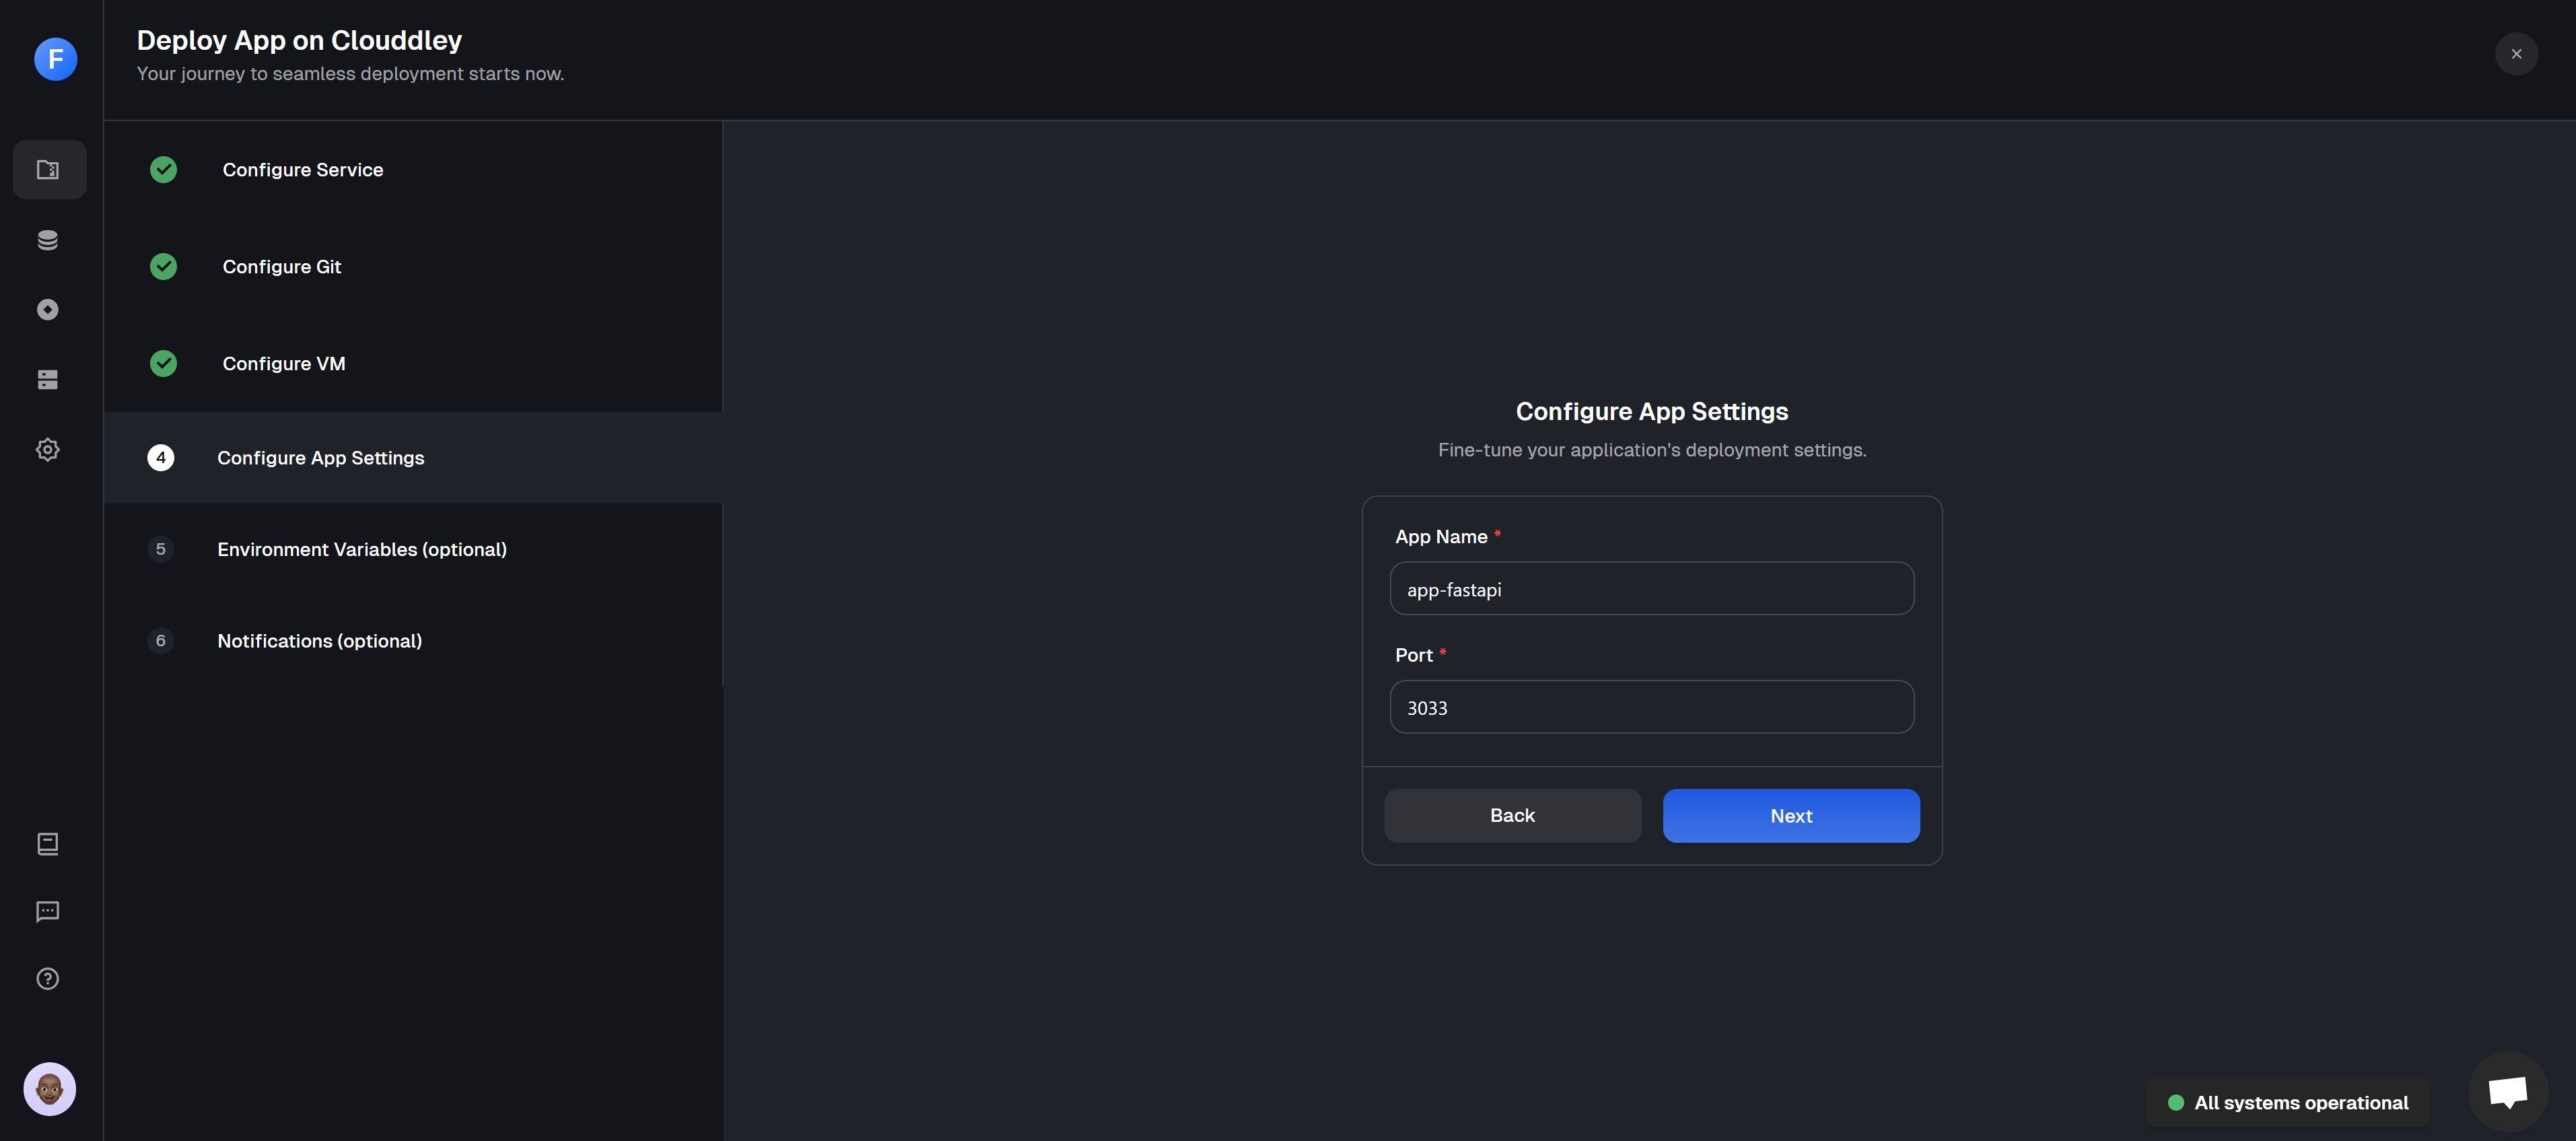
**Step 4: Configure app settings**
* Enter the **name** of your application and its **port** **number**.
* Click on **Next** to continue.
The firewall of the virtual machine should allow access to the application port.
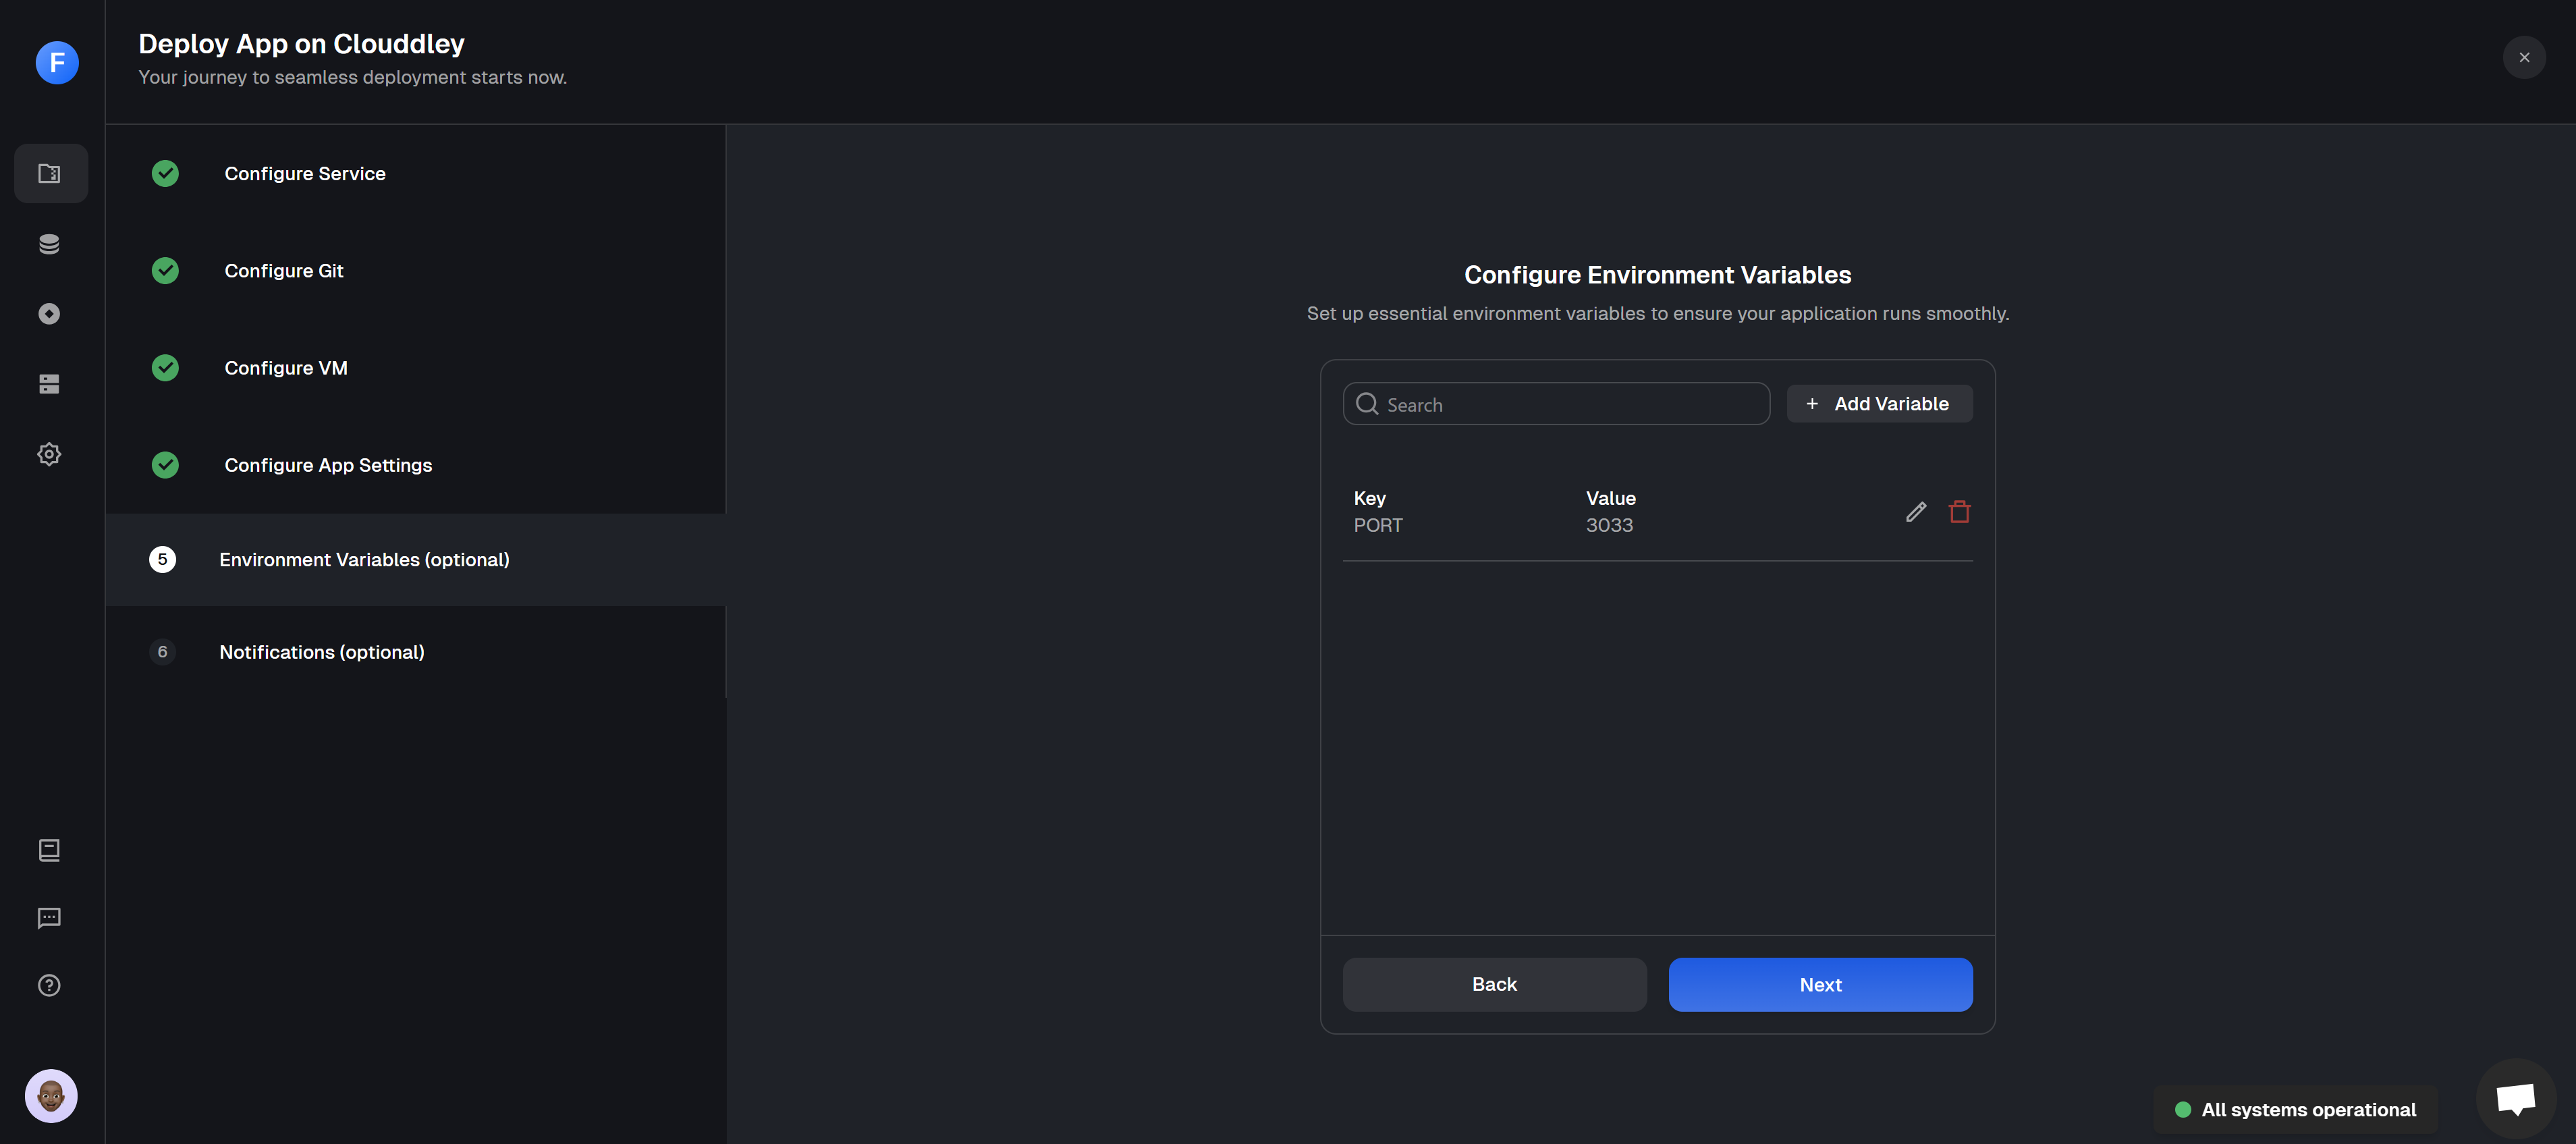
**Step 5: Configure Environment Variables**
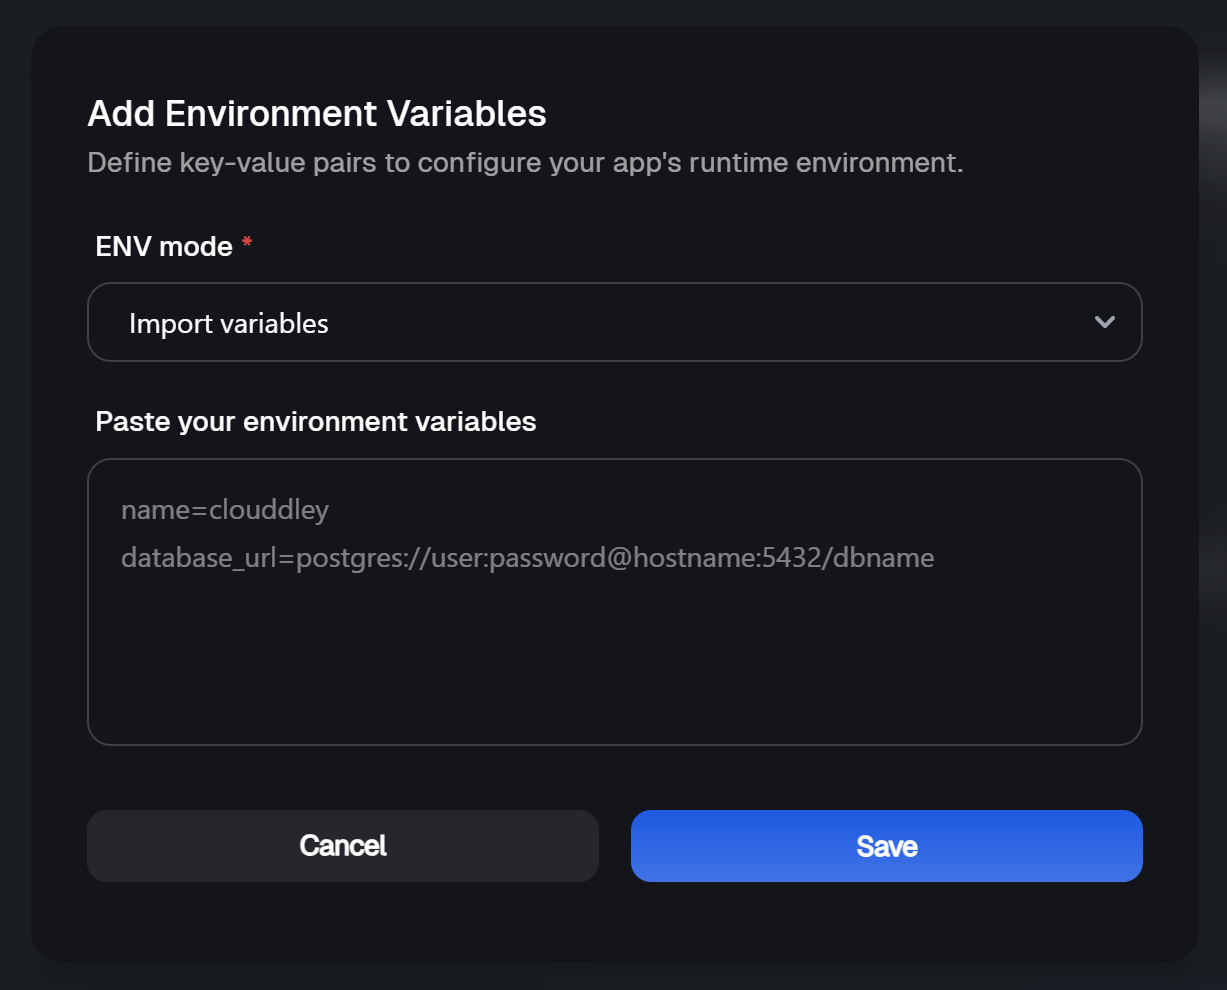
* Click on Add Variable
* Choose an ENV mode: either a **single variable** or **import variables** mode. Learn more [here](https://docs.clouddley.com/apps/extras/environment-variables).
* Add the key-value pairs and click on **Save**.
* Click on **Next** to continue.
**Step 6: Setup Notifications (optional)**
* To configure the notifications settings of the application, click on **Add Alert**
* Select the **Alert type**. For this tutorial, we will set up Email Alerts.
* Toggle on the buttons of the deployment event (failed, timed out, or success) you want to be notified of.
* Enter the **Email address** where you want to receive alerts. (You can add multiple email addresses)
* Click on **Save**
* Click on **Deploy**
**Step 7: Test and Verify the app**
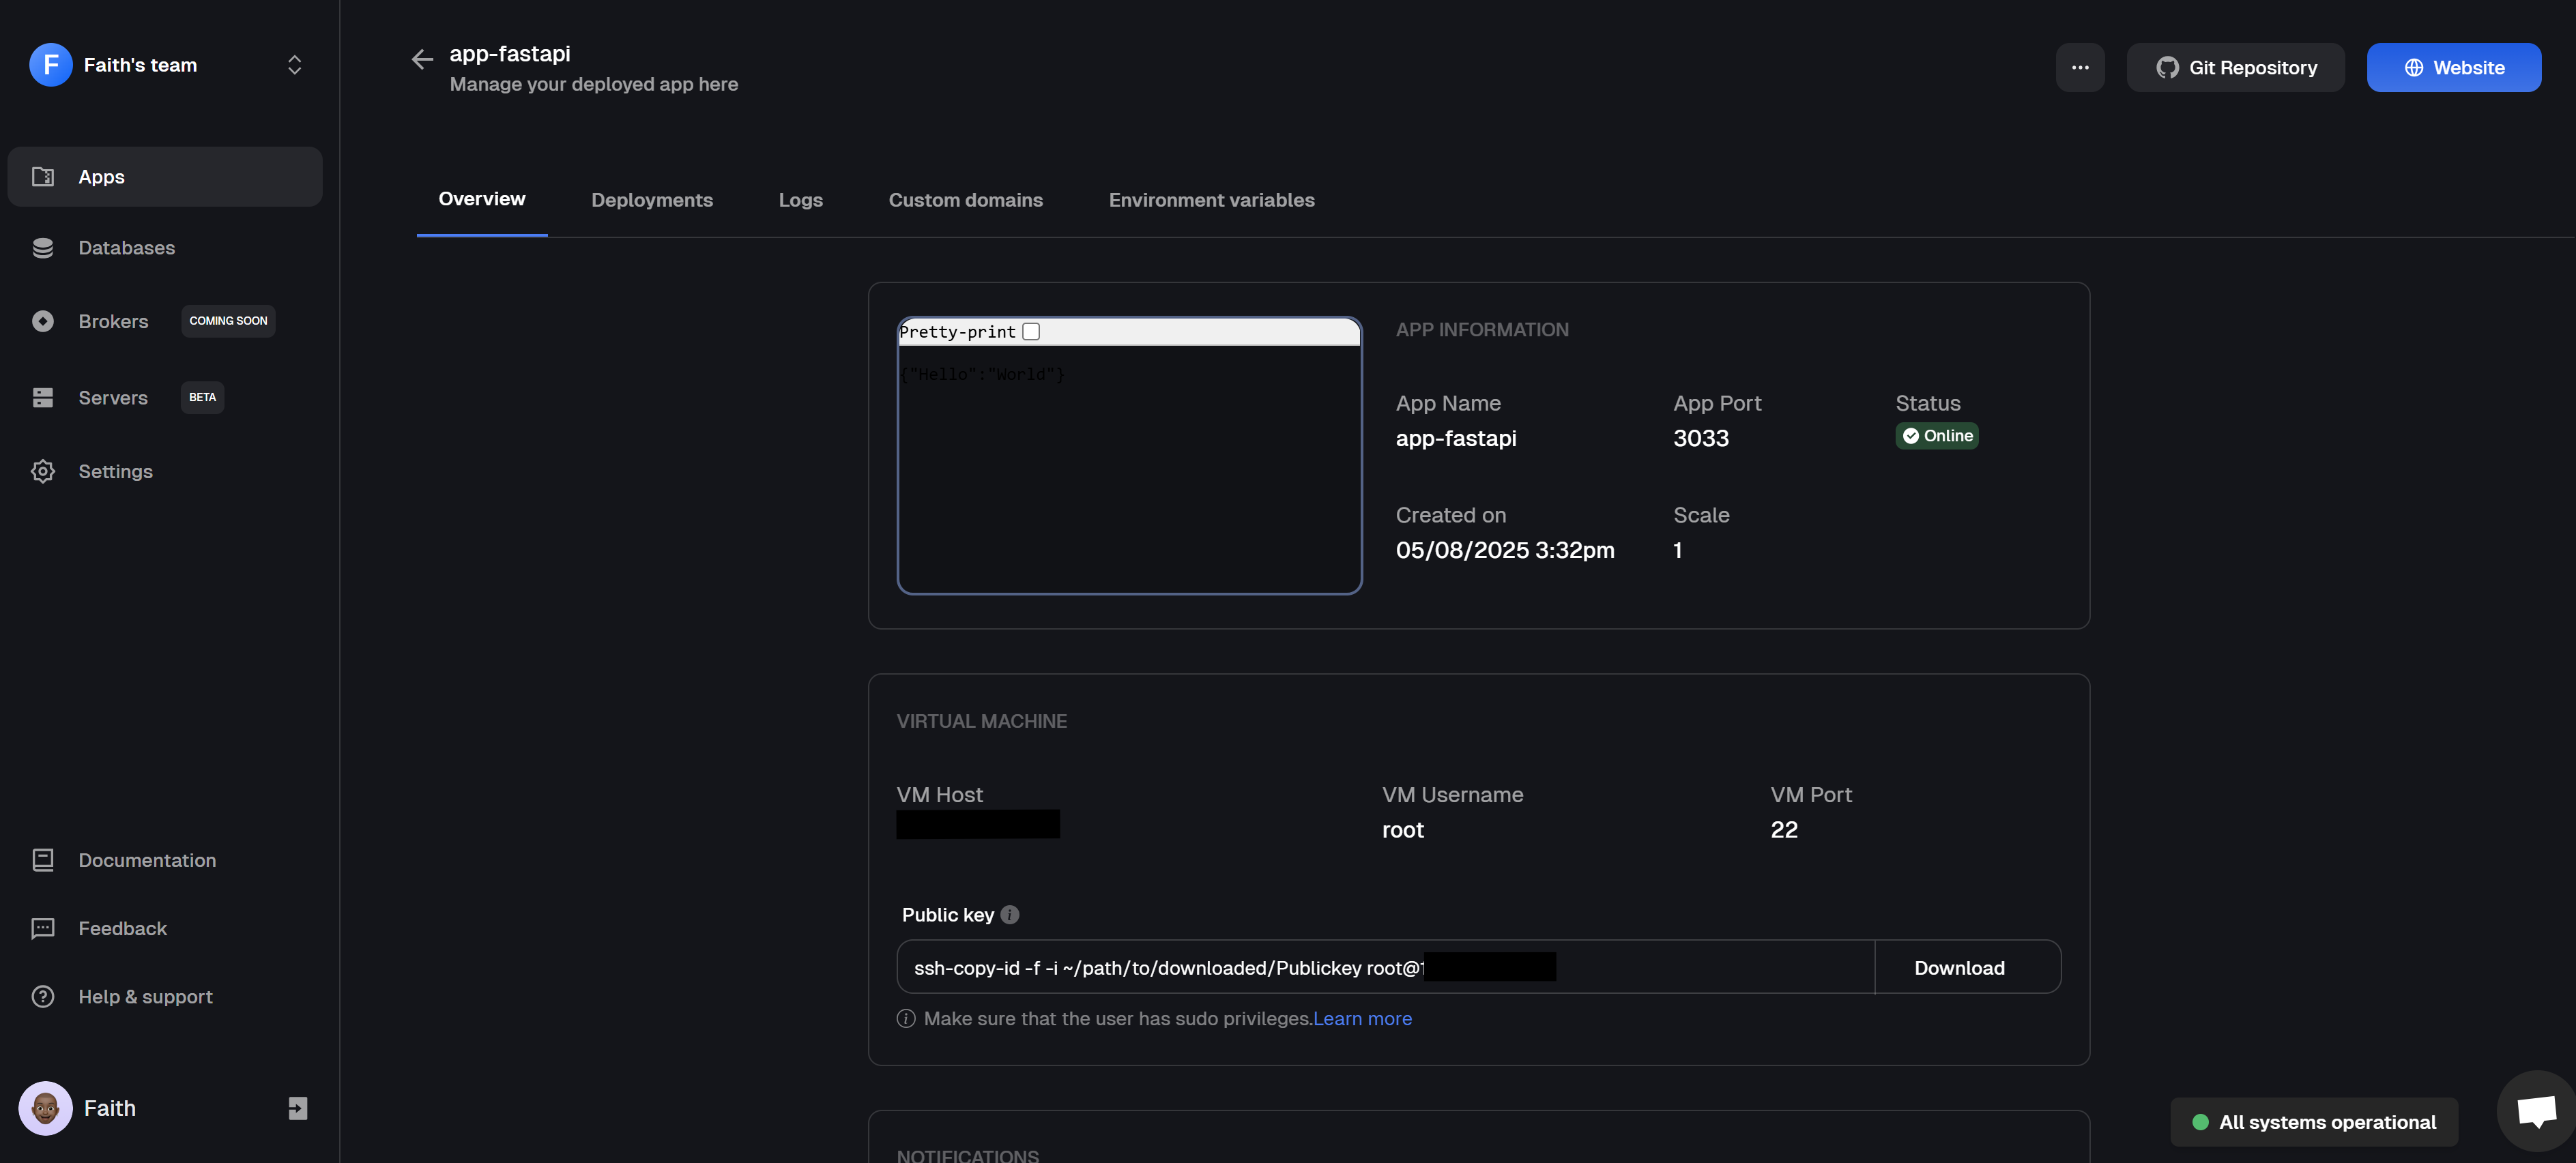
* Click on **Go to Dashboard** to see your application on the apps dashbaord.
* Once the deployment is complete, the app status changes from `Deploying` to `Online`.
* Click on 🌐 **Website** at the top right corner of the webpage, this opens the URL of your application in your browser.
* You should see your Golang application running successfully.
## Post Deployment: Managing Your Application
After your FastAPI app is live on an AWS EC2 instance using Clouddley, managing it becomes straightforward. From the apps dashboard, you can take care of everything without logging into the server. You can update settings, [scale](https://docs.clouddley.com/apps/extras/scale-applications-on-clouddley), [roll back](https://docs.clouddley.com/apps/extras/how-to-rollback-an-application) to previous versions, [pause or resume](https://docs.clouddley.com/apps/extras/how-to-pause-and-resume-applications) the app, or even delete it. The dashboard also gives you tools to view deployment history, check logs, manage [environment variables](https://docs.clouddley.com/apps/extras/environment-variables), and connect a [custom domain](https://docs.clouddley.com/apps/extras/custom-domain) all in one place.
Follow these best practices to ensure your code is clean, secure and optimized.
**Structure your project**\
Instead of cramming everything into one `main.py`, split things out. Have separate files or folders for routes, models, services, and utilities. It makes your code easier to read and scale.
**Hide your secrets**\
API keys, database passwords, or tokens don’t belong in your code. Use environment variables or a config manager so you can swap them out without touching your codebase.
**Use Pydantic to your advantage**\
One of FastAPI’s biggest strengths is data validation. Define request and response models with Pydantic, and let it catch bad inputs before they cause trouble.
**Make errors human-friendly**\
Nobody likes a messy traceback. Add custom exception handlers so your API responds with clear, helpful messages when something goes wrong.
**Go async when it matters**\
FastAPI is built for async, but it only helps if you use it. Choose async-ready libraries for database calls, HTTP requests, or anything that waits on I/O. Otherwise, you’re just slowing yourself down.
**Lock down your endpoints**\
Even small projects deserve security. Use authentication (JWT, OAuth2, or at least API tokens) and authorization checks so only the right people can access sensitive routes.
**Write tests**\
Start small with endpoint tests and expand from there. Tools like Pytest work beautifully with FastAPI, and having tests in place keeps you from shipping bugs.
**Document as you go**\
FastAPI generates docs for you, but don’t stop there. Add descriptions, examples, and notes in your route definitions so your API feels polished and easy to use.
## Conclusion
And that’s it, you’ve got your FastAPI application deployed on an AWS EC2 instance using Clouddley, making the process smoother. No complicated setup. Just a simple, reliable way to bring your app online and keep it running. Now you can focus less on deployment and more on building the features your users actually care about.
If you’ve got feedback or ideas to make Clouddley even better, let us know [here](https://clouddley.productlane.com/roadmap). We’re excited to see the cool things you’ll deploy with it!
A backend infrastructure for your own compute. Run apps, databases, brokers, and AI workloads on your VMs, bare metal, or VPS.
## Resources
* [Clouddley Documentation](https://docs.clouddley.com/)
* [Run Dockerfile on Clouddley](https://docs.clouddley.com/apps/extras/deploy-an-application-with-a-dockerfile-on-clouddley)
* [AWS EC2 Documentation](https://aws.amazon.com/ec2/)
* [FastAPI Documentation](https://fastapi.tiangolo.com/)
* [GitHub Docs](https://docs.github.com/en)