Prerequisites
Before you start, make sure you have:- A Clouddley account
- A Scaleway account
- .NET Core installed
- A GitHub or Bitbucket account.
- An API key on Scaleway to manage your instances.
- Git installed locally
- Basic familiarity with command line interface
Create a .NET Core App
In this section, you’ll create a simple .NET Core console application that prints a message to the console. If you already have an app, you can skip this step.Create a .NET Core app
Open your terminal and run the following commands to create a new .NET Core application:This command creates a new console application named
MyApp and navigates into the project directory.Add a simple message
Open the
Program.cs file in your favorite text editor and replace its content with the following code:Containerize Your .NET Core App
Create a Dockerfile
To deploy your .NET Core app on Scaleway using Clouddley, you need to containerize it. This involves creating aDockerfile named triggr.dockerfile that defines how your app will run in a container.
Here, you can see a simple triggr.dockerfile for a .NET Core app:
Building and Running the Container Locally
To test your container locally, follow these steps:- Build the Docker Image:
This command builds a Docker image named
dotnet-appusing thetriggr.dockerfile - Run the Docker Container:
This command runs the container, mapping port 5013 of the container to port 5013 on your local machine. You can now access your Rails app at
http://localhost:5013.
Push Your App to GitHub or Bitbucket
Next, you’ll push your .NET Core app to a GitHub or Bitbucket repository. For this example, we’ll use GitHub, but you can follow similar steps for Bitbucket.Create a New Repository on GitHub
Go to GitHub and create a new repository. Give it a name and leave the rest of the settings as default (no README, no .gitignore, you already have those locally).
Create branch and add Remote Repository
Create a branch and link your local repository to the GitHub repository you created:
Create a Scaleway instance using Scaleway CLI
- First, install the Scaleway CLI if you haven’t already.
- Once installed, authenticate by running the command:
API Keys. Enter them when prompted.
- To make sure your CLI is set up correctly, run:
- Configuring security groups is essential for controlling access to your instance. Create a security group that allows HTTP and HTTPS traffic:

- Next, add rules to allow traffic on port
5013(the port your .NET Core app will run on) and22by running the following commands:
Replace
<your-sg-id> with the ID of the security group you just created. You can find your security group ID by running the command $ scw instance security-group list and this will list all security groups.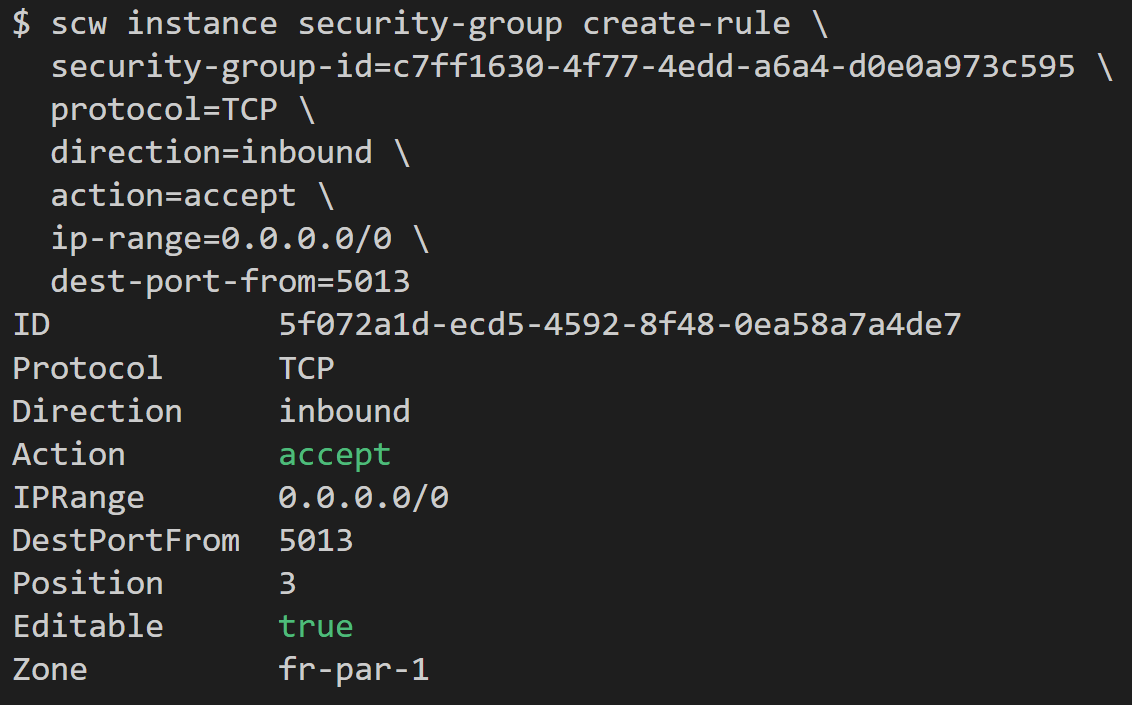
- Now, create a Scaleway Instance:
Replace
<your-sg-id> with the ID of the security group you created earlier.app-server with the specified type and image in the fr-par-1 zone. It assigns a new public IP address to the instance and applies the security group you created.
You should see output similar to this:

Deploy
Now that your app is on GitHub or Bitbucket and your Scaleway instance is ready, it’s time to deploy it.- Open your browser, log in to your Clouddley account
- Click on the Apps in the left sidebar.
- Click on Deploy App to begin.

Step 1: Configure your service
- Select your Git provider (GitHub or Bitbucket) and authorize Clouddley to access your repository. For this guide we will use Github.
- Click on Continue with Github

Step 2: Configure Git
- To connect your Github user or organization account, click the Select username/organization dropdown and Add Github account.
- Once connected, select the repository you created earlier and branch.
- Click on Next to proceed.

Step 3: Connect Your Scaleway Instance
- From the Choose or add server dropdown, select your VM if it appears in the list. If not, click + Add Virtual Machine.
- To add your VM, enter your Scaleway Instance’s IP address as VM host, VM user, and the VM port for SSH access.
- Once you’ve entered the details, verify the connection using the Clouddley CLI(recommended) or SSH.
How to Install Clouddley CLI to Verify your Scaleway Instance
How to Install Clouddley CLI to Verify your Scaleway Instance
- Open your local machine’s command line, then connect to the remote VM you want to configure with Clouddley. Use this command to SSH into your Scaleway instance:
- Install Clouddley CLI by running the command:
- To add the SSH public key, run the command:
- Click Verify to test the connection to your VM.
- Once it’s verified, click on Next.

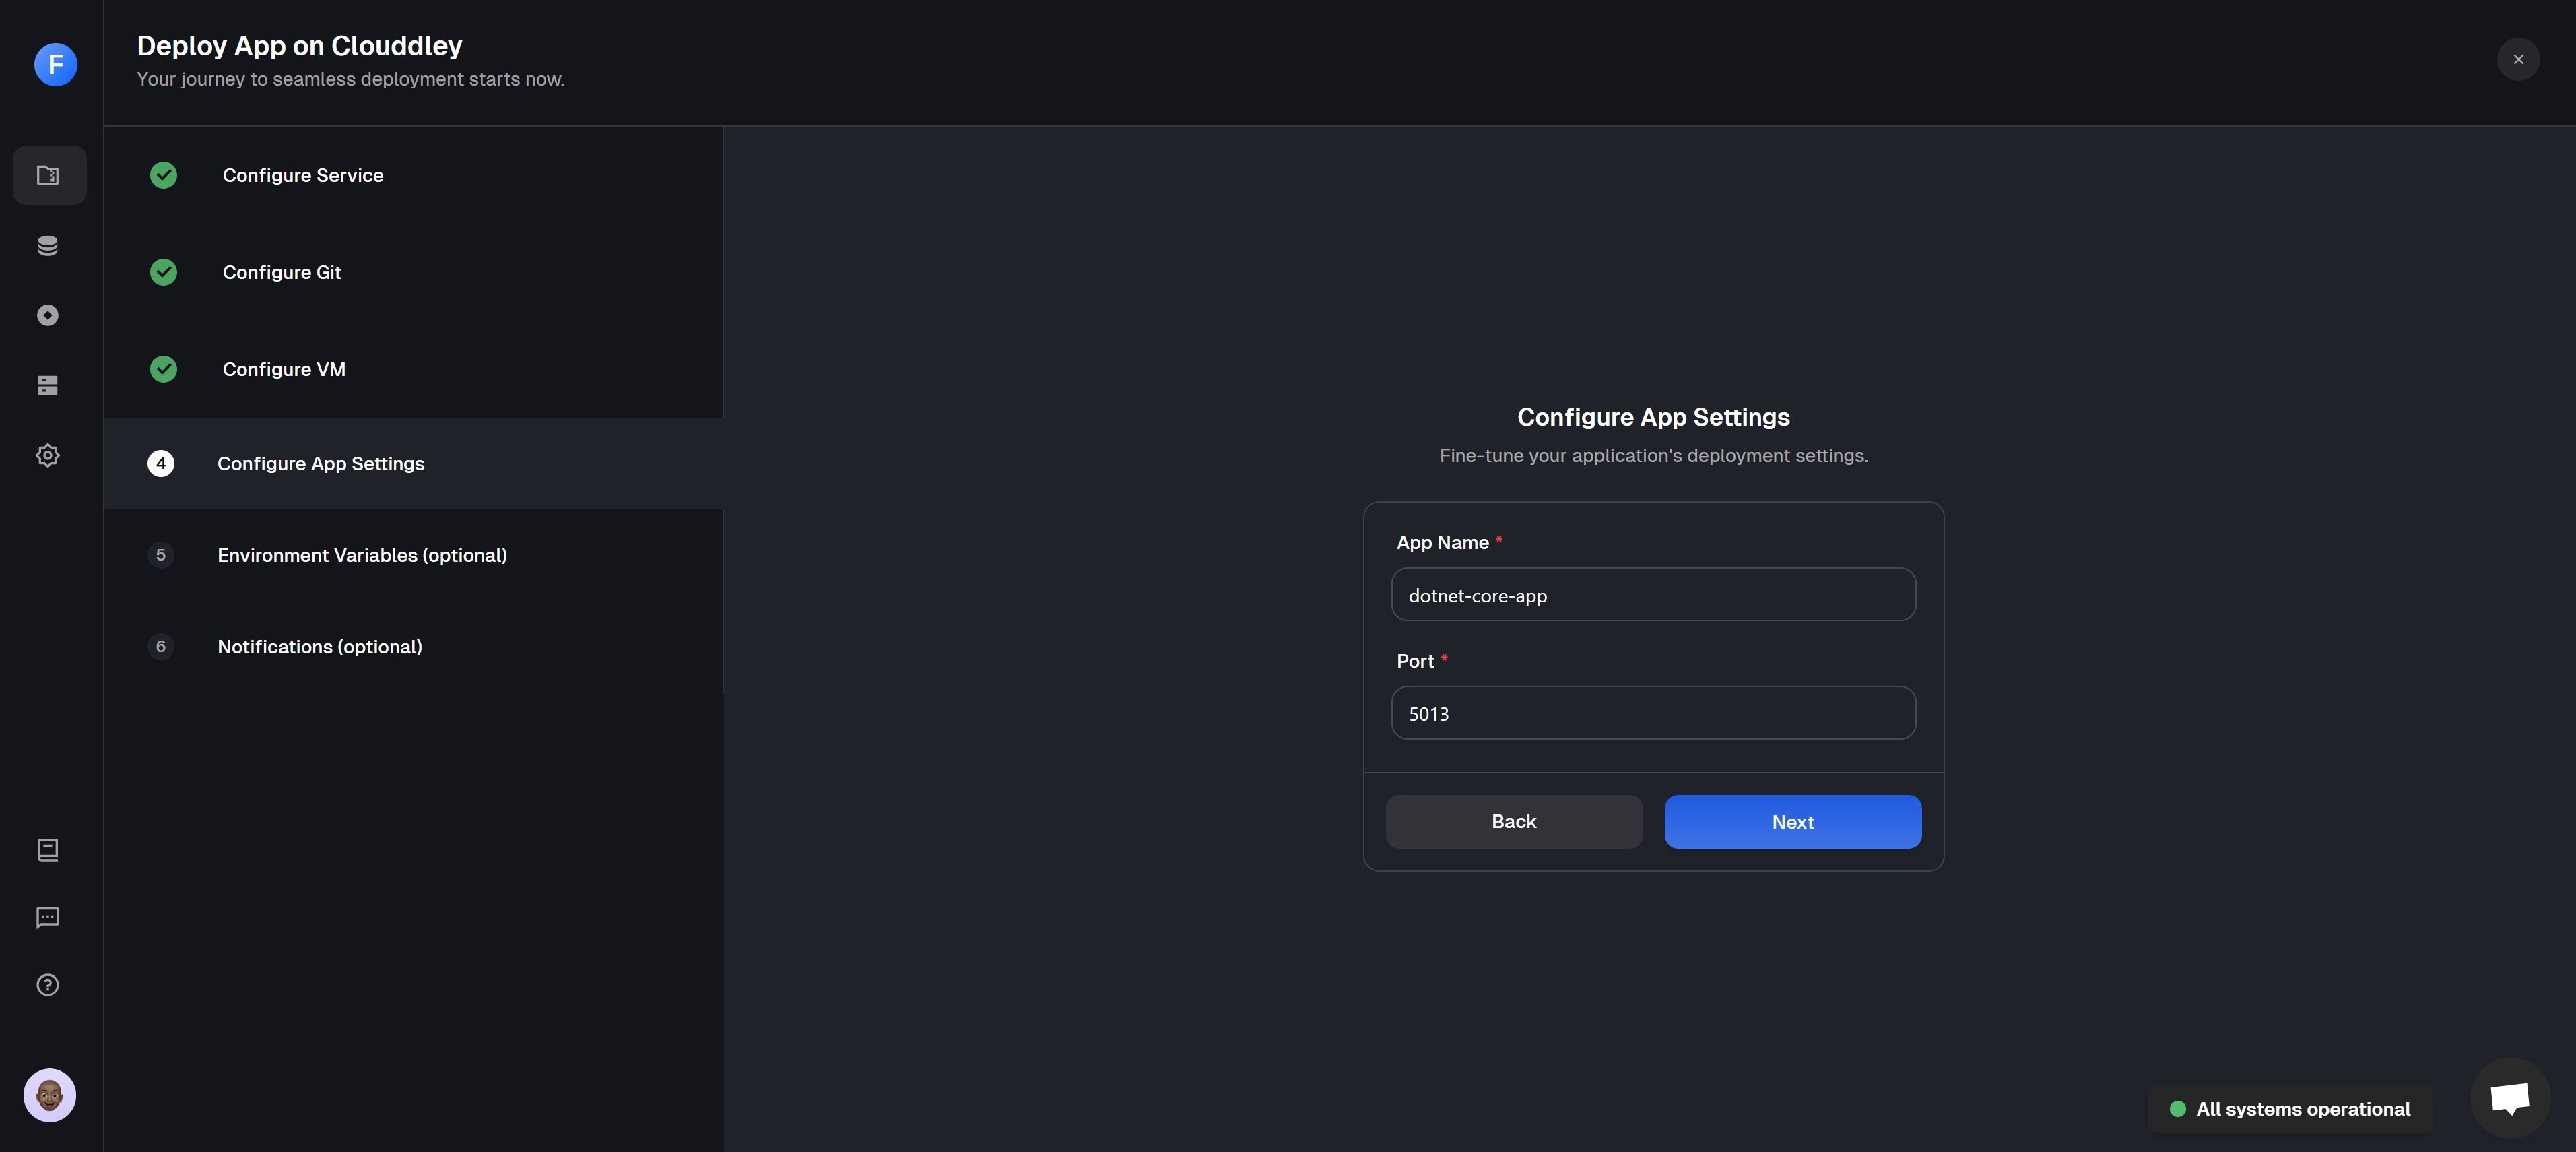
Step 4: Configure app settings
- Enter the name of your app and the port your app will run on.
- Click on Next
- Click on Add Variable
- Select an ENV mode: either single variable or import variables. Learn more about Environment Variables.
- Single Variable
- Import Variables

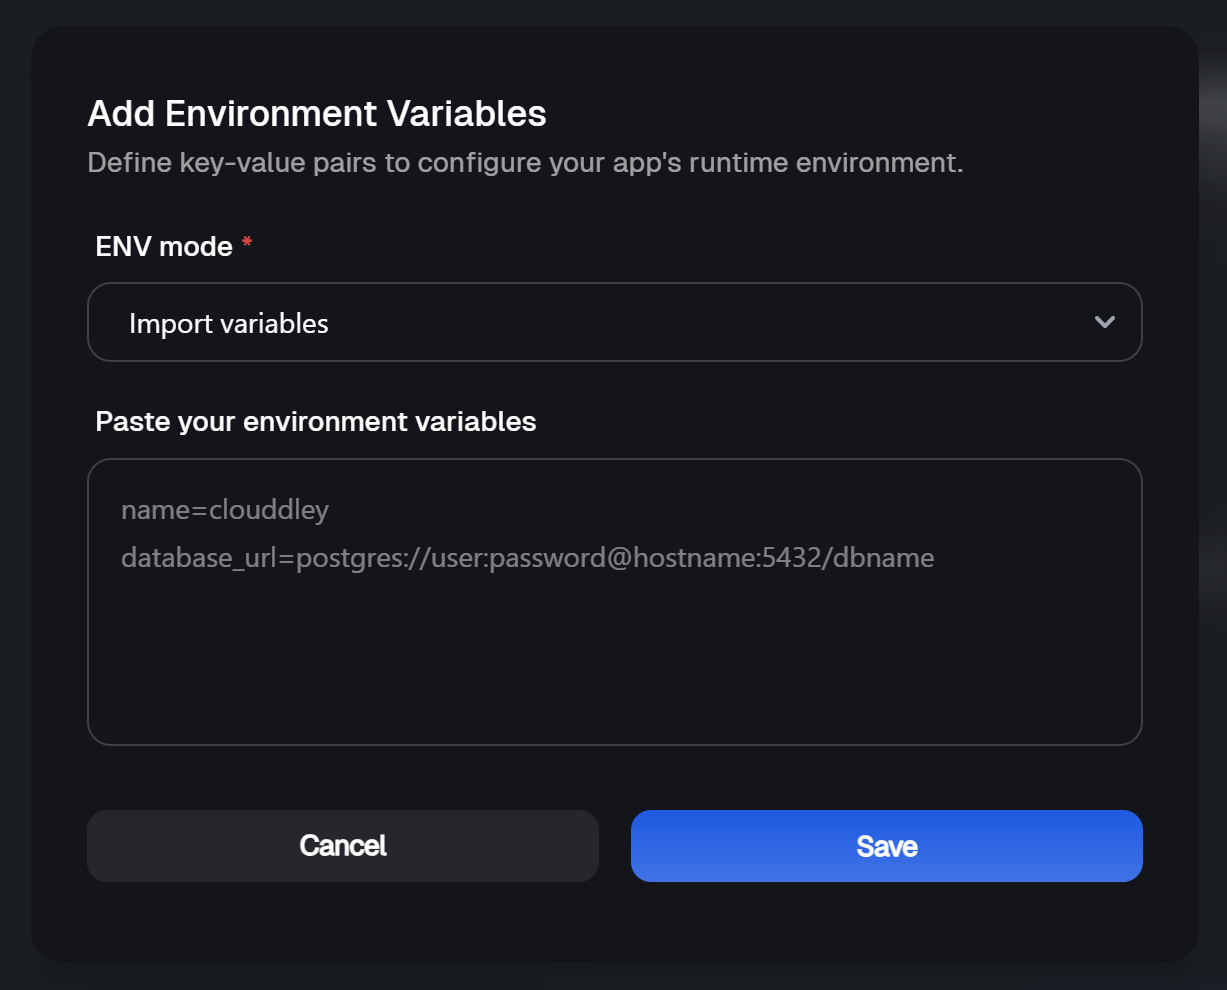
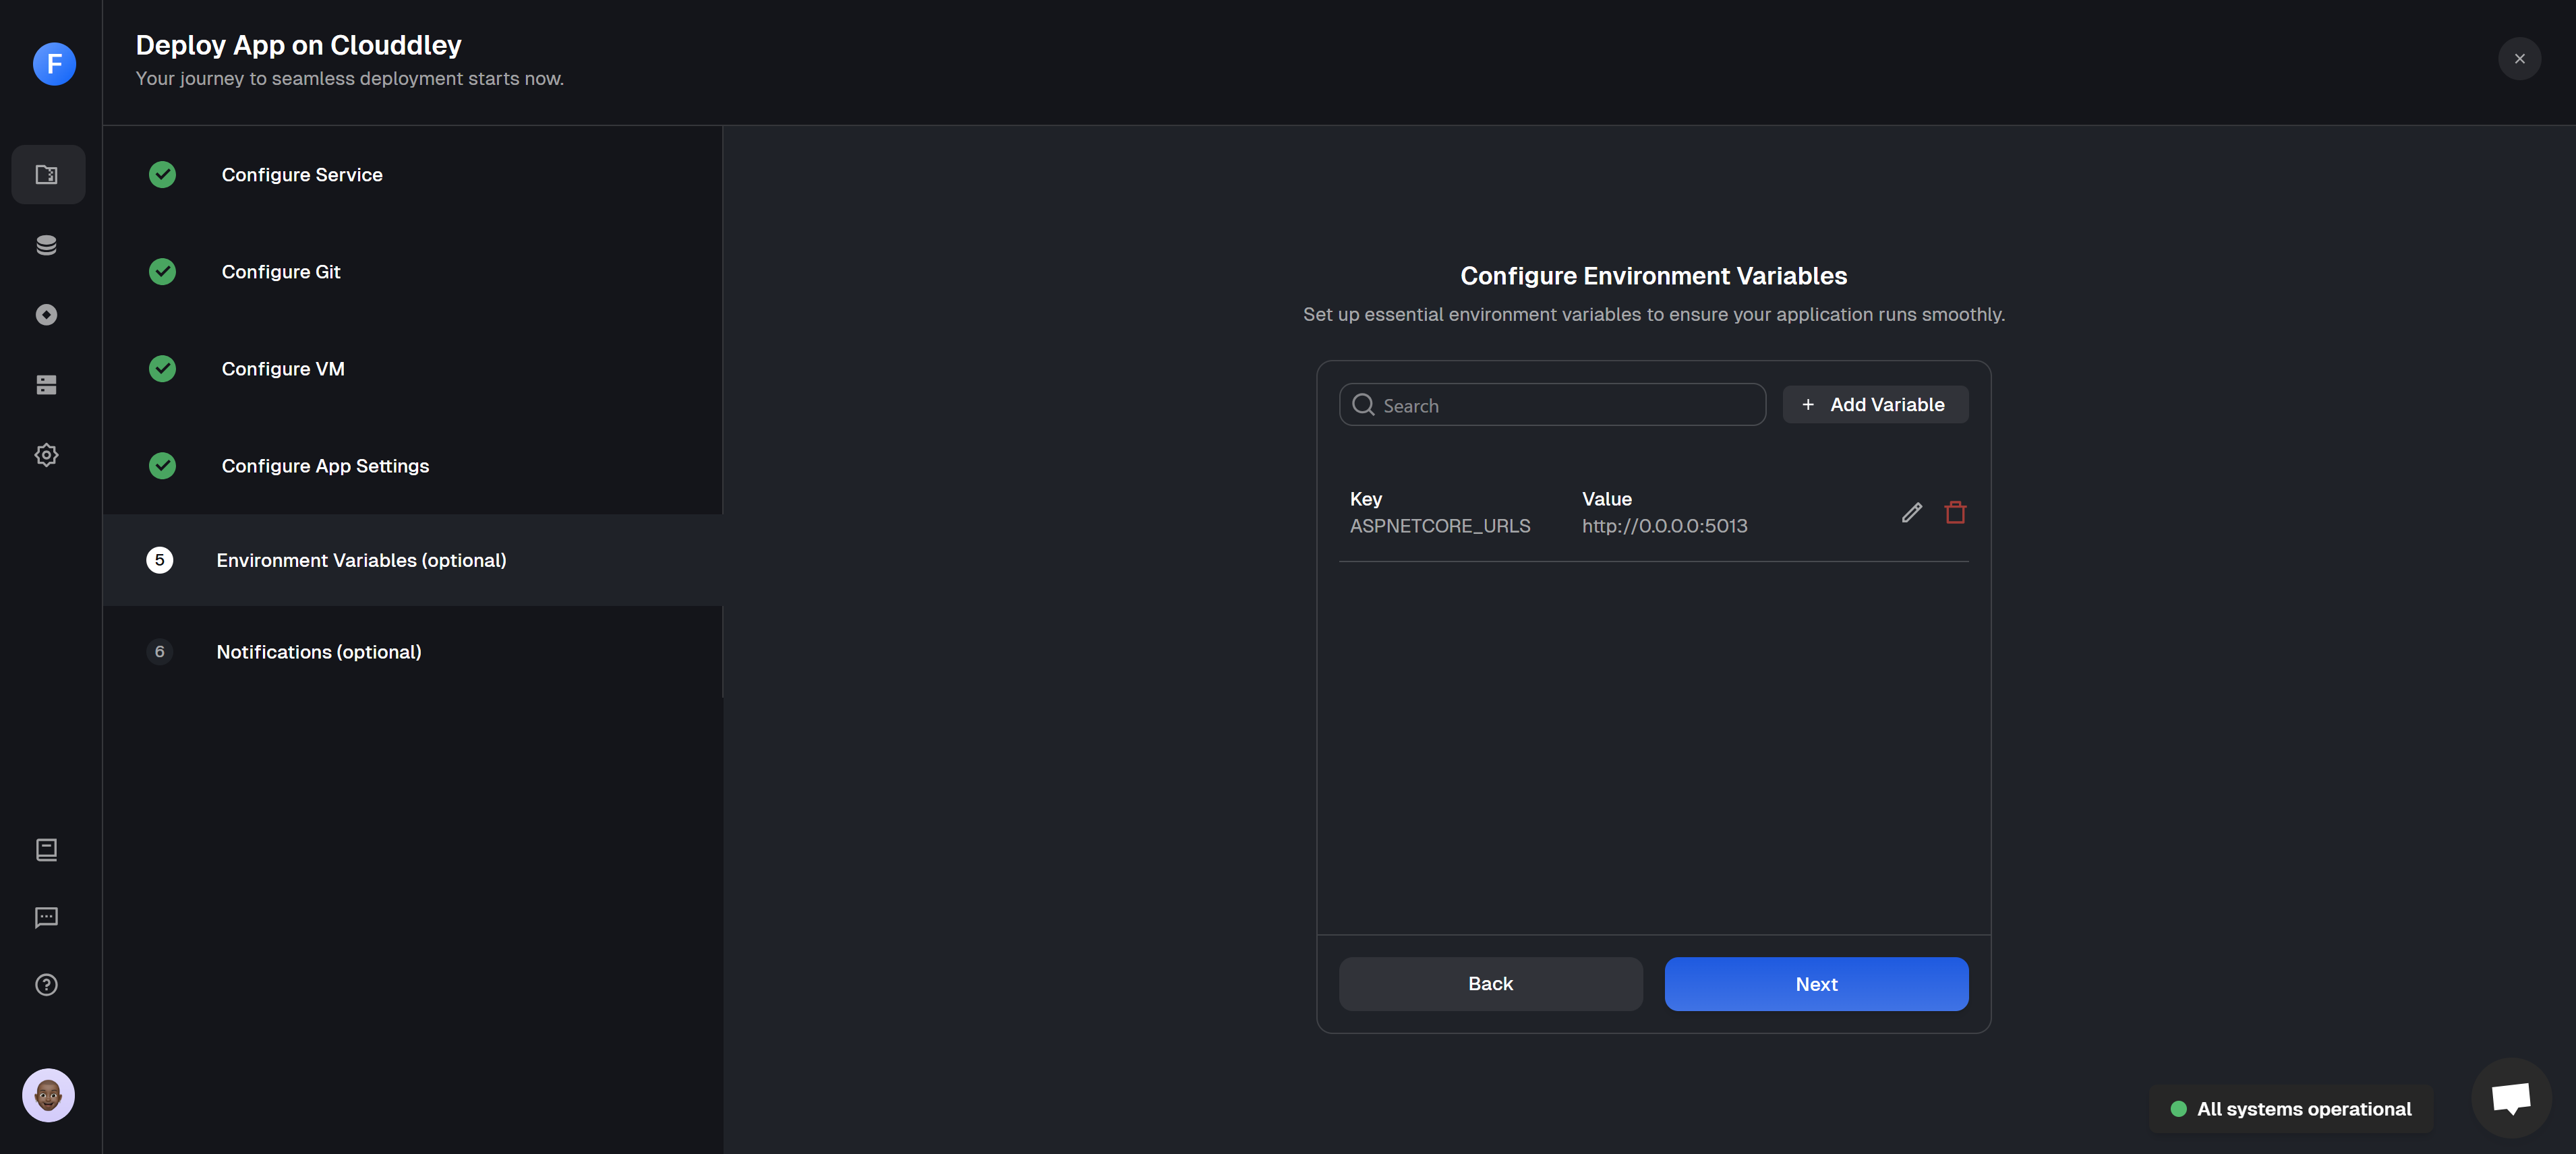
The URL for your.NET core application must be configured as an environment variable, either DOTNET_URLS or ASPNETCORE_URLS, in order to deploy it on Clouddley. Since the application is ASP.NET Core, we will set:
key: ASPNETCORE_URLS value: http://0.0.0.0:5013- Add the key-value pairs and click on Save
- Click on Next
Step 6: Setup Notifications (optional)
- To configure the notifications settings of the application, click on Add Alert
- Select the Alert Type. For this guide, we will use Email.
- Toggle on the deployment events you want to be notified of, such as failed, timed out, or success.
- Enter your email address (or multiple, if needed) and click on Save.
- Click on Deploy

Step 7: Test the app
- Click on Go to Dashboard. Your app will be visible on the apps dashboard.
- Once deployment completes, its status will update from
DeployingtoOnline.
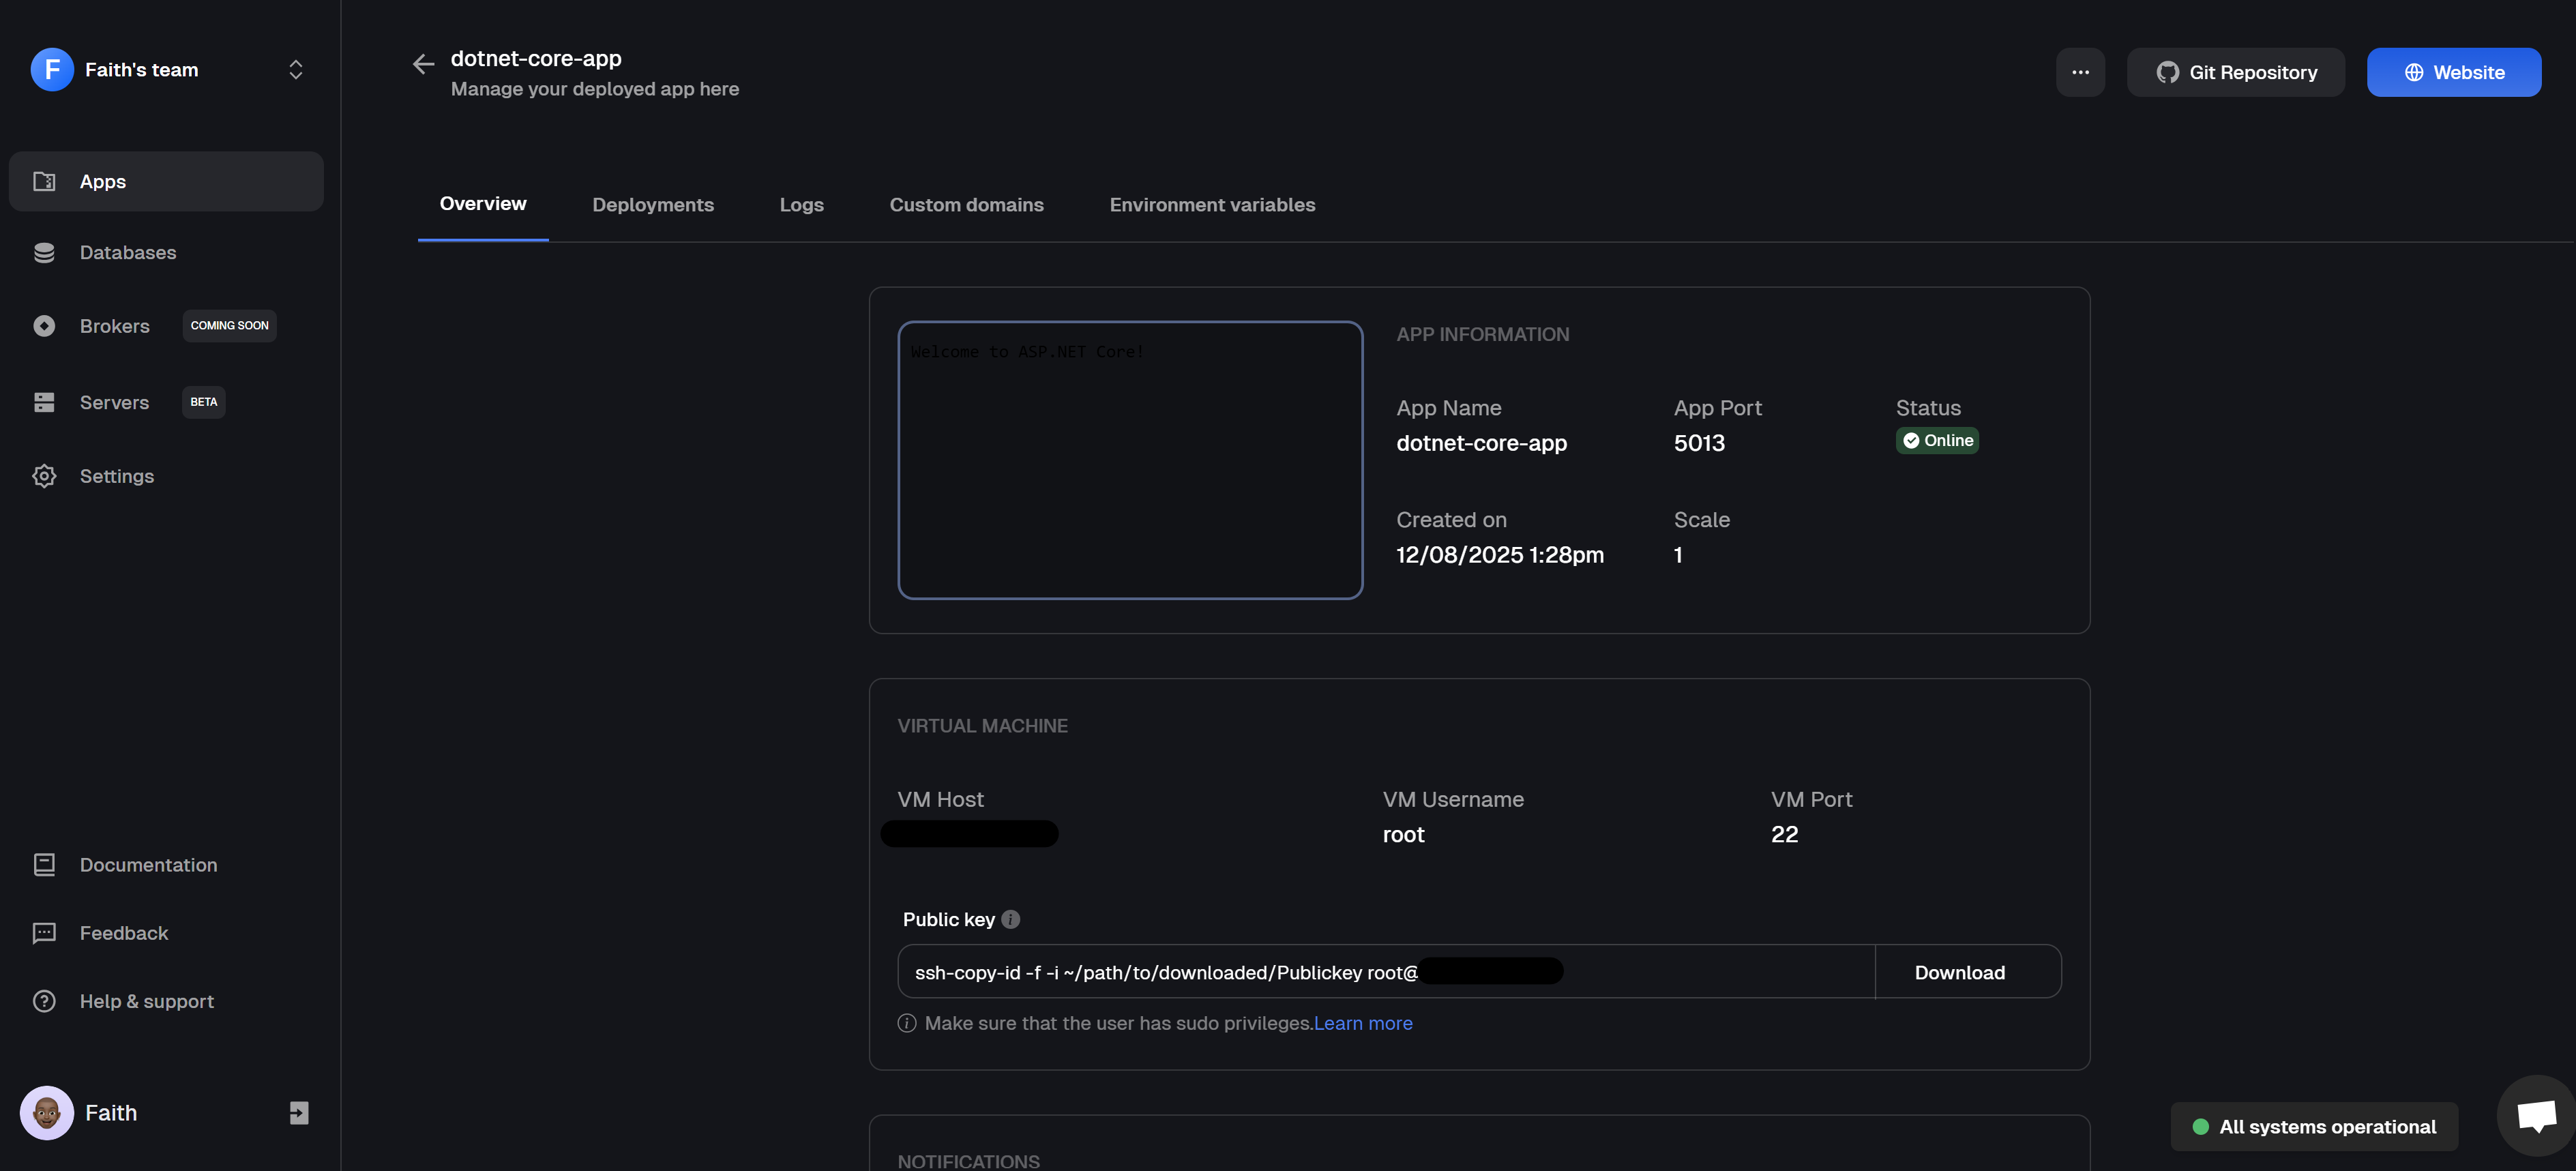
- To test your app, click on the 🌐 Website button in the top right corner to open your live app in the browser. You should see the message “Welcome to ASP.NET Core!” displayed in your browser.

Next Steps: Managing Your App After Deployment
Once your app is live, You can change your deployment settings, roll back to a previous version, scale up if traffic grows, and even pause or resume your app when needed all from the app dashboard. Everything’s designed to be simple and quick. Need to update environment variables or check your logs? That’s all built in too. You’ll also be able to connect a custom domain and keep track of your deployment history, right from the same dashboard.Recommended Practices for .NET Core Projects
Recommended Practices for .NET Core Projects
When working with .NET Core, following best practices can help you build robust, maintainable applications. Here are some key practices to keep in mind: Keep your project structure clean
Organize your code into logical folders by feature or domain. Group controllers, models, and services that work together. This approach makes finding code much easier when your project grows beyond a few files. Embrace the built-in dependency injection
.NET Core comes with DI out of the box, so use it everywhere. Register your services in Program.cs and inject them through constructors. This keeps your classes decoupled and makes testing much simpler. Use model validation for incoming data
Data annotations and custom validators aren’t optional—they’re your first line of defense. Validate everything that comes into your API to prevent bad data from breaking your application or causing security issues. Keep controllers lightweight
Your controllers should just handle HTTP concerns. Move all business logic into separate service classes where it belongs. This makes your code reusable and keeps your API endpoints focused on their job. Set up proper logging from day one
Configure structured logging early in your project. Add context like request IDs so you can trace problems across your application layers. Good logs save hours when something breaks in production. Store configuration in environment variables
Don’t hardcode connection strings, API keys, or any settings directly in your code. Use the configuration system to pull values from environment variables or secure storage like Key Vault. Write tests that actually matter Focus on unit tests for your business logic and integration tests for your API endpoints. .NET Core’s testing tools make this straightforward—use them to catch issues before your users do. Implement async patterns everywhere
When you’re calling databases, external APIs, or doing file operations, use async/await consistently. Don’t mix synchronous calls into async code paths—it causes performance problems and potential deadlocks. Handle exceptions at the application level
Use middleware to catch unhandled exceptions and return consistent error responses. Log the details you need for debugging while giving users clean, helpful error messages. Secure your application by default
Enable HTTPS redirection, add security headers, and validate all inputs. Build security into your application architecture rather than trying to add it later as an afterthought.These practices help you build applications that are maintainable, secure, and ready for production use.
Conclusion
That’s it, you’ve successfully deployed your .NET Core app on a Scaleway instance using Clouddley. We’ve covered everything from spinning up your instance to pushing your code, keeping things straightforward and efficient. This setup isn’t just about getting your app online; it’s about building a foundation for automation and scale. You can expand or build on it as your project grows. Need to deploy other apps? Clouddley has you covered there, too.Getting started with Clouddley?
A backend infrastructure for your own compute. Run apps, databases, brokers, and AI workloads on your VMs, bare metal, or VPS.