Prerequisites
Before you start, ensure you have the following prerequisites:- A Clouddley account
- A GitHub or Bitbucket account
- Python 3.8 or higher installed on your machine
- An account on OpenWeatherMap to get an API key
- Basic command line skills
- A virtual machine or server
Creating the FastAPI Weather Alert MCP Server
Create a New Directory
Set Up a Virtual Environment
- On Windows:
- On macOS/Linux:
Install Required Packages
requirements.txt file in your project directory with the following content:Create a .gitignore File
.gitignore file in your project directory to exclude unnecessary files from version control:Set Up Environment Variables
.env file in your project directory to store your OpenWeatherMap API key:your_openweather_api_key_here with your actual OpenWeatherMap API key. You can get an API key by signing up at OpenWeatherMap.Create the MCP server
main.py and add the following code:get_current_weather() for current conditions, get_weather_forecast() for 5-day forecasts, and get_weather_by_coordinates() for location-based weather using coordinates. The @mcp.tool() decorator makes these functions available to AI systems as discoverable tools.The make_openweather_request() function handles API communication with error handling, while formatting functions convert raw data into readable reports. Running on a Starlette server with Server-Sent Events, it creates /sse and /messages/ endpoints for real-time communication, allowing multiple AI applications to access weather data through one reliable service instead of managing API calls individually.Run the server locally
Push Your Code to GitHub
Create a New Repository on GitHub
Initialize Git
Add and Commit Your Code
Create branch and add Remote Repository
Push code
Deploying on Clouddley
Accessing Apps- Open your browser and log in to your Clouddley account
- Navigate to Apps and click on Deploy App

Accessing Apps
Step 1: Configure your service
- Choose your Git provider: either GitHub or Bitbucket. For this guide, we’ll use GitHub.
- Click on Continue with GitHub

Choose your Git hosting service
Step 2: Connect Your Git Repository
- To connect your GitHub user or organization account, click the Select username/organization dropdown and Add GitHub account.
- Once connected, choose the repository and branch that contains your app.
- Click on Next to proceed

Setup the FastAPI server repository on Clouddley
Step 3: Connect Your Virtual machine
- From the Choose or add server dropdown, select your VM if it appears in the list. If not, click + Add Virtual Machine.
- To add your VM, enter your VM’s IP address as VM host, VM user, and the VM port for SSH access.
- Once you’ve entered the details, verify the connection using the Clouddley CLI(recommended) or SSH.
How to Install Clouddley CLI to Verify your Virtual Machine
How to Install Clouddley CLI to Verify your Virtual Machine
- Open your local machine’s command line, then connect to the remote VM you want to configure with Clouddley. Use this command to SSH into your VM:
- Install Clouddley CLI by running the command:
- To add the SSH public key, run the command:
- Click Verify to test the connection to your VM.
- Once it’s verified, click on Next.

Configure virtual machine on Clouddley
Step 4: Configure app settings
- Enter the name of your app and the port your app will run on.
- Click on Next
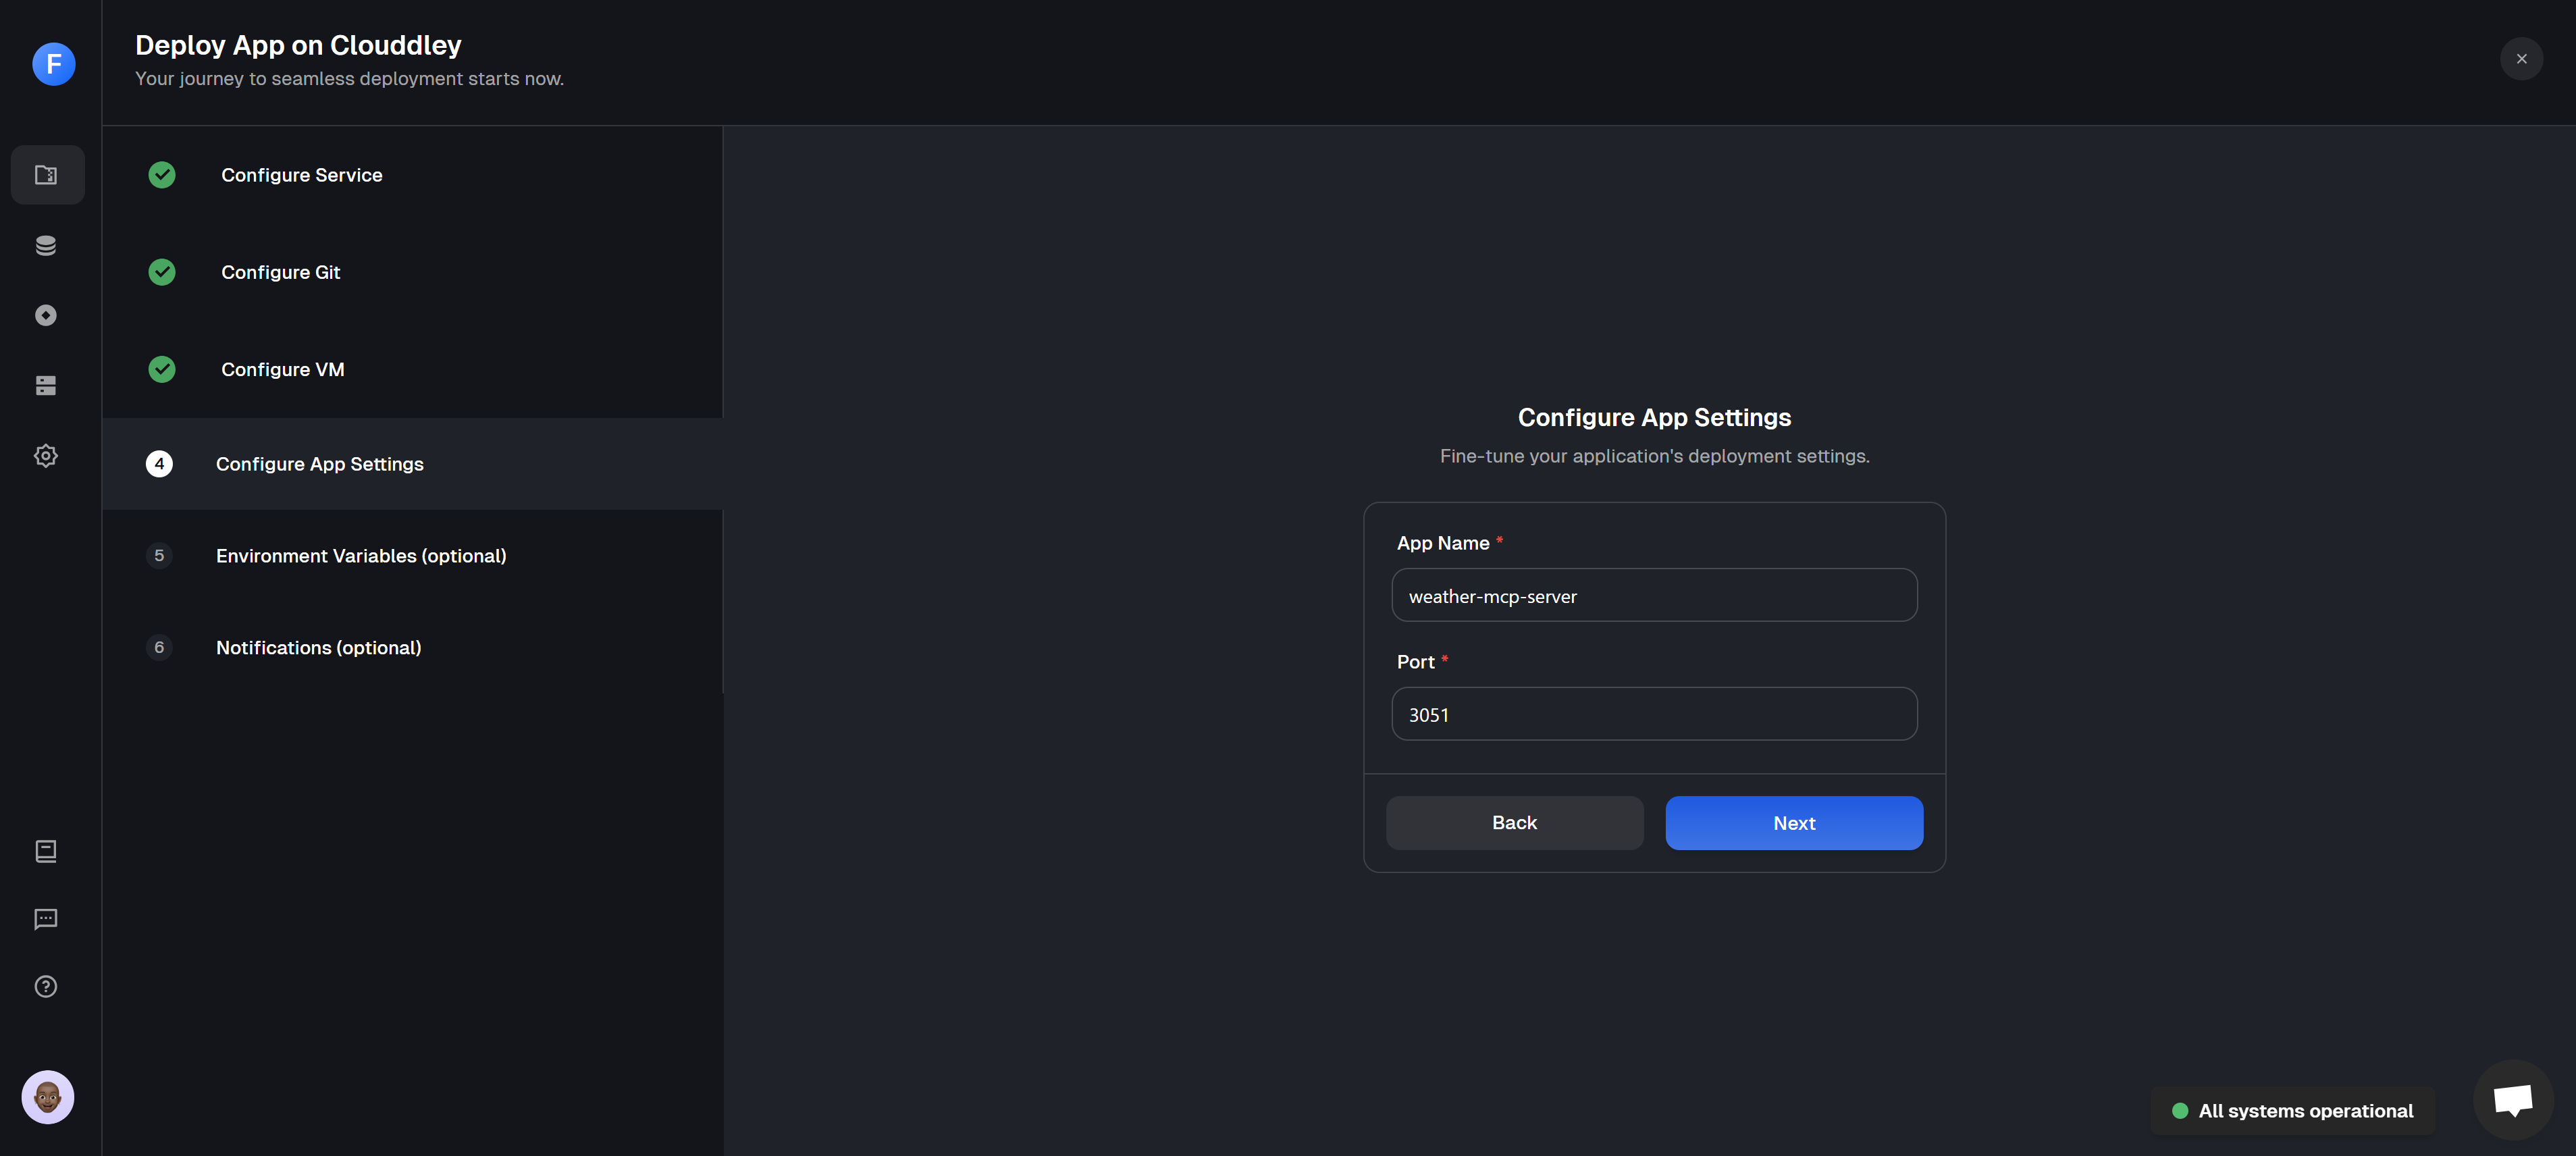
Configure the App name and port
- Click on Add Variable
- Select an ENV mode: either single variable or import variables. Learn more about Environment Variables.
- Single Variable
- Import Variables

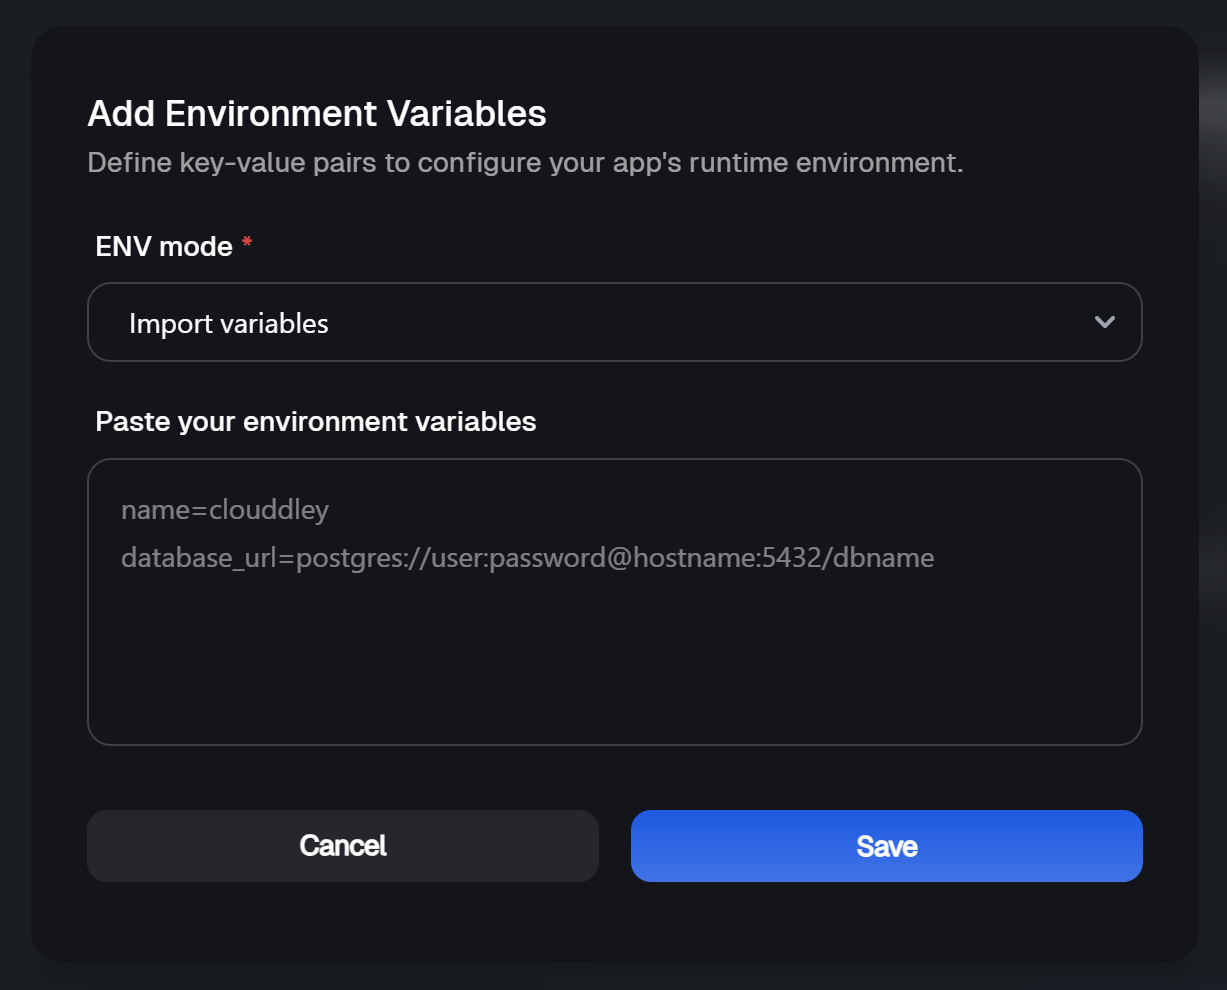
- Add the key-value pairs and click on Save
- Click on Next
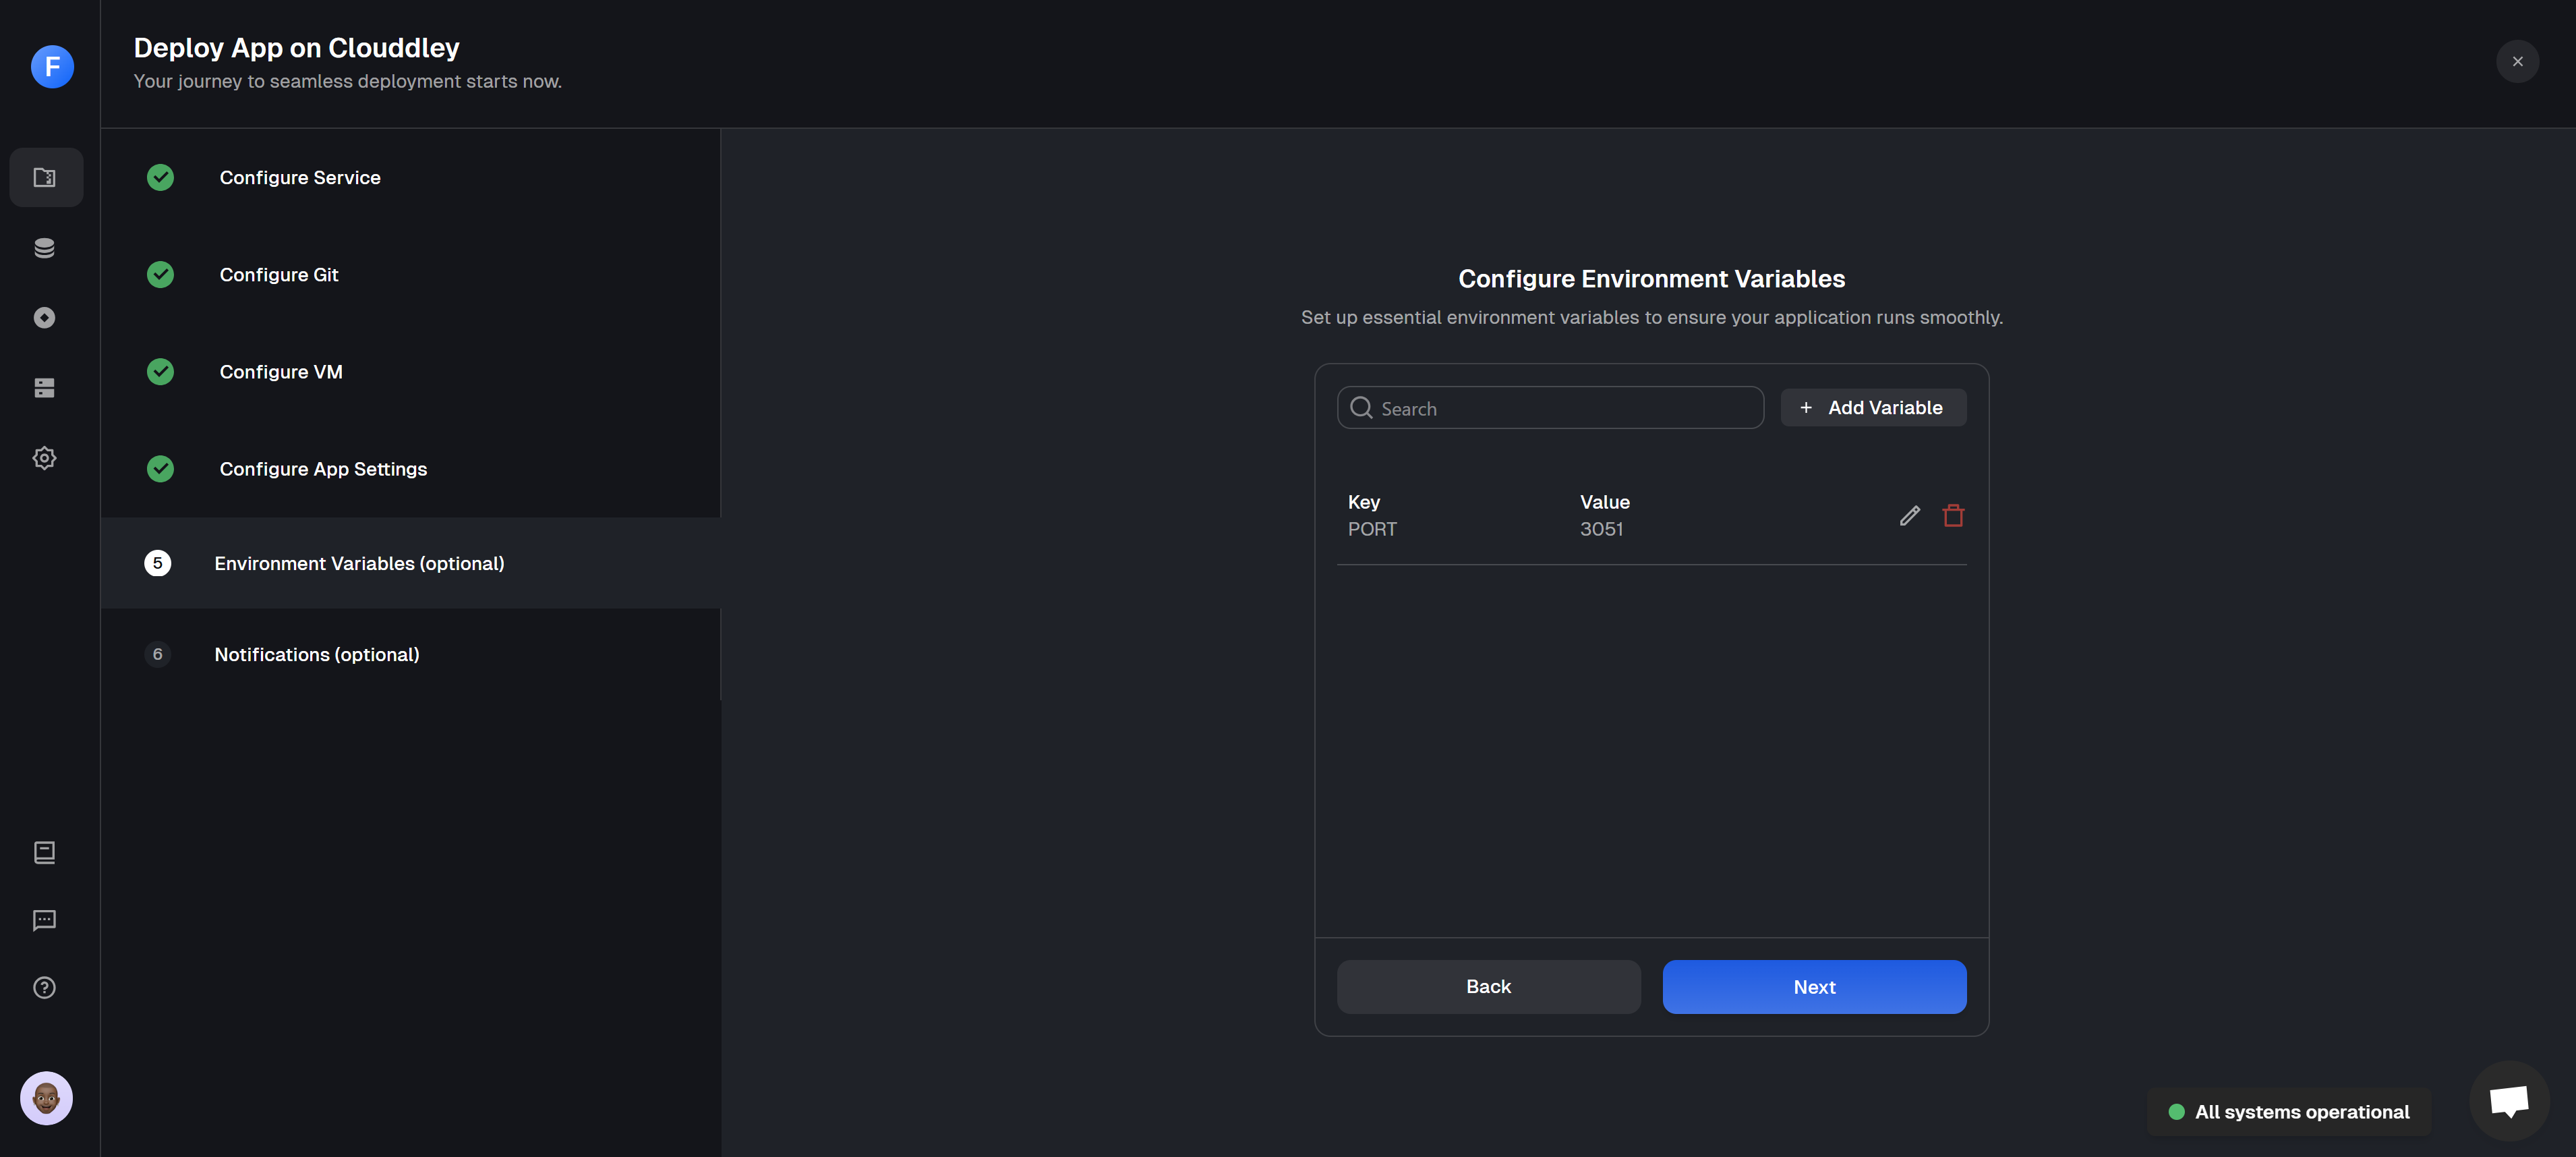
Adding environment variables
Step 6: Setup Notifications (optional) You can set up notifications to receive updates about your app’s deployment status. This step is optional but recommended for monitoring your app.
- To configure the notifications settings of the application, click on Add Alert
- Select the Alert Type. For this guide, we will use Email.
- Toggle on the deployment events you want to be notified of, such as failed, timed out, or success.
- Enter your email address (or multiple, if needed) and click on Save.
- Click on Deploy

Notifications set up and creation of FastAPI server on Clouddley
Step 7: Test and Verify the app
- Click on Go to Dashboard. Your app will be visible on the apps dashboard.
- Once deployment completes, its status will update from
DeployingtoOnline.
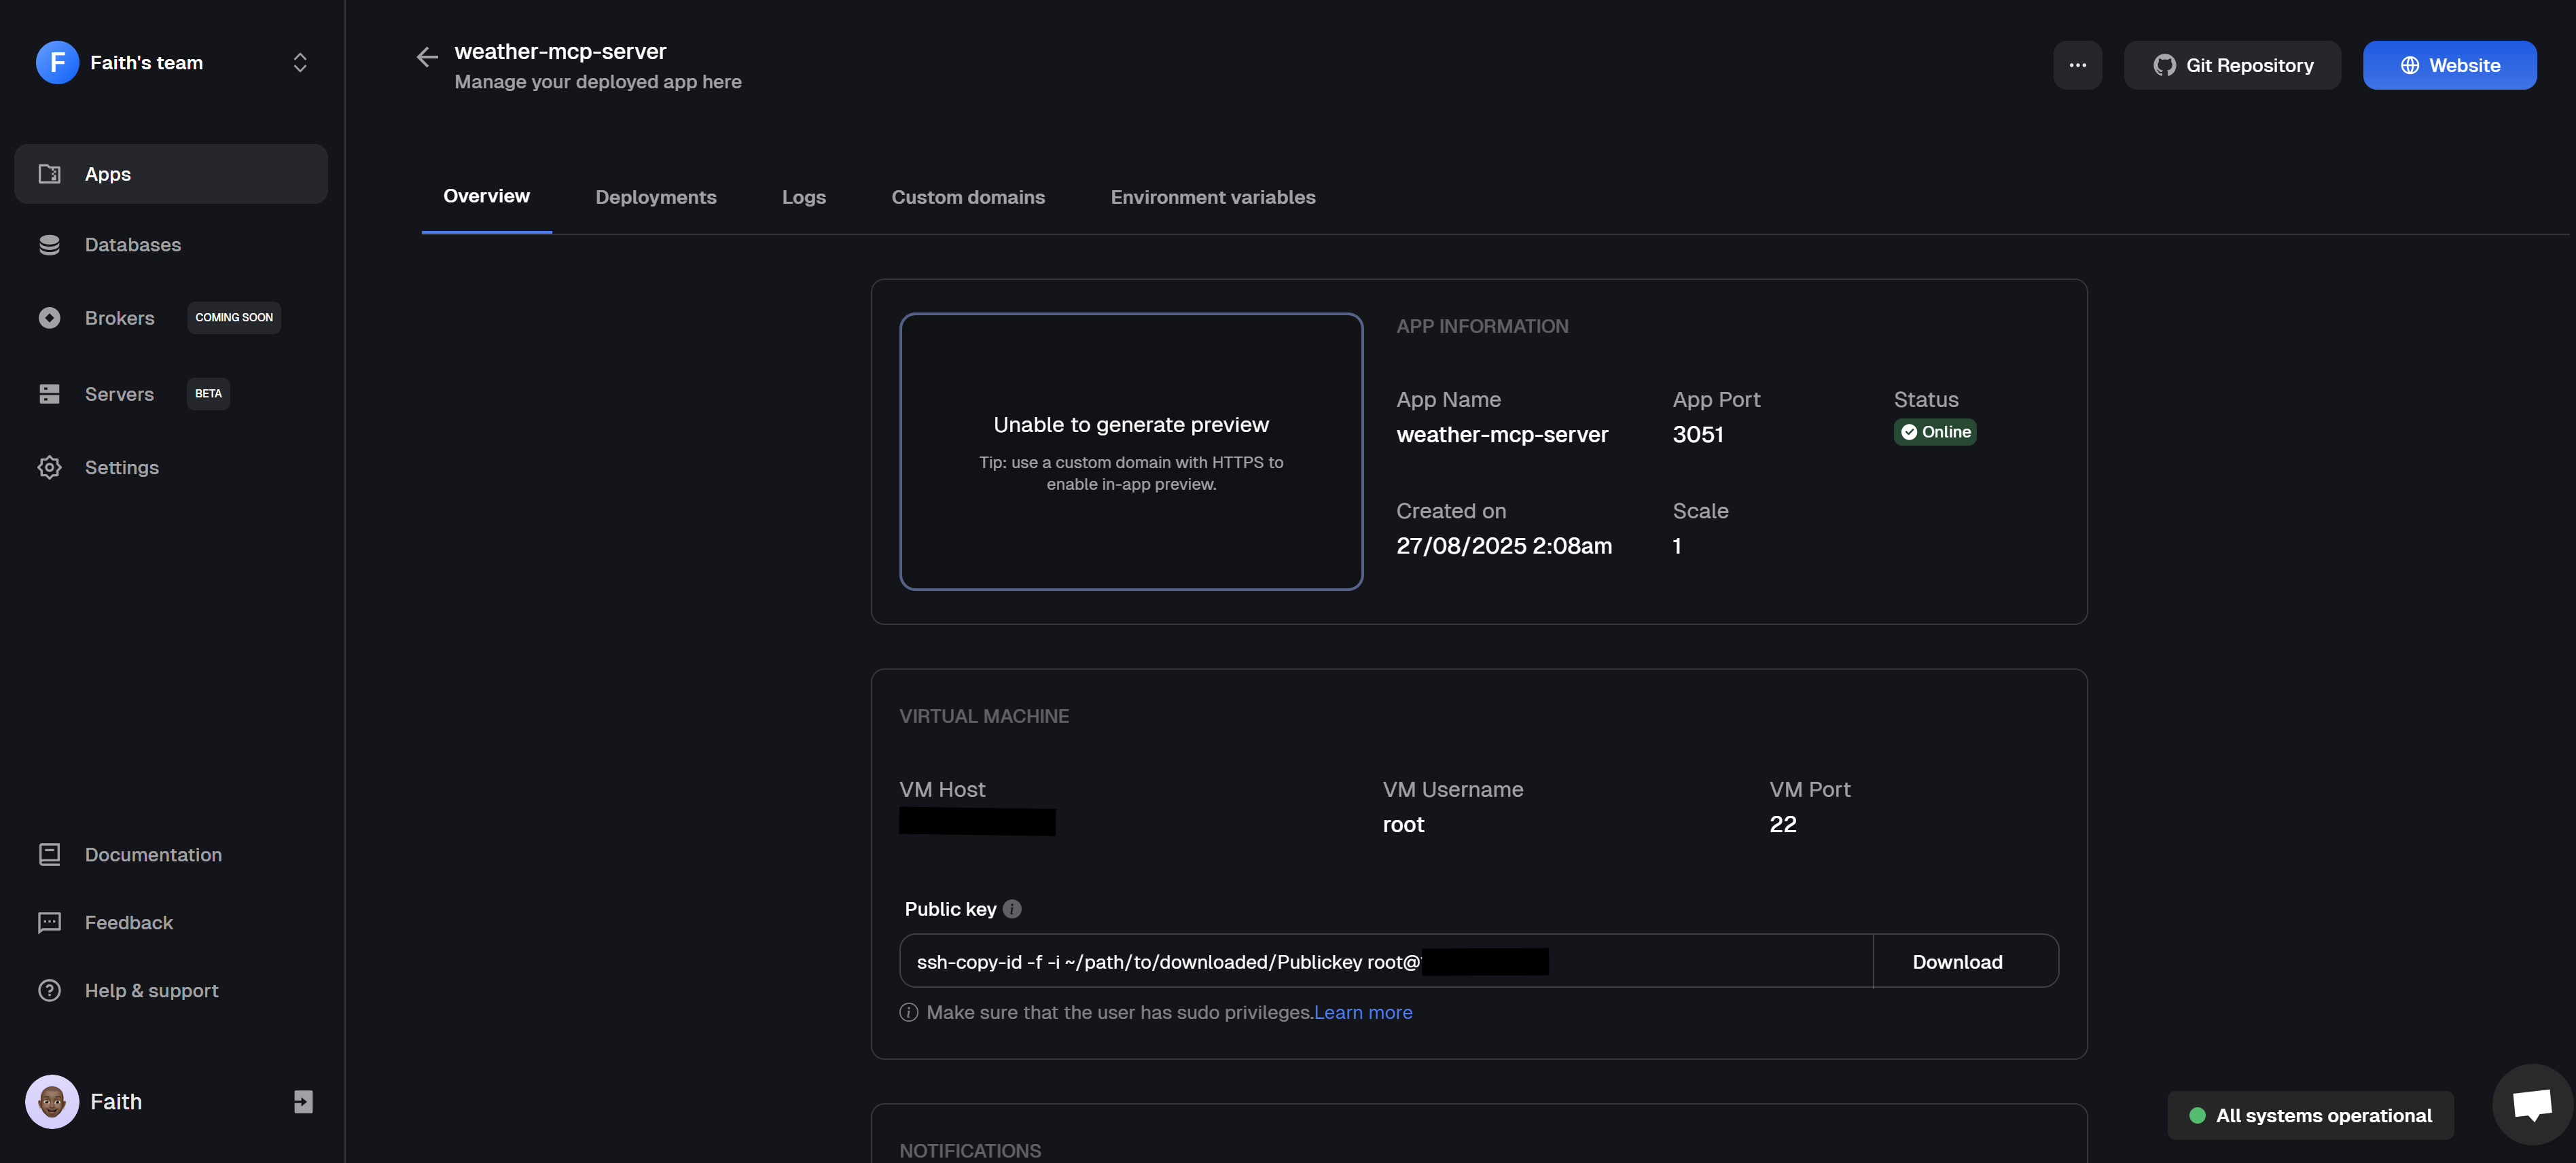
FastAPI MCP Server dashboard overview
http://<your-vm-ip>:<port>/sse
Testing Locally with Cline
Use the Cline extension to test your FastAPI server locally. Cline interacts with your MCP server through the Model Context Protocol (MCP), letting you send requests and receive real-time responses. Follow these steps to test:Install Cline extension on Vscode
- Open Visual Studio Code and go to the Extensions view by clicking on the Extensions icon in the Activity Bar on the side of the window.
- Search for “Cline” in the Extensions Marketplace.
- Click on the Install button to install the Cline extension.
- Once installed, you can access Cline from the Command Palette (Ctrl+Shift+P) by typing “Cline”.
Add your API key to VS Code settings
- Open the Command Palette (Ctrl+Shift+P) and type “Preferences: Open Settings (JSON)”.
- Add your Cline API key to the settings:
your-api-key-here with your actual API key.Set up MCP configuration
- In VS Code, open Command Palette (Ctrl+Shift+P)
- Type “Cline: Open MCP Settings” to open
cline_mcp_settings.json - Add your MCP server configuration:
Test your MCP server
- Open a new task in Cline in VS Code
- Ask: “What is the weather in London?”
- Verify Cline can:
- Connect to your FastAPI weather MCP server
- Make weather API calls
- Return formatted weather data
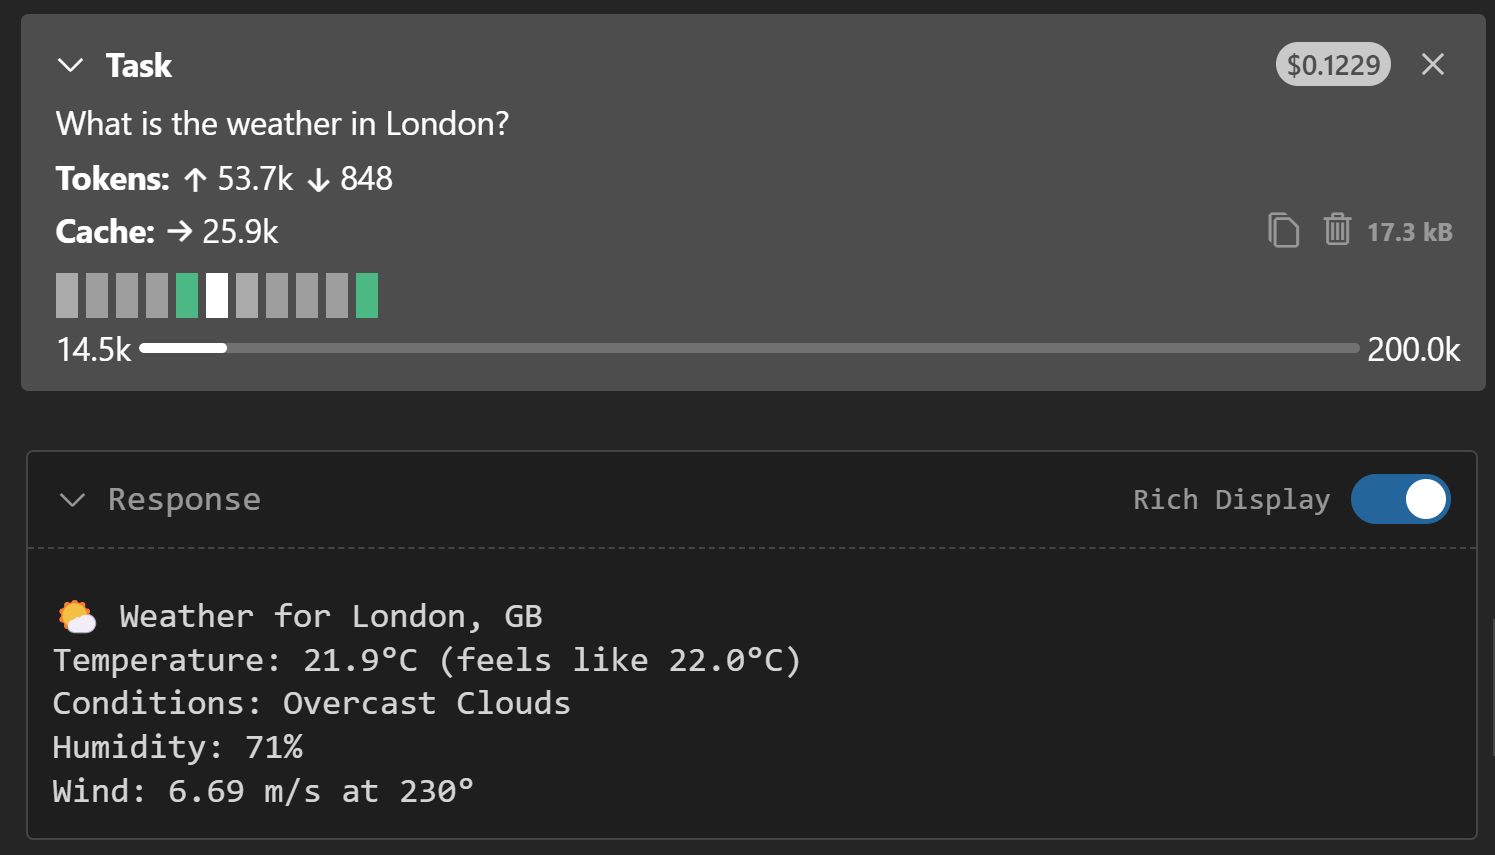
FastAPI weather MCP Server response
Test weather forecast tool
- Ask: “What is the 5-day weather forecast for Lagos?”
- Verify Cline returns a formatted forecast response:
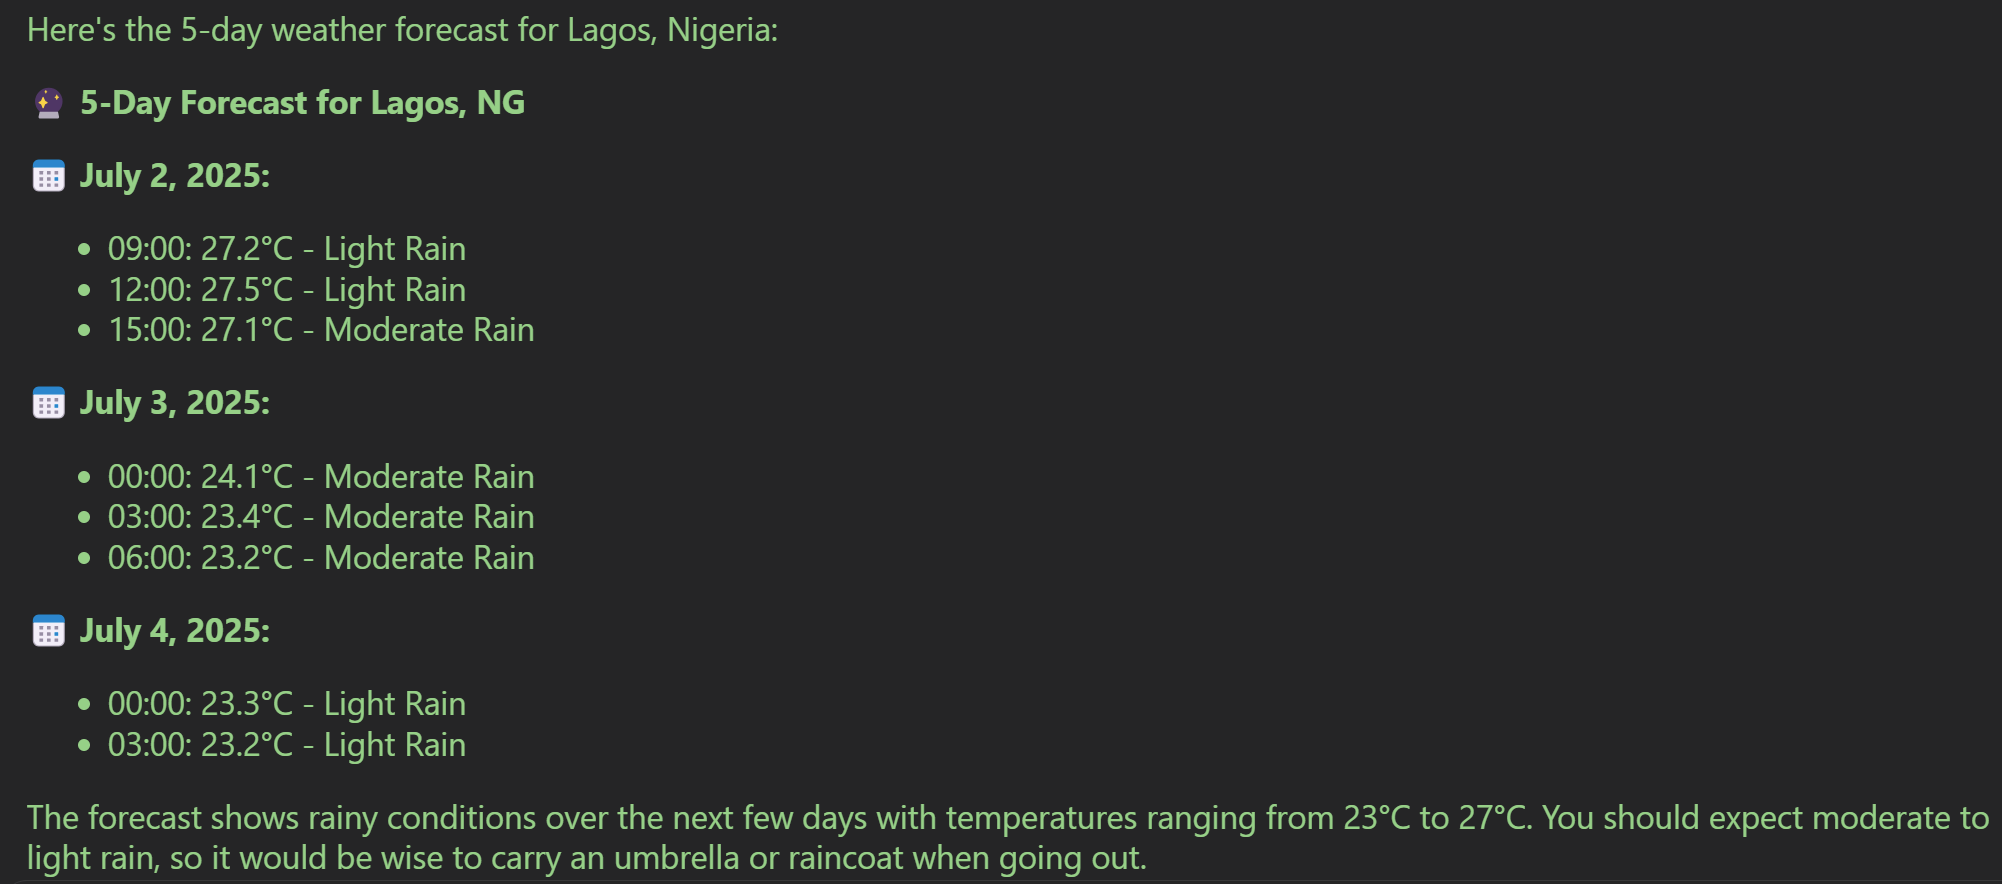
FastAPI weather MCP Server response